An Introduction to Blazor

As a full stack developer it is important to always keep your ears to the ground and keep up with the latest and greatest. One of the more interesting projects that has come out in the past couple of years has been WebAssembly. No, its not the fabled “JavaScript killer”, at least not right now. But its maturation could one day legitimately usher in a time when JavaScript is not the only language for the web and the web is simply a compile target.

Blazor is a project put together by Steve Sanderson (of Microsoft fame) that uses WebAssembly and Mono to build C# applications for the browser; without plugins of extensions. It simply compiles the .NET Core code you write to IL which is then targeted to WebAssembly (put very simply). This project is very much in its early stages and has not (as of this writing) received official backing from Microsoft outside of it being a “experiment”.

But Blazor represents an idea, one that I think we will see more of in the coming years, and developer seek to utilize WebAssembly to open the web up to new programming models. With that in mind, let’s talk about how to get started in Blazor:

The Setup

For Blazor to work you will need Visual Studio 15.7 (or later), .NET Core 2.1 GA (or later), and the Blazor Language Services Extension (here). Once all of these are installed you are free to create Blazor application using the standard ‘Create New ASP .NET Core Application’ template (there will be two Blazor related options in the subsequent dialog)

New Blazor app dialog

Blazor
This template is your typical SPA style application that can be deployed to any web site; I refer to this as the React/Angular SPA style application. In it you can make various web calls to APIs not your own and bring back data. This is the template that I currently favor

Blazor (ASP .NET Core hosted)
Similar to the OG Blazor template, this one includes a .NET Core Web API Backend that you can call into. One of the advantages of Blazor is you can truly share code between the backend and frontend without issue. At the time of this writing, however, this one had stopped working for whatever reason. This is the approach you would take if you want your SPA to work with an API that was yours; you would need to deploy the API to a separate location from the web content, as is the case with any SPA deployment.

For now, I suggest using the Blazor template. You can run this straight out of the gate. IOt has two nice examples of client side operations: Counter which uses C# to track click counts and FetchData which shows async init operations in action to load a local JSON file (the Hosted template actually retrieves this data from a web service).

Component Driven Design

The concept of a “component” in UI design is nothing new, I remember them from way back in the day with UserControls in ASP .NET, and now we have Angular and React embracing it as the way to go for SPA applications.

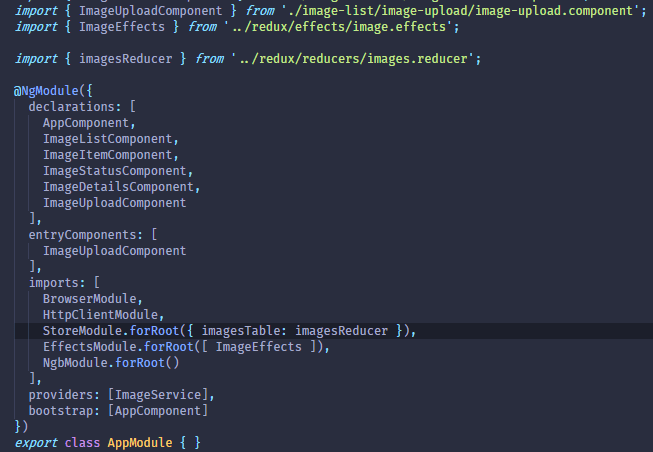
In Blazor, you create Razor files (.cshtml) in which  you embed both C# and HTML, these are components and they are surfaced as such. In this files index.html there are three components: ForecastDayList, LocationDisplayand CurrentWeather.

Selection_001

This is a very common approach with web content these days and it makes it easier to design and do things like CSS isolation and emphasize reusability. The cool thing here is these components are surfaced for us automatically by .NET without any using statements.

Routing

This is somewhat new since the first time I opened Blazor at the MVP Summit, they didnt have this though it was talked about how important it was as a feature.

Selection_004

Before we had to refresh the page entirely, and dont even get me started on adding parameters. Now you can just drop this line at the top and everything is handled for you (though you can replace it if you like). If you want to add parameters simple add it with the :pName syntax you will see in React and Angular, plus others.

The reason this works is because, again, Blazor adoptive of the Component design pattern. All these routes do is say “if you see this path, load this component” – we do the same thing in React in Angular.

Event Handling

Much like with traditional ASP .NET applications, C# code can be embedded in these Razor pages using the Razor syntax (the now famous @ prefix). It offers a clean and simple way to elegantly blending code with markup.

For HTML elements we can use shorthands that let us reference our C# code directly. The default template has a great example of this with Counter.

Selection_002

One thing I will point out is to be careful using reference variables, since they will be null to start in most cases. We can see the use of the onclick attribute which is a special keyword for Razor in this case and will point at our method, IncrementCount in this case. The page automatically refreshes as the value changes; newly released there are lifecycle methods that let you hook into this process: OnAfterRender (here).

This is the simplest example of handling interactivity on pages, we can do some more complex things like using Async to bring down data from a remote source.
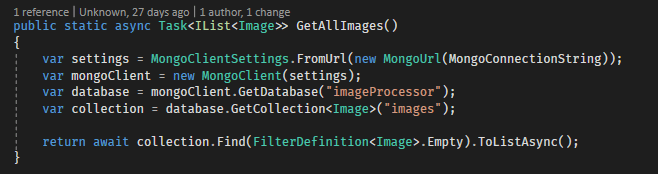
Handling Async

One of the coolest features in the .NET world, and it has begun to find its away outside there (in ECMA7) is async/await, .NET’s syntactical sugar to make writing asynchronous operations easier. For the uninitiated, async/await is NOT parallel programming, it creates a sort of event loop in the background where code waits for an operation to complete and then resumes at that point. While other code may execute in the interim, parallel programming is doing things at once. With async/await the system is still utilizing a single thread.

The ability to bring this feature to SPA programming is, in a word, awesome.

Selection_005

This file can be found in full here on my GitHub – I tried to get as much of here as possible. There looks to be a lot going on but, we can take this as a very small slice and not worry too much about other things.

When you specify an Event Handler you can either choose to return void or Task (void for an method marked as async). This differs from traditional ASP .NET which had the old event handler signature that necessitated void be allowed as a return from an async method, something you dont ever want to do (but that is another story).

Our page defines a number of properties and uses the bind attribute to record the user entered value. When executed this will operate as any async method does. And as we saw with the Counter page, as the variables change the page will re-render. In this case populating the data for our other components.

You can view this application, deployed as HTML to S3, here.

Dependency Injection

Also in use here is the @inject handler which allows us to inject dependencies into our components. You define these in the Program.cs file of your main, its very similar to what we see with ASP .NET Core server apps. Based on the type you “label” for the dependency you can @inject that type.

As a side, I noticed while doing this that you will always to @inject HttpClient in some way as there appears to be a special version of sorts in use (or it has certain configurations). The out of the box on in System.Net does not seem to work. Just an FYI

This is awesome, I want to use it for my next app!!

I wouldnt. Blazor is still VERY experimental and missing some key features that make it unsuitable for a mission critical application; the lack of Microsoft officially recognizing it should be you wary. The key things are:

  1. Lack of debugging within Visual Studio. You are wholly reliant on Console.WriteLine for debug information as the Mono team has not yet added debugging hooks. I expect this will come soon though
  2. Application size. If you are familiar with Xamarin and Mono you know there is a vast difference between the assembly you create during development and the one you deploy to the AppStore, principally in size. Blazor is not yet supportive of the AOT compilation style that would enable it to get a binary size that is palatable as a download. That is the biggest reason, in my mind to avoid this in Production for right now

The main point here is to play with this and offer feedback to the team working on Blazor at Microsoft. They are very active in this project and many of the requests that I have made have been fulfilled. The team is well aware of the projects current shortcomings and is working to eventually make this a legitimate offering to the larger community.

What is the future?

It has been interesting the reaction to WebAssembly some of the hardcore web developers I know have had. Some see it as just another would be silver bullet ala Flash and Silverlight that will ultimately lose to JavaScript. That may be true but I dont recall Flash or Silverlight ever being a standardized thing that is quickly being adopted. If anything, the rise of WebAssembly could alter the landscape for web developers over the next few years to give us more options.

I think a lot of the negativity is born out of people who dont like JavaScript seeing WebAssembly and reaching for the “JavaScript is dead” hammer, Ive certainly seen quite a few articles going in that direction. My take: WebAssembly is an alternative. There are many things that JavaScript can do that are, well, awkward. For example, while I can create a 3D game in JavaScript, chances are C++ might be better for it. WebAssembly gives me the option to run my code natively in the browser. But would I want to use C++ to deliver a Line of Business application? Probably Not.

But that gets at the heart of the problem on the web. Right now, its only JavaScript. So regardless of what you want to do you really only have one language you can do it in. Thankfully that language has been shown flexible enough to carry us this far but, maybe with WebAssembly, web developers will finally get to a point where we can pick the best language for the job. Is it so bad that I could pick from Swift, Python, C#, or Java as my language and have it run natively in the browser? I dont see that as a problem, I see that as helping us move the web forward.

There is a chance that, one day, WebAssembly  could supplant JavaScript but that day is far off at best and, if you listen to the creators of WebAssembly talk, that has never been the goal of WebAssembly. Its always been about filling the gaps and giving developers more options to do things that might be awkward in JavaScript.

Regardless, that conversation goes off into direction that is not entirely related to Blazor but I think Blazor is the first of, I hope, many such tools that enable us to have more options when developing web applications.

Docker: The Barest of Introductions

For the uninitiated, Docker is a tool which enables containerization for dependencies for programming. This enables adhering, more closely to the 12 Factor App principles which are designed strategies for synchronizing, more closely, the various environments used in development and mitigating the “works on my machine” problem.

But it is so much more than that. True, Docker has found the best uses as a means to provide for consistent deployments but I see it as much more than this. I see containerization as changing the way we develop applications because it lets us, as developers, do what we love, which is play with new stuff, while still allowing our development environments to be consistent. It normalizes this notion that everything should live together, as a unit, which makes deployment and management so much easier.

Perhaps it does sound grandiose when put this way but I do truly believe it. The ability for me to do LAMP, or LEMP without any of those things installed or the ability to dabble with Go without installing a compiler is huge. I imagine this being the way I want development to go from now on. A project starts and the lead or whomever creates the Dockerfile or the docker-compose file. Developers can then start almost immediately without having to worry about what is installed on their machine and how it might impact what they are working. We can store these files with our source allowing us to take it wherever want to go. I truly find the scenarios enabled by Docker to be amazing and game changing.

The Basics

You download Docker here: https://store.docker.com/search?type=edition&offering=community

Docker is built on the idea of images, effectively these are the templates for the containers which run your apps. The Docker dameaon (installed above) will automatically pull an image if you request one and it does not exist, by default it will pull from Docker Hub. Alternatively, you can pull an image yourself. Here I am pulling the latest version of aspnetcore, which is an image for a container that has the latest .NET Core Runtime installed:

docker pull microsoft/aspnetcore:latest

latest is a tag here to get the newest image available, alternatively you can request a specific version tag such as aspnetcore:2.0.103. By doing this you can pull down a new version of a runtime and see how your code will function in that runtime. A great check before an en masse update.

Once you have the image, you need to create a container. This is done using the run command. You can create many containers from the same image. Containers can be long running (web servers) or throw away (executors). Below I will run our image as a container:

docker run –name core-app microsoft/aspnetcore:latest

If you run the above it will not do much. This is because, while we can think of a container as a VM conceptually, that is not what it is. I like to think that a Container must exist for a purpose, which is contrary to a VM which exists to be used for something. Considered in this light, our above simply starts and then closes. Trick, you can actually see it if you run this command

docker container ls -a

This lists all of the containers on our machine, even those that are not running. So how can we give our container a purpose. For aspnetcore it needs to a web server to run or some sort of process. When dealing with Docker you need to consider the purpose of the container as that is what will drive the general need.

To demonstrate a running container, we are going to go with something a bit simpler, a Go environment. This is where we will write Go code locally and then run it through the container and observe the output. Our container will not need to be long running in this case and exist only long enough to compile and execute our Go code. Let’s get started.

Building a Go Development Environment with Docker

As always, we will be writing code so you will need an editor, so pick your favorite. I tend to use VSCode for most things these days, and it has a Go extension. You will need to disable various popups that complain about not finding Go in the path. It wont be there cause we are not going to install it.

Above we talked about some of the basic commands and only referenced the Dockerfile in passing. But this file is crucial and represents the core building block for an application built on Docker as it lets you take an existing image, customize it and create your own.

Here is the file I have created for my environment

FROM golang:1.8
WORKDIR /src
COPY ./src .
RUN go build -o startapp;
WORKDIR /app
RUN cp /src/startapp .
ENTRYPOINT [ “./startapp” ]
What this says is:
  • Pull the golang image tagged as 1.8 from a known repository (Docker Hub in this case)
  • Change working directory on the image to /src (will create if it does not exist)
  • Copy the contents of the host at ./src to the working directory (I have a folder at the root of my project called src where all code files reside)
  • Run the command go build -o startapp – this will run the Go compiler and output an executable called startapp
  • Change working directory to /app (create if it does not exist)
  • Run the copy command to move the created executable to /app
  • Set container entrypoint as the startapp executable in the working directory

In effect, this copies our local code into the image, runs a command, and copies that output of that command to a directory. Setting entrypoint tells Docker what it should call when the container is started. You remember how above our run command just exited? That is because we never told it what to do, here we do.

Here is a basic Go Hello World program, I have stored this at /src/start.go

package main
import “fmt”
func main() {
   fmt.Printf(“Hello World”);
}
This does nothing more than print “Hello World” to the screen. To do this, first run the following command:
docker build -t my-app .


This command will directly invoke the <em>Dockerfile</em> in the local directory. Per this, Docker will construct our image using the <strong>golang:1.8</strong> as a base. The -t option allows us to tag the image with a custom name. Once things finish up, use this command to see all of the images on your machine.

docker images

If this is the first time you have used Docker you should see two images in this list, one being that with the same name you used above with -t

Ok, so now we have our image we want to run this as a container. To do that, we use the Docker run command. This will also provide us with our output that we want. Here is a shot of my console.

console

A few things with this run command:

  • In Docker, container names must be unique. Since our container will exist SOLELY to run our Go code, we dont want it hanging around, even in a stopped state. The –rm option ensures that the container is removed once we are done
  • –name does what you expect and gives our container a name, if this is omitted Docker will provide a name for us, some of which can be quite amusing
  • go-app-hello-world is our target image. This is the image we will use as the template

Congratulations, you have run Go on your machine without installing it. Pretty cool eh?

Expanded Conversations

What we have demonstrated here is but a sliver of the scenarios that Containerization (here through Docker) opens up. If go beyond this and consider a general development scenario, we are also locking ourselves to THIS version of Go. That allows me to install whatever I want on my local machine in the way of tools or other applications and SDKs and have no fear of something being used that would otherwise not be available in production. This principle of isolation is something we have long sought to ensure consistent production deployments.

But there is more to it. Using containers allows for better resource use scenarios in the Cloud through Orchestration tools like Kubernetes, MesOS, and Docker Swarm. These tools enabled codified resilient architectures that can be deployed and managed in the Cloud. And with containerization your code becomes portable meaning if you want to move to AWS from Azure you can, or from AWS to Google. It really is amazing. I look forward to sharing more Docker insights with you.

Google Cloud: Backend and Vision API

This post is in conjunction with the first post I made (here) about building a Cloud Function in Google Cloud to accept an image and put it in my blob storage. This is a pretty common scenario for handling file uploads on the web when using Cloud. But this by itself is not overly useful.

I always like to use this simple example to explore the abilities for deferred processing of a platform by using a trigger to perform Computer Vision processing on the image. It is a very common pattern for deferred processing.

Add the Database

For any application like this we need a persistent storage mechanism because our processing should not be happening in real time so, we need to be able to store a reference to the file and update it once processing finishes.

Generally when I do this example I like to use a NoSQL database since it fits the processing model very well. However, I decided to deviate from my standard approach an opt for a managed MySQL instance through Google.

gcp5

This is all relatively simple. Just make sure you are using MySQL and not PG, its not clear to me that, as of this writing, you can easily connect to PG from a  GCF (Google Cloud Function).

The actual provisioning step can take a bit of time, so just keep that in mind.

At this time, there does not appear to be any sort of GUI interface for managing the MySQL instance, so you will need to remember your SQL and drop into the Google Cloud Shell.

gcp6

Once you are here you can create your database. You will want a table within that database to store the image references. Your schema may very, here is what I choose:

gcp7

The storageName is unique since I am assigning it during upload so that the name in the bucket matches the unique name of the image in both spots; allows me to do lookups. The rest of the values are designed to support a UI.

Inserting the record

You will want to update your upload trigger to insert the record into this table as the file comes across the wire. I wont show that code here, you can look at the backend trigger to see how to connect to the MySQL database. Once you have that figured out, it is a matter of running the INSERT statement.

Building the Backend Trigger

One of the big draws of Serverless is the integration abilities it gives you to integrate with the platform itself. By their nature, Cloud Platforms can easily produce events for various things happening within itself. Serverless functions are a great way to listen for these events through the notion of a trigger.

In our case, Google will raise an event when new blobs are created (or modified), among other actions. So, we can configure our trigger to fire on this event. Because Serverless scales automatically with load, this is an ideal way to handle this sort of deferred processing model without having to write our own plumbing.

Google makes this quite easy as when you elect to create a Cloud Function you will be asked what sort of trigger you want to respond to. For our first part, the upload function, we are listening to an Http Event (a POST specifically). In this case, we will want to listen to a particular bucket for when new items are finalized (that is Google’s term for created or updated).

gcp8

You can see, we also have the ability to listen to a Pub/Sub topic as well. This gives you an idea of how powerful these triggers can be as normally you would have to write the polling service to listen for events; this does it for you automatically.

The Code

So, we need to connect to MySQL. Oddly enough, at the time of this writing, this was not officially supported, due to GCF still being in beta from what I am told. I found a good friend which discussed this problem and offered some solutions here.

To summarize the link, we can establish a connection but that appears to be some question about the scalability of the connection. Personally, this doesnt seem to be something that Google should leave to a third party library but should offer a Google Cloud specific mechanism for hitting MySQL in their platform. We shall see if they offer this once GCF GAs.

For now, you will want to run npm install –save mysql. Here is the code to make the connection:

(This is NOT the trigger code)

gcp9

You can get the socketPath value from here:

gcp10

While you can use root to connect, I would advise creating an additional user.

From there its a simple matter of calling update. The event which fires to trigger the method includes what the name of the new/updated blobs is, so we pass it into our method call it imageBucketName.

Getting Our Image Data

So we are kind of going out of order since the update above only makes sense if you have data to update with, we dont or not yet. What we want to do is use Google Vision API to analyze the image and return a JSON block representing various features of the image.

To start, you will want to navigate to the Vision API in the Cloud Console, you need to make sure the API is enabled for your project. Pretty hard to miss this since they pop a dialog up to enable it when you first enter.

Use npm install –save @google-cloud/vision to get the necessary library for talking to the Vision API from your GCF.

Ok, I am not going to sugarcoat this, Google has quite a bit of work to do on the documentation for the API, it is hard to understand what is there and how to access it. Initially I was going to use a Promise.all to fire off calls to all of the annotators. However, after examining the response of the Annotate Labels call I realized that it was designed with the idea of batching the calls in mind. This led to a great hunt to how to do this. I was able to solve it, but I literally had to splunk the NPM package to figure out how to tell it what APIs I wanted it to call, this is what I ended up with:

The weird part here is the docs seemed to suggest that I dont need the hardcoded strings, but I couldnt figure out how to reference it through the API. So, still have to work that out.

gcp11

The updateInDatabase method is the call I discussed above. The call to the Vision API ends up generating a large block of JSON that I drop into a blob column in the MySQL table. This is a big reason I generally go with a NoSQL database since these sort of JSON responses are easier to work with than they are with a Relation Database like MySQL.

Summary

Here is a diagram of what we have built in the test tutorials:

GoogleImageProcessorFlow

We can see that when the user submits an image, that image is immediately stored in blob storage. Once that is complete we insert the new record in MySQL while at the same time the trigger can fire to start the Storage Trigger. Reason I opted for this approach is I dont want images in MySQL that dont exist in storage since this is where the query result for the user’s image list will come from and I dont want blanks. There is a potential risk that we could return from Vision API before the record is created but, that is VERY unlikely just due to speed and processing.

The Storage Trigger Cloud Function takes the image, runs it against the Vision API and then updates the record in the database. All pretty standard.

Thoughts

So, in the previous entry I talked about how I tried to use the emulator to develop locally, I didnt here. The emulator just doesnt feel far enough along to be overly useful for a scenario like this. Instead I used the streaming logs feature for Cloud Functions and copy and pasted by code in via the Inline Editor. I would then run the function, with console.log and address any errors. It was time consuming and inefficient but, ultimately, I got through it. It would terrify me for a more complex project though.

Interestingly, I had assumed that Google’s Vision API would be better than Azure and AWS; it wasnt. I have a standard test for racy images that I run and it felt the picture of my wife was more racy than the bikini model pic I use. Not sure if the algorithms have not been trained that well due to lack of use but I was very surprised that Azure is still, by far, the best and Google comes in dead last.

The once nice thing I found in the GCP Vision platform is the ability to find occurrences of the image on the web. You can give it an image and find out if its on the public web somewhere else. I see this being valuable to enforce copyright.

But my general feeling is Google lacks maturity compared to Azure and AWS; a friend of mine even called it “the Windows Phone of the Cloud platforms” which is kind of true. You would think Google would’ve been first being they more or less pioneered horizontal computing which is the basis for Cloud Computing and their ML/AI would be top notch as that is what they are more less known for. It was quite surprising to go through this exercise.

Ultimately the big question is, can Google survive in a space so heavily dominated by AWS? Azure has carved out a nice chunk but really, the space belongs to Amazon. It will be interesting to see if Google keep’s their attention and tries to carve out a nice niche or ends up abandoning the public cloud offering. We shall see.

Google Cloud: Image Upload

When we talk about using a “public cloud” we are most often referring to Amazon and Azure. These two represent the most mature and widely available public clouds in the world. But, Google has also been working to enhance its public cloud offerings, and given their history and technical prowess, it would not be wise to ignore them. So, given that Google gives you a nice $300 credit per month, I decided to take some time and see what I can build.

Recently, I decided to dive into GCP (Google Cloud Platform) and see what its like to build my standard microservice based Image Processor application in the platform, mostly to get a feel for what its like and its level of maturity. What I found was what I expected, good offerings but still in need of polishing when compared to AWS and Azure. Let’s walk through my example.

Setting up the function

I really do like the UI of Google Cloud, its clean and makes sense; though this could be do the lack of offerings compared to Azure and AWS which have to provide access to many more. Nevertheless, I found the UI easy to navigate.

The Project

Everything in your Google Cloud is organized into “projects”, near as I can tell. Within these projects you turn on various APIs (like Cloud functions) and define the various cloud resources the project will use; very similar to resource groups in AWS and Azure. When you access APIs, you will need to use your Project Id as a key value. Google Cloud displays your current project context in the top bar making switching between very easy.

gcp1

As soon as you select the Cloud Functions options from the sidebar nav (the site is clearly built using the Material UI) you will be asked, if this is the first time, to Enable API which will allow you to actually use the feature.

Google Cloud Functions use ExpressJS under the hood. Use that to inform your Google searches.

The Function

Given they have been around only since 2016 it makes sense why this area feels behind compared to AWS and, especially, Azure. By default, Google will lay out a nice example for you but its kind of raw; I do not like the fact that when I call my trigger it will respond to ANY verb leaving it to me to write the verb isolation logic, so I hope you like that if statement to return 405s.

The inline editor is nice but, quickly becomes irrelevant once you start adding packages. I recommend using something like Visual Studio Code or Atom to do most of your code editing. As a tip, you will want to use the ZIP options when you add new files since the editor will not let you create files, at least not right now.

 gcp2

Given this, you can leverage the trigger Url (look for the Trigger tab), drop it into Postman and play with the request (only verbs supporting a body work out of the box). Also notice the above, the values indicated by the arrows must match, standard JavaScript stuff.

Meet the Emulator

Google provides a Cloud Functions emulator that you can install via an NPM package (instructions). It provides a good way to play with functions locally and easily see a result. However, this product is still very much in alpha and I ran into some problems:

  • You need to deploy after any file change. While I sometimes saw my function updated in real time, it was not consistent and I chased a bug for a good while because I thought my code was updating
  • Get familiar with functions logs read –limit=## this is the best way to debug functions. I couldnt get the debug command to work. Using console.log you can drop messages into the local logs.
  • When you deploy  you are deploying to the emulator, NOT the Cloud
  • File Uploads do not seem to work. Hard as I tried, even using the exact code form the Cloud Functions tutorial (here) my file would always appear absent, even though Content-Length was correct. Not sure what is going on.

Overall, the Emulator is a nice add on, but it needs a bit more add before I can say its a valuable tool for development. I lost a few hours on my File Upload try before I did a sanity check and discovered that the file was being passed in the Cloud verison but not the emulator.

Development Flow

What I ended up doing to get this working was I would write my changes, do my NPM stuff in VSCode and then copy paste into the online Function Editor, Deploy it and run it. All the while I had my Log Viewer open and actively streaming new log entries to me. There is a process that allows use of Source Control to deploy changes, I didnt get to look at that (here). The code I am going to show below was mostly built using this copy and paste approach; nostalgically, this is what I used to do with AWS Lambda and Azure Functions before the tooling got better.

The Code

I kept the Busboy library reference, though I never got it to call its finish action, not sure why. The final version just calls my success once the save to Cloud Storage finishes. Here is our code which accepts the file being uploaded:

const Busboy = require('busboy');

exports.upload = (req, res) => {
    if (req.method === 'POST') {
        const busboy = new Busboy({ headers: req.headers });

        // This callback will be invoked for each file uploaded.
        busboy.on('file', (fieldname, file, filename, encoding, mimetype) => {
            console.log('got the file');
            res.sendStatus(200);
        });

        busboy.end(req.rawBody);
    } else {
        res.status(405).end();
    }
}

My hope is this runs straightaway in your inline editor (I did test this). Make sure Postman is set to use form-data as its type (I always also drop a Content Type multipart/form-data into the headers as well to be safe) and you send a file up. If all goes well, in your logs you see a message got the file.

Enter Storage

Ok, so what we wrote above is pretty worthless. What we want to do is drop this into a Storage bucket for long term storage. To create storage in Google Cloud, revisit the left hand nav bar and select Storage. From the subsequent interface create a new storage bucket.

gcp3

Remember the name of you bucket, you will need it in our next section.

Save to Storage

This is an area where I found a pain point. I do not like to save a file to disk and THEN upload it to storage, I want to upload the stream; its faster. With the current NodeJS Client (npm install @google-cloud/storage) you cannot do this, you MUST provide a physical path for upload to use [link]. Am hoping that gets added in future versions.

Here is the code, changed with our Storage upload call (note the save to a temporary directory preceding the storage upload).

const bucketFileName = uuid();
const tmpPath = path.join(os.tmpdir(), bucketFi
console.log(tmpPath);
file.pipe(fs.createWriteStream(tmpPath));
const storage = new Storage({
    projectId
});
const bucketName = 'image-processor-images';
storage
    .bucket(bucketName)
    .upload(tmpPath, {
        destination: bucketFileName
    })
    .then(() => {
        console.log('write complete');
        res.sendStatus(200);
    })
    .catch((error) => {
        console.log(error);
        res.sendStatus(500);
    });

This code happens inside the busboy.on(‘file’,…) handler. To ensure uniqueness of the blobs I use the uuid library to generate a unique name. Finally, you can see the reference to projectId which is the Id of the project. You can get this by clicking your project in the top bar.

If you run the same call as before in Postman, it should store the uploaded file in your Storage account. One note, Max is 10MB per file. Google has a way to take larger files, but I didnt look into it yet.

Overall Thoughts

Overall, I was impressed with Google and I like what I saw. Sure it wasnt the smoothest development process, but I find it better than AWS and Azure were at the same points in development. I think the big focus needs to be on the developer experience, because ultimately that is how you get developers to want to use your platform and, ultimately, push it when they influence the choice.

But, I think Google is going to end up being a serious player just because they are Google and this sort of thing (Cloud and large scale processing) is what they are known for. So, I view this as essential but, it would still need more maturation before I would consider it in the same breath as AWS and Azure.

That hard part for Google will be getting traction. The $300 per month credit is awesome because it gives a lot of flexibility to really explore the platform and potentially recommend it.  Next, I plan to check out their Database offerings.

Comparing React and Angular: Redux

Angular and React are, perhaps, the two most popular frameworks for creating JavaScript Single Page Applications (SPA) though comparing them is a bit of a fools gambit. ReactJS does not pit itself as the end to end framework that Angular is, instead it (React) focuses on allowing easy development of View pages, mainly through JSX. This is perhaps why the support for Redux in Angular feels lacking compared to ReactJS.

Redux in ReactJS

To say that Redux and ReactJS are closely linked is to state the understated. Redux was born from the Flux pattern which, like ReactJS itself, was developed by Facebook. Therefore, we should not be surprised at how much better developed the Redux implementation is on ReactjS vs Angular.

This is mainly done through the use of the react/redux NPM package. This single library allows you to utilize the connect method as a way to automatically wire React Components (called Containers in this context) to the store and listen for events. Example:

redux_compare1

connect takes a couple parameters and returns a function which then takes the connected components. These parameters are the mapStateToProps and mapDispatchToProps. Through each of these methods we can define simple objects which create props that our component will receive.

This pattern is very easy, though can take some getting used to (more), but it offers a very easy way to bring elements of state into a component, as well as defining the methods that will dispatch actions to mutate state.

Redux in Angular

As a hard contrast to ReactJS, there is no single library for Angular, though a lot of the community has consolidated to using @ngrx/store. It actually does a very good job of aligning itself with what a developer that has Redux would expect.

Untitled Diagram (1)

Where I had the most difficulty was around properly defining the State Type here – I ended up going with the notion of global state but I realize now there are some better ways to go about this. Here is a sample of my current code:

redux_compare2

In Typescript (which is the default language for Angular 2+) you can take an arbitrary JSON object and put an interface on top of it. This allow TS to be aware of what to expect from that object. If we go to the app.module.ts file which has the responsibility for setting up our store

redux_compare3

We can see that our “store” defines an object with imagesTable property to which we have assigned our imagesReducer; this makes more sense if you view your reducers as being a “table” in the sense that it holds and manipulates only a certain segment of your data.

Now, as a rule, this really is a pure JSON object. GlobalState is an interface. As I said before, you can leverage interfaces as a means to give defined structure to JSON objects. Here is the definition of GlobalState:

redux_compare4

The really important thing here is to make the connection of the properties defined for the store above and the properties of GlobalStateimageState here is simply the interface we placed on our reducer data, as defined through our initial state.

redux_compare5

What happens with the store.select method is it gets passed the object we used in our StoreModel call within app.module. Then, using interfaces we can, effectively, “mask” this object to only see the state we wish to see; this is what gets passed into the select callback.

Thus, returning to our Component we can know understand this call better

redux_compare2

Finally, as with most things in Angular 2+ we rely heavily on observables via the RxJS library; we do this in React as well using the redux-observables package, though that setup is slightly more complicated than Angular, which can leverage the built in support for observables, whereas React must rely on middleware, fore Redux anyway.

The one key point with observables in Angular, at least with those that are bound to the UI is that we must use the async directive to ensure the UI updates as the value within the observable changes.

redux_compare6

Why I like React better?

In this example, I focused on the @ngrx/store library which seems to be what a lot of Angular developers are gravitating towards for their Redux. In React, this choice is already clear via the react/redux package and there are ample tutorials on how to set things up. With @ngrx/store there was not really a single good tutorial that I could find that would give me the step by step.

Further, I ran into breaking changes with @ngrx where I had to change things out as I went to build. This tells me the project is still very much under development and is still changing, as is Angular itself. I have not had the experience of running into such changes when dealing with react/redux.

The reality is, I wont truly recommend one over the other mainly because you can use both (React can be used as a view engine for Angular) and they are aimed at different purposes. I do feel the redux story is more refined with React but, that is not to say that Angular should be avoided, it just needs better docs and more maturation.

Development Agnosticism and its Fallacies

Over the latest weekend I spent time looking at a tool called Serverless (http://www.serverless.com) whose premise was that I can write Serverless functions independent of any one provider and deploy them up to any provider seamlessly. Basically, a framework to let you build for the cloud without choosing a single provider.

It took some effort but I got things working with the basic case over the course of a few hours. The hardest part was getting the process to work with Azure. Where I was left (relient on various Azure credentials being present in the environment variables) was hardly ideal. Further, the fact that, at least right now, that .NET Core is not supported on Azure through Serverless is disappointing and harkens to the fact that, if using something like this, you would be dependant on Serverless to support what you are trying to do.

All of these thoughts are familiar to me, I had them with Xamarin and other similar frameworks as well. In fact, frameworks like Serverless stem from a peculiar notion of future proofing that has propagated within the developer community. We are terrified of trapping ourselves. So terrified that we will spend hundreds of hours over complicating a feature to ensure we can easily switch if we need to; this despite there being very cases of it happening. And when it does happen, the state of the code is often the least of our worries.

My first experience with this was around the time that Dependency Injection (DI) really cemented the use of interfaces in building data access layers. At the time, the reasoning was it “allows to move to a totally different data access layer without much effort.”. For the new developer this sounded reasonable and a worthwhile design goal. To the seasoned pro this was nonsense. If your company was going to change from SQL Server to Oracle the code would be the least of your worries. Also, if you had designed your system with a good architecture and proper separation to begin with, you would already be insulated from this change.

The more important aspect of using interfaces in this way was to enable easier unit testing and component segregation, also for testing. Additionally, with the consideration of DI, it meant that we could more easily control the scope of critical resources. But, in my 10 years as a consultant, never once have I been asked to change out the data access layer of my application; nor do I anticipate being asked to do it on a regular enough basis where I would advocate an agnostic approach.

I feel the same way with Cloud. I was working with a company that was being reviewed for acquisition last year. One of the conversation topics with their developers was around the complexity of a cloud agnostic layer. Their reasoning was to support the move from Azure to AWS if it became necessary and because they “had not fully committed to any one cloud vendor”.

My general point was, I understand not being sure but neither Azure and or AWS are going away. Being agnostic means not taking advantage of some of the key features that help your application take full advantage of the infrastructure and services offered by that Cloud vendor.

And this is where I have a problem with a tool like Serverless it represents giving developers the impression that they can write their code and deploy it how ever they want to any provider. The reality is, similar with the database point, its not likely your enterprise is going to switch to another Cloud vendor and demand that, in one week, everything be working. Chances are you can reuse a lot of what you have built but changing also means you have the chance to take advantage of what that vendor offers. I personally would relish that versus just lifting and shifting my code to the new platform.

At the end of the day, I believe we, as developers, need to take stock and be realistic when it comes to notions of agnosticism. While its important to not trap ourselves, it is equally important to not plan and burn effort for something that is not likely to be an issue or, if it becomes an issue, is something that requires an organizational shift. If your organization switches from AWS to Azure and then wonders why things dont just work you either have a communication problem or an organization problem.

So, to sum things up. Tools like Serverless are fun and can probably be used for small projects that are simple; I have similar feelings when it comes to Xamarin. But they will be behind the curve and enforce certain restrictions (lack of supporting .NET Core on Azure) and conventions that are made to promote agnosticism. In a lot of cases, these end up making it harder to build and, the truth is, the farther down the path you get with an application’s development the more difficult it is to justify changing the backend provider. For that reason, I would not support using a tools like Serverless or Xamarin for a complex applications.


Serverless Microservice: Conclusion

Reference: Part 1, Part 2, Part 3, Part 4, Part 5, Part 6

Over the last 6 parts of this series we have delved into the planning an implementation of a serverless microservice. Our example, while simple, does show how serverless can ease certain pain points of the process. That is not to say Serverless is without its own pain points, the limited execution time being one of the largest. Nevertheless, I see serverless as an integral part of any API implementation that uses the Cloud.

The main reason I would want to use Serverless is due to the integration with the existing Cloud platform. There are ways, of coursem to write these operations into an existing implementation, however, such a task is not going to be a single line and an attribute. I also believe that the API Manager concept is very important; we are already starting to see its usage within our projects at West Monroe.

The API management aspect gives you greater control over versioning and redirection. It allows you to completely change an endpoint without the user seeing any changes to it. Its a very powerful tool and I look forward to many presentations and blog entries on it in the future.

Returning to the conversation on serverless, the prevailing question I often hear is around cost: how much more or less do I pay with serverless vs a traditional approach that might be stand alone services or through something like Docker and/or Kubernetes.

Pricing

Bearing in mind that you are automatically granted, monthly, 1 million serverless executions per month ($0.20 per million after that). There is also a cost for the execution time. The example that Microsoft lays out is a function that uses 512MB of memory and executes 3,000,000 times (4,000,000 considering the free million) would cost about $18 a month.

On the whole I feel this is a cost savings over something like App Service, though it would depend on what you are doing. As to how it compares to AWS Lambda, it is more or less equivalent, Azure might be cheaper, but the difference is slight at best.

Closing Thoughts

As I said above, I see a lot of value in using Serverless over traditional programming, especially as more and more backends are adopting event driven architectures. Within this space Serverless is a very attractive because of the each with which it integrates and listens to the existing cloud infrastructure.

I would be remiss if I didnt call out the main disadvantages of Serverless. While there is work going on at Microsoft, and I assume Amazon, to reduce the cold startup time, it remains an issue. That plus the limited execution time (5m) mean that developers must have a solid understanding of their use case before they use Serverless; a big reason why I started this series with a Planning post.

The one other complaint I have heard is more of a managerial notion which is, when I create a traditional application in Visual Studio, its associated with a solution and project and its very clear what is associated with what. With serverless, it feels like a bunch of loose functions lacking any organization.

From what I have seen in AWS this is a fair complaint, AWS Lambda functions are just a list of functions that one would need to understand what is what and how it is used; not ideal. In Azure, however, you can logically organize things such that relevant functions are grouped together; Visual Studio Serverless tools make this very easy. In my view, on Azure, this complaint does not hold water, on AWS, based on what I know this is a difficulty.

Outside of these drawbacks the other area I am focusing on is how to work DevOps into a serverless process. While both Lambda and Azure Functions offer the ability to debug locally (Azure is better IMO) the process of publishing to different environments needs more work.

The topic of Serverless is one I am very keen on in both AWS and Azure. I plan to have quite a few posts in the future directed at this, in particular some of the more advanced features supporting the development of APIs within AWS and Azure.

Fixing Visual Studio Docker

One of the things I have been focusing on building, skillset wise, over the last several months is Docker. From a theory standpoint and with Docker itself I have made good progress. The MVP Summit gave me the chance to dive into Docker with Visual Studio.

Unfortunately, this process did NOT go as I expected and I hit a number of snags that I could not get past, specifically an Operation Aborted error that popped up whenever I attempted to run locally.

Google indicated that I needed to Reset Credentials, Clean the solution, and remove the aspnetcore Docker image. None of these seemed to work but, with the help of Rob Richardson I was able to get the Container to work properly on Azure and even experiment myself with adding updates. But we still could not get anywhere locally.

I therefore took advantage of so many Microsoft employees being around and was able to get Lisa Guthrie and Lubo Birov from the Visual Studio tools team to help me. It wasnt easy but we managed to find the problem; happily it was not rooted in something I had done which was what I suspected.

It turned out that the VS Debugger had decided to go haywhire and needed to be replaced.

Lubo showed me the vsdbg folder located here: C:\Users\<Your User>. By changing the name of this folder we forced Visual Studio to recreate it and everything was fine.

So that is it, just wanted to share this to hopefully spare someone from my pain and to give another shoutout to Lisa, Rob, and Lubo and everyone else who helped. One of the great things about being an MVP is the great community and the knowledge that there are some uber smart people out there ready and willing to help others.

Serverless Microservice: Reading our Data

Reference: Part 1, Part 2, Part 3, Part 4, Part 5

Returning to our application we know have a service, sitting behind an Azure API Manager (APIM) that requires a token to access. The APIM layer can also be used to enforce rate limiting and CORS rules, as well as other common API features. Additionally, this feature gives us access to a couple portals where we can administer the API and even provide users with self service for getting tokens.

Now, we are going to add our final endpoint which performs a GetAll for our data. This is similar to what we did in Part 2 when we created the Upload handler, though it will just peform a read against our Cosmos (Mongo) table.

Create the endpoint in Visual Studio

One of the things I like about how Microsoft has approached Azure Functions is the solution based approach that Visual Studio helps promote. Unlike with Lambda, your functions are not simply floating but can be easily grouped.

In this way, I recommend opening the SLN file which holds the Upload endpoint. You can right click on the Project and indicate you want to Add a new Azure Function.

microservice17

This will walk you through the same sequence as before and again you will want to create an HTTP Trigger.

Per the convention laid out by REST we are going to want to ensure that our endpoint responds to a GET verb. We can use Anonymous for security. (Note: this does NOT control whether a token is required or not, that is controlled by APIM).

Here is some code that I wrote up that selects our results from Cosmos, its all pretty straight forward.

microservice18

Now we can Publish our project and see our new function in the Portal. Now, we need to add it to our API.

Adding a Route in APIM

So in Part 4 we added an APIM layer which allows us to govern the AI and set up routes independent of what we specify for the function itself; this allows us to present a model of consistency for the API, even if under the hood the services are varied and support a variety of different route forms. Here we want to add a route in APIM for our GetAll operation.

Here are the steps for doing this (assuming this call is being added to an existing APIM):

  1. Access the APIM instance
  2. Select APIs and select Add Operation
  3. This will ask you to provide a route – remember route forwarding happens with each communique into the APIM
  4. Test the connection with Postman – remember if you followed the Products discussion in Part 5 you will have to provide the token

I mentioned route forwarding with point #3 and this is important to understand, its also discussed in Part 3. When APIM receives a matching route it calls the mapped call with the route part beyond the version:

Ex. http://www.somehost.com/api/v1/version -> /version is passed to mapped resource

You can override this behavior, as is discussed in Part 3. For this /version call, it is likely not necessary.

Closing

We know have a full fledged microservice that is focused on image processing and retrieval. Our next section will focus on why Serverless is a big deal for Microservices and other lessons learned in my experience

Serverless Microservice: Understanding Products

Reference: Part 1, Part 2, Part 3, Part 4

In the previous post we talked about the building the API using Azure API Management. This is a very important part of a modern API, especially one that will be consumable for users not within an organization or for sharing the API. With the sheer number of features and abilities of the API Management service, I felt it necessary to dive in a bit deeper and talk about a core concept of the APIM layer: the Product.

Product, its not quite what you think

To be fair, I think this is a terrible name choice. The Product is effectively the “thing” you will select to gain access. Most developer sites I have seen would simply do this as you register a particular product and then give the option to select a tier of access; that is effectively what a Product is: a tier of access for a given set of APIs.

Just to clarify that last point, a Product can span multiple APIs that are being managed by the layer. To access your Products you need to select the appropriate option in your APIM options:microservice16

By default a new APIM instance is given two products: Starter and Unlimited. These products are designed to give you a sense of how these things work; though I have found that Starter doesnt actually work the way Microsoft’s docs suggest. But let’s get a sense as to what these allow.

Register for a token

So, if we access the Unlimited we can note two checkboxes:

  • Require Subscription – means in order to access APIs using this Product you will need to be subscribed
  • Requires Approval – means that subscription requests need to be approved by an administrator

For our purposes in this posting, you will want to make sure the Require Subscription is checked. Once you save this change, if you have been following along you wont be able to access your API.

I should point out that, if your API is accessible by a Product which does NOT require a subscription, it will still allow the anonymous access. So, in order to see the security in action, you will need to make Starter require a subscription or remove your API from Starter.

Assuming the Require Subscription checkbox is checked, attempting to access the API calls now, you will get a message indicating you need a subscription key. To do that, we need to go to the Developer Portal.

First, a gripe. There is a navi  link in this site that shows APPLICATIONS. Unlike Facebook, Twitter, and other popular APIs this is purely just a gallery, it has little purpose outside providing links to other applications using the API. Its a weird feature with a bad name.

What you will want to do is select PRODUCTS which will list out the Products you APIM layer supports. Let’s click on Unlimited – Products that do not require a subscription are not visible in this list.

Once you hit a Subscribe you will enter the flow to either login or create a user. Once you complete this process you will receive a set of keys. Use one of these values as your Ocp-Apim-Subscription-Key header. This will allow your request to go through.

Other Features

The APIM service is an extremely deep service with a wide variety of features, I could not hope to dive into all of them but, I felt that Products was especially underserved. So I hope this post makes sense. Future posts will assume you have this setup appropriately.