Continuing from our Planning in Part 1, our creation of our Upload Azure Function in Part 2 and our backend processing pipeline in Part 3, Part 4 (this) goes up a level and talks about the API.
This may seem somewhat strange since, technically, when we deployed our Upload function we got a Url, so isnt that our API? Well yes, and no. Let me explain.
The entire purpose behind the Microservice architecture is to spread things out and allow for more parallel development and processing. When things are separated they can scale and follow different release cycles and be managed by different teams. These are all good things but, any organization, is going to want to still build an API that makes sense. And when you have a bunch of Azure Functions like this, you can very easily wind up with names or paths you dont want. This is where Azure API Management comes.
The Azure API Management service lets you lay a layer over n microservices and allow users to see it as a single API rather than a hodgepodge collection of services with no consistency. You can even combine Azure Functions with traditional services and the end users are none the wiser. On top of that, you get things like rate limiting, token provisioning, and a variety of other features built in natively. Azure API Management is a HUGE topic so we will be doing a few parts on this.
Let’s set things up
Just to get a clear picture of this, here is a diagram which, at a basic level, shows our setup:
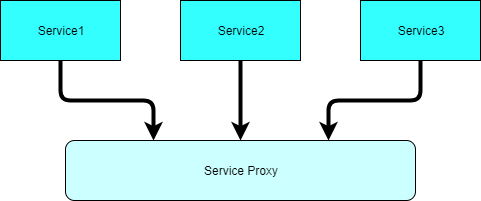
Essentially, you can have any number of services behind the proxy layer, and they can be anything (the proxy is basically using Url Rewriting). What the proxy provides is, authentication, rate limiting, CORS, and other general API features you are familiar with. For the remainder of this post we will do the following:
- Create the API Management Service
- Setup our API endpoints
- Remove the requirement for tokenization (basically make it allow anonymous access)
- Access the endpoint via Postman
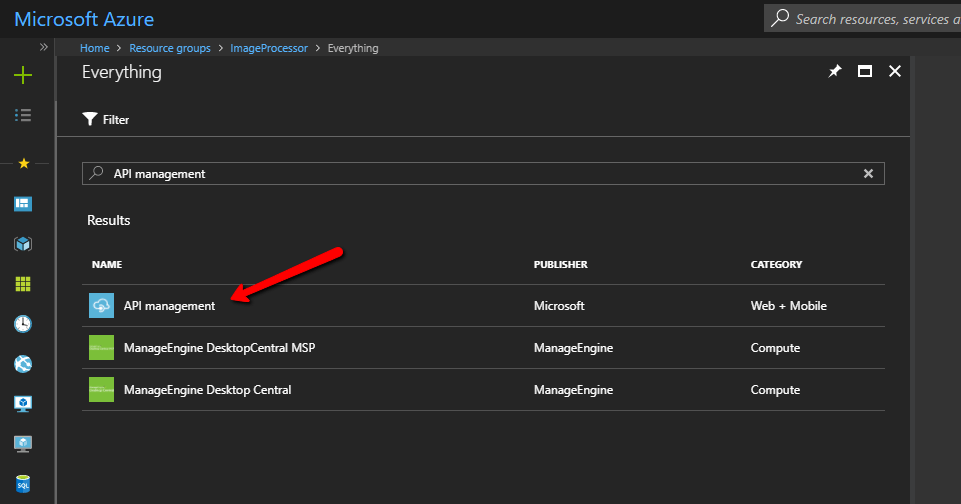
Creating the API Management (APIM) is straightforward though the provisioning process can take a while; mine took around 20 minutes.
Once you begin this process you will, as per usual, be asked to supply details for your new API. The two fields that are important here is Name and Pricing Tier. The former because it ultimately drives the name of the proxy and therefore the URL that users will use to access your service(s). The later because it drives your SLA agreement. If you are just playing around, I recommend the Developer SLA as it is part of the free tier. For kicks, I named by APIM imageService.
Once the provisioning process is completed you can access the APIM instance. Before we talk technical I want to point out two things on the Overview section: Developer Portal and Publisher Portal.
One of the nice things I like about APIM is what it gives you out of the box. The Developer Portal contains an automatically generated set of documentation that provides multi language code examples and interactive API test tool.
The Publisher Portal contains information about the API and includes a way to “request” tokens. Basically, it gives you the sort of site that Twitter, Facebook, and others give to request tokens and learn more about the API. Both portals are fully customizable. There is also a reference to something called Products in the Developer Portal. These are important and we will be talking about them later.
Let’s add an endpoint
So, if you are following this series you should have an endpoint to upload an image. Right now this is coded as a pure Azure Function with its own Url and everything. Adding this to an APIM is fairly straightforward.
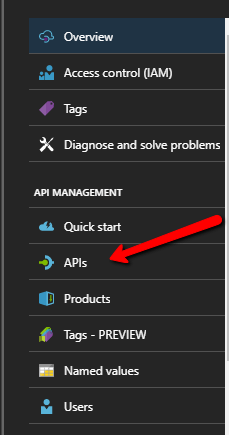
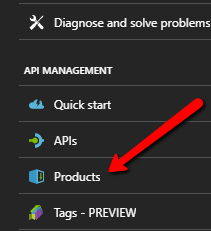
We can manage our APIs under the APIs options:
For our purposes, we will select Functions App. This will be the easiest way to add our endpoint which is sourced in an Azure Function.
Notable fields in the creation dialog:
- API Url Suffix – this allows you to prefix ALL calls to your API with a qualifier. Very useful if the API also serves web content as in a traditional MVC setup.
- Version this API – gives your common versioning options for APIs. Honestly, you should always take this for any serious project because, you are going to have to version the API. Better to assume yes and not, than assume not and have to.
- Products – This is the product association for how access is determined. We will discuss Products in more depth later. For now you can select Unlimited.
It is also likely that you will also get the follow message for your Azure Function during this process:

In order to understand what endpoints are “there” and thereby automate the mapping, APIM looks for an API Definition, usually a Swagger definition. This is not generated by default, but luckily its pretty easy.
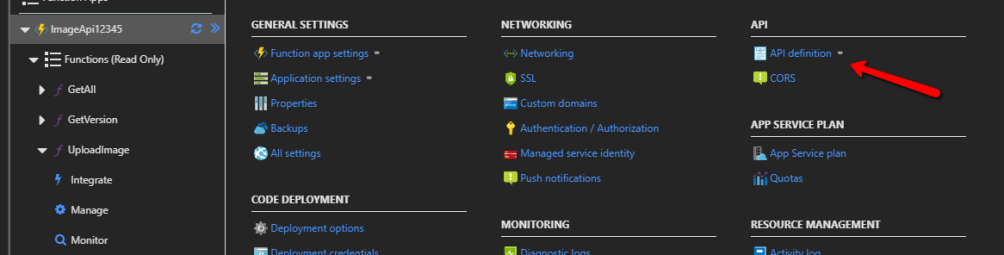
As you can see, under Function App Settings there is a section for API Definition. In this section you are able to either copy/paste or define your Swagger definition. There is also a nice preview feature for Azure Functions that will introspectively build you definition for you – use the Generate API Definition template.
As a side note: I have observed that sometimes this doesnt work the first time the button is clicked but seems to be fine when you do it a second time
Once the definition is generated you can head back to APIM and complete the add process.
API Building
So, let’s walk through this flow
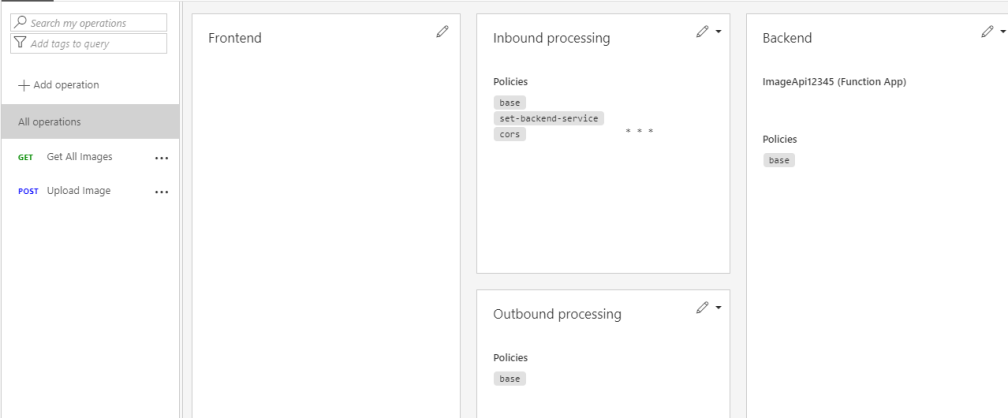
I am going to enumerate each of these pipeline areas to give you an idea of what is happening.
Frontend
This is the face of your API call, the path that is matched which invokes this “lane”. Now this is very important to understand because when your path is matched everything, except the host (and optional API suffix and version identifier) are passed through. Let me use a diagram to better illustrate this:
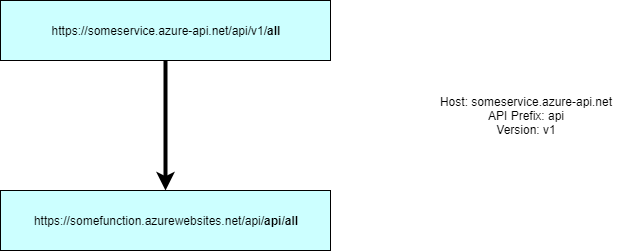
So, in this example look very carefully at the route for the APIM service. Notice that we configured it to use api as the prefix. So when it is matched the APIM layer will forward (rewrite) the request to the Azure Function endpoint you have configured maintaining the unique portion of the route.
Azure Function endpoints have an interesting property where they MUST have api/ in front of their path (I have yet to find out how to disable this). As you can see, this creates a weird path to the Azure Function. You can easily fix this by adding a rewrite rule to the Inbound stage but, just something to keep in mind if you have trouble connecting.
So, to summarize, the Frontend is the outward facing endpoint that your APIM exposes. Ultimately it will get rerouted internally to whatever is backing that specific endpoint.
Inbound Processing
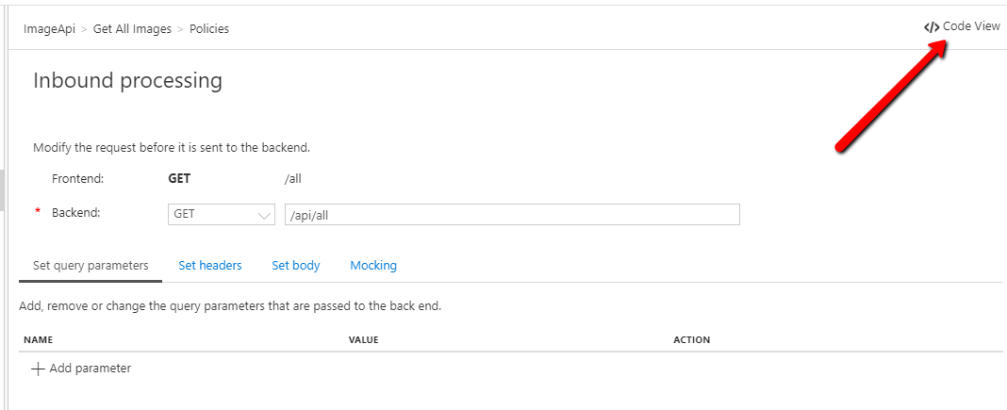
In this situation the Frontend has matched the Url and is forwarding the request, this is the point where we can check for certain headers and perform Url rewriting (if needed) for the ultimate destination of our request.
Given this is a processing node, it offers a much wider array of capabilities vs the Frontend node. Microsoft does not provide a full featured editor for this yet, but does expose the Code View with shortcuts which allow you to take advantage of most common features fairly easily.
Backend
This layer is pretty easy, it is the node that the request will be routed to. Notice that, in the case of an Azure Function, you point at the Azure Function node and not a specific function. This is where the rewritten route comes in handy as Azure will use that Url to call into the Azure function, so the new Url has to match what is supported in the Azure Function endpoint.
There are some great test tools here, but the most common problem that I ran into was, by far, getting the wrong Url out of Inbound processing and getting a 404 with my Azure Function. To correct this, I employed the time tested validate independently each component so I knew the plumbing was the problem.
You can also drop into Code View here, similar to the Inbound processing section but, take heed, as it may not make sense to do certain things here. Also, CORS usually will not not be needed here if you are using strictly Azure resources; only at the Frontend node.
Outbound processing
Outbound processing is Inbound processing in reverse. It lets you examine the result of the backend call and perform tasks like adding response headers.
Before you try to query
So, if you are taking most of the defaults here you wont be able to hit the API with Postman, that is because you lack a token. For this post we are going to disable this requirement, later we will discuss how to manage it.
Products
So, the way Microsoft choose to go about this can either make sense to you or be a bit weird; for me it was mostly the later and some of the former. So a “Product” is a single or many APIs that a user can “use”. The Developer Portal, if you remember, allow us to drill into these Products, test them, and understand how to use them.
The Publisher Portal, on the other hand, allows us to get tokens (if needed) to allow use of these APIs. These tokens can be used to implement some of APIMs more global features, such as rate limiting and usage tracking.
By default, every new APIM instance is given 2 published Products: Starter and Unlimited. Each of these have their own configuration and can be associated with one or more APIs and access policies. For now, we are going to select Unlimited.
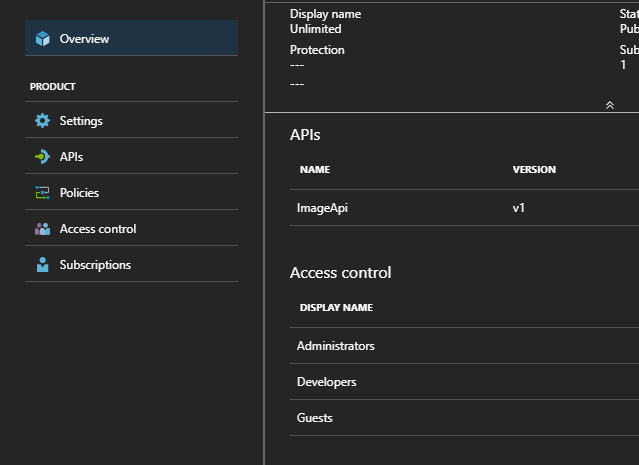
There are a number of options here. We can select APIs and see which APIs this Product is associated with. We can click Policies and see the Policy information for this Product. As I have said, Products in APIM is a HUGE topic and not something I want to dive into with this post. For right now, select Settings.
Here, you will want to disable Requires subscription and this will effectively remove the need for a token in the request. Note that this is NOT recommended with a Production type deployment. I am going this route for simplicity sake, we will cover Products in more detail in another post.
With that in place you should be able to hit your API with Postman. This wont yet work from a client app (ala Angular) cause we have not configured CORS on the Frontend, we will do that next.

4 thoughts on “Serverless Microservice: The API”