So over the last week I have been battling an issue in Terraform that truly drove me nuts and I think understanding can help someone else who is struggling with the same issue.
What is a data source?
In Terraform there are two principle elements when building scripts: resources and data sources. Resource is something that will be created by and controlled by the script. A data source is something which Terraform expects to exist. Keep this in mind, as it will be important in a moment.
What is a module?
Modern Infrastructure as Code approaches focus on modules as a way to encapsulate logic and standards which can be reused. It is this approach which underpins the problem I found. That is, when a module is built that needs to look up existing resources to hydrate fields on encapsulated resources.
What is the problem?
The problems a sequence of events like this:
This file contains hidden or bidirectional Unicode text that may be interpreted or compiled differently than what appears below. To review, open the file in an editor that reveals hidden Unicode characters.
Learn more about bidirectional Unicode characters
Where the problem rears its head is in the source for the image-container
This file contains hidden or bidirectional Unicode text that may be interpreted or compiled differently than what appears below. To review, open the file in an editor that reveals hidden Unicode characters.
Learn more about bidirectional Unicode characters
The key here is the data source reference to the azurerm_storage_account. Here, DESPITE the reference to the storage-account module used in the root, Terraform will attempt to resolve the data source within the image-container before ANYTHING, which results in this error:
As you can see, Terraform will NOT wait for the storage-account module to complete before trying to resolve the data source within the container module.
What is the solution?
Frankly, I am not sure I would classify this as a bug so much as “by design” but it still annoying. The way to get around it is to not have ANY data source in your modules that reference components created as part of your root scripts. So for example, our test script would look like this:
This file contains hidden or bidirectional Unicode text that may be interpreted or compiled differently than what appears below. To review, open the file in an editor that reveals hidden Unicode characters.
Learn more about bidirectional Unicode characters
Notice how I have removed the data source and simply used the variable for the storage account name directly? This is all you have to do. This is, I admit, a simple script but, it is something you will want to be thinking about. Where I ran into this problem was defining custom domains and mTLS certificates for API Management,
So that is it, that is what I found. Maybe it is not new and it was something obvious, though I venture otherwise due to the lack of this mention in the Terraform documentation. It might be something HashiCorp considers “works as designed” but I still found it annoying. So if this helps you, let me know in the comments.
One of the things I have been looking at it recent weeks is Event Streaming, or basically democratizing data within a system so that it can be freely accessed by any number of microservices. It is a wonderful pattern and Azure Functions are an ideal platform for implementation. However, over the course of this process I came to realize that while Azure Functions has a bevy of bindings available to it, one that is very clearly missing is for Redis. So I set about building one.
Under the hood there are two supporting libraries:
NewtonSoft Json
Stack Exchange Redis
Reading Values
This file contains hidden or bidirectional Unicode text that may be interpreted or compiled differently than what appears below. To review, open the file in an editor that reveals hidden Unicode characters.
Learn more about bidirectional Unicode characters
Here, the binding is reading a string value from Redis (connected using the RedisConnectionString app setting value) with the key of value. The binding is, right now, limited to only reading data from either a Redis string or a Redis list. However, it can support reading C# classes – which are stored as JSON strings and deserializable using Newtonsoft’s Json.NET. For example:
This file contains hidden or bidirectional Unicode text that may be interpreted or compiled differently than what appears below. To review, open the file in an editor that reveals hidden Unicode characters.
Learn more about bidirectional Unicode characters
When we get into reading lists, the internal type can either be string or a normal C# class. For example:
This file contains hidden or bidirectional Unicode text that may be interpreted or compiled differently than what appears below. To review, open the file in an editor that reveals hidden Unicode characters.
Learn more about bidirectional Unicode characters
As when reading a single object our of the cache, the underlying value is stored as a JSON string and will be deserialized using Newtonsoft Json.NET.
Writing Values
This is currently the newest use case I have added to the binding, and it, like reading, only supports the string and basic C# types saved using either ICollector<T> or IAsyncCollector<T>, currently out parameter is NOT supported, I plan to add it in the future.
This file contains hidden or bidirectional Unicode text that may be interpreted or compiled differently than what appears below. To review, open the file in an editor that reveals hidden Unicode characters.
Learn more about bidirectional Unicode characters
When doing an output (write) case, you must specify the underlying type the value is stored as, right now either Single or Collection. In the above example, the use of Single will invoke JSON serialization logic and store the value given using StringSet. If the given key already has a value, the new value sent through the collector will overwrite the existing value.
When using Collection the underlying code will use List functions against the Redis class, with two potential execution paths. For example, the following code will append JSON strings for objects given:
This file contains hidden or bidirectional Unicode text that may be interpreted or compiled differently than what appears below. To review, open the file in an editor that reveals hidden Unicode characters.
Learn more about bidirectional Unicode characters
Its important to understand that, the above code will keep adding values to the end of the Redis list. If you want to update values in a list, you need to have your C# object implement the IRedisListItem interface, which will force an Id property. Note this approach is NOT available for strings.
This file contains hidden or bidirectional Unicode text that may be interpreted or compiled differently than what appears below. To review, open the file in an editor that reveals hidden Unicode characters.
Learn more about bidirectional Unicode characters
The binding will key off this Id value when it receives a value for the specific Redis key. The one drawback in the current implementation is the entire list has to be pulled, so if you are adding a lot of values for a C# class you will notice performance degradation. Here is an example of this approach being used:
This file contains hidden or bidirectional Unicode text that may be interpreted or compiled differently than what appears below. To review, open the file in an editor that reveals hidden Unicode characters.
Learn more about bidirectional Unicode characters
Governance is a very important component of a strong security and operational posture. Using Azure Policy, organizations can define rules around how the various resources in Azure may be used. These cover a wide range of granularity from the general “resources may only be deployed to these regions” to “VMs must be of certain SKUs and certain resource tiers are prohibited” to finally, “network security groups must contain a rule allow access over port 22”. Policies are essential to giving operators and security professionals peace of mind that rules and standards are being enforced.
As organizations have moved to adopt Cloud Native technologies like Kubernetes, the governance question continues to come up as a point of concern. Kubernetes resources are, after all, outside the true scope of the Cloud Provider, Azure included. Thus, in many cases, teams rely on each other to avoid any pitfalls, in lieu of proper governance.
Open Policy Agent (https://openpolicyagent.org) is a Graduated CNCF (https://cncf.io) project aimed at providing an agnostic platform for enforcing policy rules across a variety platform, one of which is Kubernetes (a fully intro on this topic is not covered here). Open Policy Agent hooks into the Kubernetes Admission Controller and works to prevent the creation of resources that violate defined rules. To aid in applying this at scale, Microsoft created the Azure Policy for Kubernetes (https://docs.microsoft.com/en-us/azure/governance/policy/concepts/policy-for-kubernetes) feature to allow the provisioning of OPA policies (written in Rego) to be created in an assigned AKS or Arc connected cluster.
The feature is enabled via an add-on to the target AKS cluster. Azure Policy authors have already written a large amount of these policies that you can use for free with an Azure subscription. Support for custom OPA policies is, at this time, still in Preview mode but, it is stable enough that walking through it should prove beneficial.
Enable the Add-on
Support for OPA type policies in AKS is done through an add-on, which must be enabled to support proliferation of the policies. Instructions for enabling this add-on can be done using the following command:
az aks enable-addons --addons azure-policy --resource-group $RG_NAME --name $CLUSTER_NAME
As with ANY addon, you should run a list first to see if its already installed. Be prepared for the enablement process to take a non-trivial amount of time.
Create your Rego Policy
Whether you use OPA in the traditional sense or with Azure Policy you start with creating a ConstraintTemplate. This template is what enables the creation of the custom kind (the name of a specific resource type in Kubernetes) that will enable low level assignment of your policy. Below is a simple ConstraintTemplate which restricts a certain for a target namespace:
This file contains hidden or bidirectional Unicode text that may be interpreted or compiled differently than what appears below. To review, open the file in an editor that reveals hidden Unicode characters.
Learn more about bidirectional Unicode characters
This code is not something I would use in a production setting, but it gets the point across without being overly complicated. The policy registers a violation if within a namespace as indicated by an input parameter namespace, if creation of a certain type of resource is attempted.
VERY IMPORTANT!! Note the use of the openAPIV3Schema block to indicate the supported parameters and their type. Including this is vital, otherwise the addon will not generate the relevant constraint with the parameter value provided.
Once you have created the ConstraintTemplate you should store it a place which is accessible, I recommend, for ease of use, Azure Blob Storage with a public container.
This file contains hidden or bidirectional Unicode text that may be interpreted or compiled differently than what appears below. To review, open the file in an editor that reveals hidden Unicode characters.
Learn more about bidirectional Unicode characters
"displayName": "The Kind of Resource the policy is restricting",
"description": "This is a Restriction"
},
"allowedValues": [
"Pod",
"Deployment",
"Service"
]
},
"namespace": {
"type": "String",
"metadata": {
"displayName": "The namespace the restriction will be applied to",
"description": ""
}
},
"effect": {
"type": "String",
"metadata": {
"displayName": "Effect",
"description": "'audit' allows a non-compliant resource to be created or updated, but flags it as non-compliant. 'deny' blocks the non-compliant resource creation or update. 'disabled' turns off the policy."
},
"allowedValues": [
"audit",
"deny",
"disabled"
],
"defaultValue": "audit"
},
"excludedNamespaces": {
"type": "Array",
"metadata": {
"displayName": "Namespace exclusions",
"description": "List of Kubernetes namespaces to exclude from policy evaluation."
},
"defaultValue": [
"kube-system",
"gatekeeper-system",
"azure-arc"
]
},
"namespaces": {
"type": "Array",
"metadata": {
"displayName": "Namespace inclusions",
"description": "List of Kubernetes namespaces to only include in policy evaluation. An empty list means the policy is applied to all resources in all namespaces."
},
"defaultValue": []
},
"labelSelector": {
"type": "Object",
"metadata": {
"displayName": "Kubernetes label selector",
"description": "Label query to select Kubernetes resources for policy evaluation. An empty label selector matches all Kubernetes resources."
},
"defaultValue": {},
"schema": {
"description": "A label selector is a label query over a set of resources. The result of matchLabels and matchExpressions are ANDed. An empty label selector matches all resources.",
"type": "object",
"properties": {
"matchLabels": {
"description": "matchLabels is a map of {key,value} pairs.",
"type": "object",
"additionalProperties": {
"type": "string"
},
"minProperties": 1
},
"matchExpressions": {
"description": "matchExpressions is a list of values, a key, and an operator.",
"type": "array",
"items": {
"type": "object",
"properties": {
"key": {
"description": "key is the label key that the selector applies to.",
"type": "string"
},
"operator": {
"description": "operator represents a key's relationship to a set of values.",
"type": "string",
"enum": [
"In",
"NotIn",
"Exists",
"DoesNotExist"
]
},
"values": {
"description": "values is an array of string values. If the operator is In or NotIn, the values array must be non-empty. If the operator is Exists or DoesNotExist, the values array must be empty.",
Now, that is a rather long definition so, lets hit on the key points, focusing on the then block:
OPA supports many standard parameters, and these are listed in the policy JSON under parameters. Important to understand is that OPA ALWAYS expects these, so we do not need to do anything extra. You may also omit them, and the system does not seem to care.
Custom parameters should be placed under the values key. Parameters specified here MUST have a corresponding openAPIV3Spec definition.
kind and apiGroups relate directly to concepts in Kubernetes and help declare for what resources and actions against those resources the rule applies.
Note the templateInfo key value under then. This indicates where Azure Policy can find the OPA constraint template – that which we created earlier. There are a few different sourceType values available. For this example, I am referencing a URL in the storage account where the template was uploaded
Note the mode value (Microsoft.Kubernetes.Data). This value must be used so that the Azure Policy runners know this policy contains an OPA
In the case of our example, we are piggybacking off whatever kind the policy applies to and then indicating a specific namespace to make this restriction. We could achieve the same with the namespaces standard parameter but, in this case, I am using a singular namespace property to demonstrate passing properties.
I also recommend giving the new definition a very clear name indicating it is custom, I tend to recommend this regardless of whether or not it’s for Kubernetes or uses OPA, just helps to more easily find them in the portal or when searching with the CLI.
Make the Assignment
As with any policy in Azure Policy, you must assign it to a specific scope for it to take effect. Policy assignments in Azure are hierarchical in nature thus, making the assignment at a higher level affects the lower levels. In MCS, we typically recommend assigning policies to Management Groups in order to create easier maintenance – but you may assign all the way down to Resource Groups.
Once the assignment is made you will have to wait for the AKS addon to pick it up and create the new type and constraint definition on your behalf – my experience has had it take around 15 minutes. At the time of this writing, there is no way to speed it up – even using a trigger-scan command from the AZ CLI does not work.
One critical detail while doing the assignment, ensure that the value provided to the effect parameter is in lower case and either audit (which will map to dryrun in OPA) or deny. In some of the built-in templates Audit and Deny are offered as options. In my experience, the addon gets confused by this.
Validate the assignment
After a period of time run a kubectl get <your CRD type name> and it will eventually return a generated resource of that type representing the policy assignment. Once you see the result there, you can attempt to create an invalid resource in your cluster to validate enforcement.
Something to keep in mind, is the CRD Constraints will NOT report on deny actions, only dryrun (at this time warn is not supported, nor do I see much sense in the team supporting it) enforcements get reported on – this makes sense since with deny in place, invalid resources cannot enter the system.
I also recommend starting with dryrun if your governance process is new, this will give teams time to make change per the policies. Starting with deny can cause work disruptions and less then chances of success.
Debugging the Assignment
One thing I found helpful is to use -o yaml to see what the generated CRD and Constraint look like in the cluster. I used this when I was working with the Engineering team to determine why parameters were not being mapped.
I am deeply intrigued by the use OPA in Kubernetes to enforce governance, as I believe strongly in the promise of governance and its criticality in the DevSecOps movement. I also like what support in Azure Policy means for larger organizations looking to adopt OPA at a wider scale. Combine it with what Azure Arc brings to the table and suddenly any organization in any cloud has the ability to create a single pane of glass to monitor the governance status of their cluster regardless of platform or provider.
Please let me know if you have any questions in the comments.
One of the common questions I field with our customers involves the granularity of permissions within Azure. Though we provide RBAC as a means to assign roles that enables certain functionalities, often this is not granular enough – two prominent examples are Azure Key Vault and Azure Container Registry. In both of these, we typically recommend a “splitting” approach whereby multiple instances of these resources are deployed to “segment” the dispersion of values/assets.
The problem here is twofold: 1) it does not solve the problem and 2) it creates pollution, especially within large organizations and diminishes ROI (Return on Investment) as organizations must now devote additional resources to managing that which should be managed by the cloud provider. In the case of Container Registry, it also adds unnecessary cost as Container Registry is not billed on consumption as Key Vault is: https://azure.microsoft.com/en-gb/pricing/details/container-registry/#pricing
To mitigate this, the Container Registry team is offering, in preview, Scope Maps and Tokens. Let’s see how they work.
Explanation
First, the Container Registry MUST be created using the Premium SKU, if not the Scope Map and Tokens feature will not be available.
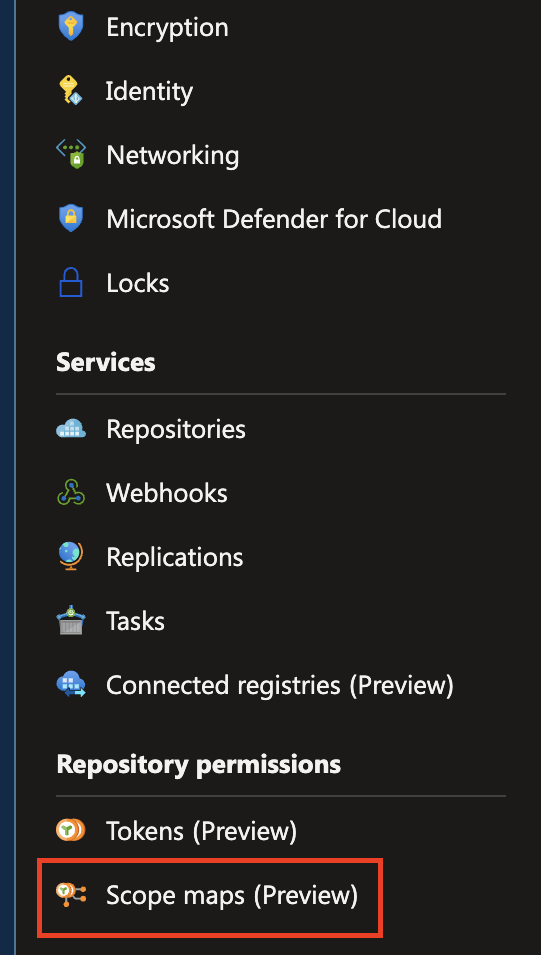
Once created, you will want to create a Scope Maps
When you open this you will see 3 default scope maps created – unfortunately at the time of this writing there is no way to duplicate these using the portal, since user created scope maps must target specific registries with no support for wild cards.
Our goal is to create an identity that supports pushing and reading images from a specific repository in the ACR, in my case I created an image called servers/nginx with a tag value of 1.3.5 – this is purely fictitious.
The specific repository (or repositories) can be selected from the drop downs after clicking the + Add button. Next to this selection select the permissions this scope map has – for a writer type mapping you will want content/read and content/write.
Once the scope map is defined, we need to create a token which will serve as the username/password for the user. We do this in the Tokens section:
This screen is self explanatory, provide the Name you want to use to identify the token (the username) and the associated Scope Map (the assigned role). Ensure the token is Enabled (default) and press the Create button.
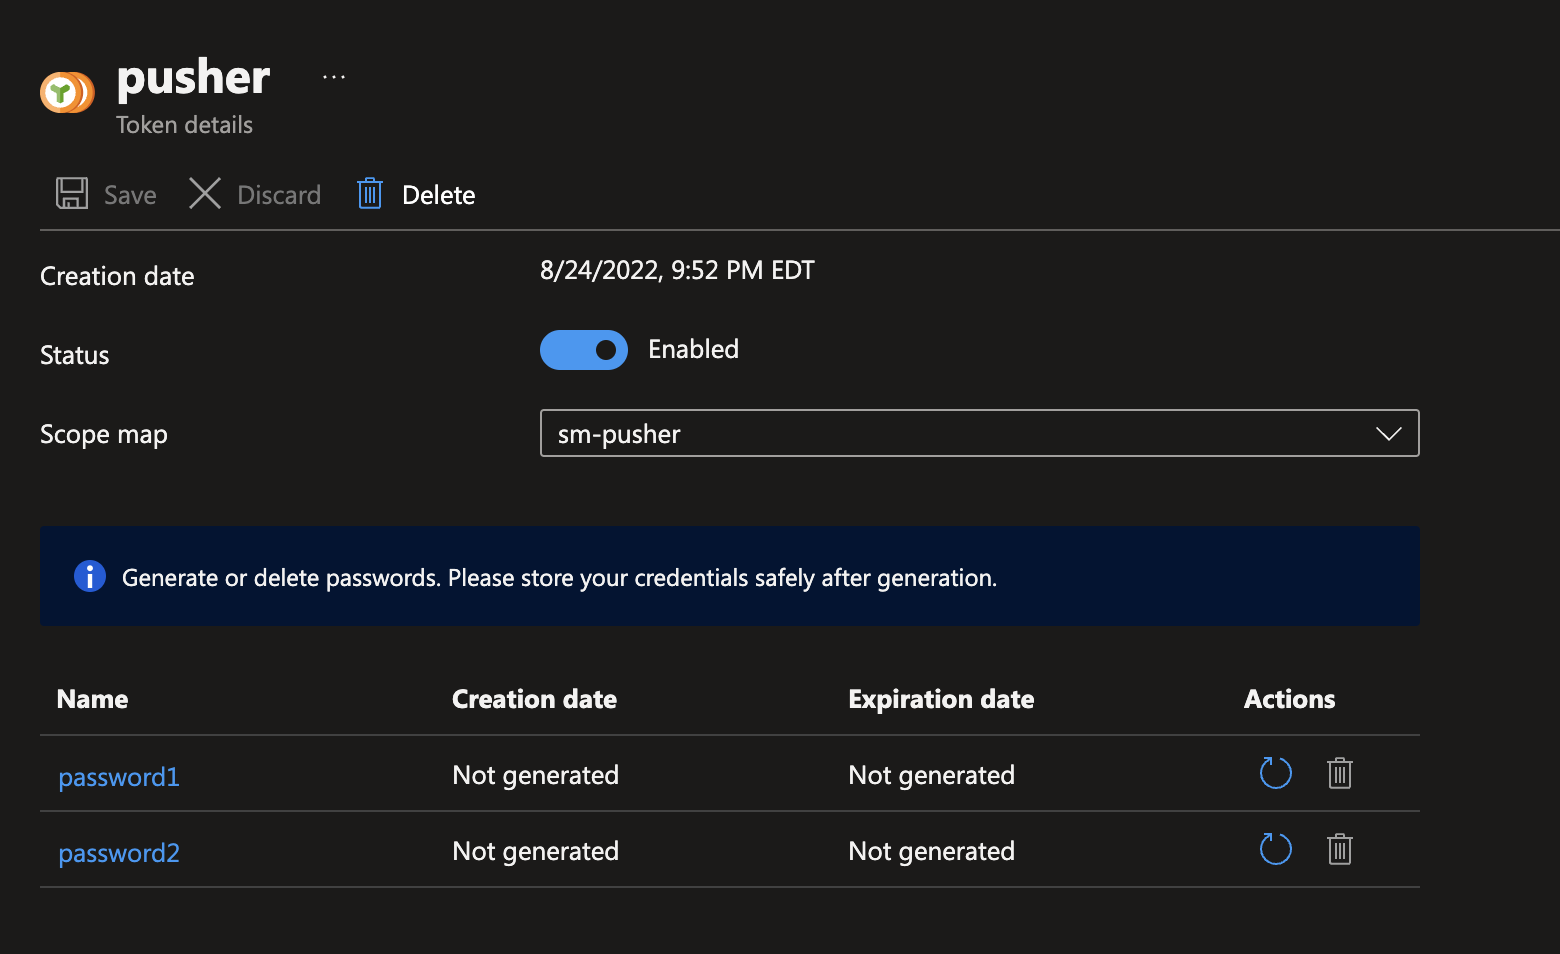
The final step is to generate a set of passwords for the token; these passwords can or cannot have an expiry value. Click the name of the Token in the list, this will open the token details screen. You can see mine below for the pusher token:
I have yet to generate a password for either value. Click the refresh arrow to generate the password, you can choose whether or not you want an expiry. Once the generation is complete the web portal will display both the password and the appropriate docker login command – this is what az acr login calls under the hood.
Copy the docker login command for later when we run our tests.
Remember, once you leave the password generation screen you will NOT be able to view the password again, only regenerate it.
Testing our Token
In my example, I had create a repository in the registry called servers/nginx, I then walked through the steps of creating a dedicated Token with Scope Map to push to this registry. To see this action, we need another image to push to our nginx repository – we can accomplish this by performing a docker tag – I used this command:
docker tag crsandboxym01.azurecr.io/servers/nginx:1.3.5 crsandboxym01.azurecr.io/servers/nginx:2.4.6
This command effectively gives me a new image called crsandboxym01.azurecr.io/servers/nginx:2.4.6 that we can push. Use the docker login command provided by the portal and then execute docker push on the retagged image – the image should push up successfully.
To test the deny case, run the following command:
docker tag crsandboxym01.azurecr.io/servers/nginx:2.4.6 crsandboxym01.azurecr.io/servers/myserver:1.0.0
This will add a new image called crsandboxym01.azurecr.io/servers/myserver:1.0.0 that is equivalent to our nginx image in every way except name. If you execute a docker push here you should get a deny message.
So that’s it – that is how to use token.
Additional Considerations
While this is certainly needed functionality, especially for some of my larger clients, I understand the disappointment that repository selection for a scope map cannot use wildcards; such a feature is nearly a requirement for enterprises consisting of many teams and numerous images and repositories. Hopefully this will be a feature that gets added in the not too distant future.
One other thing to keep in mind is Tokens do NOT trump RBAC rules. If I use an azure acr login and I have AcrPush I can still push to whichever repository I want. Thus this needs to be safeguarded and kept from development teams if the token approach is desired.
CosmosDB is one of the most interesting, and useful, services in Microsoft Azure in my view though, it can be quite daunting to use. It features many different types of databases from Cassandra, to Mongo/Core, to Table, and to Gremlin. While naturally falling under the umbrella of “NoSQL”, when understood, these databases can bring immense value to your use case. For today, I wanted to talk about Gremlin, as I have been experimenting with it heavily of late.
Have you ever wondered just how Facebook, Twitter and others maintain their data despite the volume and varied nature of the data they collect. Social networks in general represent a very unique use cases as the consistency model of RDBMS cannot easily be instituted due to volume and the nature of the data does not easily lend itself to the eventual nature of Document stores like MongoDB. Instead, these services tend to rely on Graph databases to hold their data, and in Cosmos Gremlin (Apache Tinkerpop) is the Graph API.
When might you use a Graph database?
First, no single solution is good for everything. If you are dealing with a highly transactional system (like a bank) an RDBMS like Azure SQL or PostgresSQL is likely going to fit your needs the best. On the other end, if you ingesting a high volume of data or data which has varying forms, the eventual models of NoSQL (Mongo, Raven, Cockroach) is likely going to be ideal. Where I feel Graph databases come in is when you have data that is HIGHLY relatable or where relationships are always growing or need to change. A great example of this is an organization hierarchy.
In classic computer science, we would often experiment with building these highly relative systems in RDBMS to help students and professionals better understand normalization or, because it was all we had lying around. Let me be clear, nothing stops any of these systems from handling any use case, however, always try to pick the best tool for the job.
Let’s consider a group of people based on my family. Here is a visualization (in graph form) of the data:
Nothing would stop us from representing this in an RDBMS, in fact its a well worn problem with nullable “related to” columns but, is it the best tool. If we think about Facebook and when someone “likes” a story we have to also consider how we ensure integrity of a count, aggregating would be impossible at that scale, we need our entities to “magically” keep track of these values.
Enter a Graph database. Each bubble above is referred to as a “vertex” and each arrow an “edge”. The relationships are mono-directional, though they can certainly circle back to make it feel bidirectional. But each vertex knows how many edges (or relationships) it has and can easily spit that value back. If someone chooses to “unlike” a Facebook story, for example, that edge simply disappears from the Vertex.
I think an even better example is a company hierarchy. Consider how often a company like Microsoft, for example, might shift around positions, create new titles and positions and move who reports to whom. While it could be represented in a RDBMS database, it would be far easier in a graph database.
Its good to understand but, honestly, the sample app is not very good and the default driver library leaves much to be desired. After some searching I came across Gremlinq by ExRam and I LOVE this library. It makes things so much easier and there is even a complete sample project for Gremlin (and Neptune) provided. Working with CosmosDB I created the following objects:
This file contains hidden or bidirectional Unicode text that may be interpreted or compiled differently than what appears below. To review, open the file in an editor that reveals hidden Unicode characters.
Learn more about bidirectional Unicode characters
Once you have these (and it would be easy to create these dynamically) you can set up about relating them. As I said above, I tried to keep my relationships flowing in a single direction. I could allow a loopback if needed but I wanted to avoid creating bi-directional relationships. Not sure if this is a good practice or not yet.
This file contains hidden or bidirectional Unicode text that may be interpreted or compiled differently than what appears below. To review, open the file in an editor that reveals hidden Unicode characters.
Learn more about bidirectional Unicode characters
What I came to find while doing this is, it feels like a good idea to create a base type (I used Vertex and Edge) and then create derivations for specific object and relationship types. For example:
This file contains hidden or bidirectional Unicode text that may be interpreted or compiled differently than what appears below. To review, open the file in an editor that reveals hidden Unicode characters.
Learn more about bidirectional Unicode characters
I am still trying to understand the best way to lay this out on account of when I query the whole graph in Cosmos, all I get are Guids everywhere where I would like some better identifying data being shown.
Now the strength of the Graph is that you can more easily traverse the data versus something like RDBMS where you would be writing cartesian queries or doing a lot of subquerying. To aid in this, and I was surprised it was not baked into the query language itself (it might be and I just have not found it yet), I wrote a recursive traversal algorithm:
This file contains hidden or bidirectional Unicode text that may be interpreted or compiled differently than what appears below. To review, open the file in an editor that reveals hidden Unicode characters.
Learn more about bidirectional Unicode characters
What this does is, given a specific object that we are looking for (all we need is the Id) it looks for Edges attached to the Person of type ChildOf, indicating the person is a child of another node. The graph nature allows me to count the edges attached to my node and even traverse them like a typical B-tree or other Advanced Data Type in computer science.
Closing thoughts… for now
This is a pretty shallow dip into Graph databases but I am very intrigued. Last year, while working with CSharpfritz on KlipTok we struggled with this due to the desire to have relationships between the data. Ultimately, we got around it but, looking back I realize our data was definitely graphable as the site continues to add relationships and want to do traversals and aggregate relationships. In this way, one definite conclusion is Graph allows relationships to scale much easier than in RDBMS and certainly better than NoSQL systems like Cassandra and Mongo.
I look forward to diving into this deeper and hope the above gives others reasonable insight into the approach and a good starting point.
I decided to build a proof of concept for some colleagues here at Microsoft to demonstrate how, with minimal code, we could establish secure connections with services in Azure using User Managed identities. Building the POC I realized the information and lessons could be useful as well to others so, here it is.
Why User Managed Identities?
One of the initial questions people might ask is, why would I go with a User Managed Identity instead of a System Assigned Identity. The reason is, I have started to feel like creating a single user managed identity for the application made more sense, in my view. System assigned could certainly work but, it does add a bit of complexity since, in that situation, the App Service has to be created first.
Further, User Managed Identities go with my general motivation to keep application components together.
The Process
Before we get into showing code, let’s walk through the steps. I wrote this POC with an eye on Infrastructure as Code (IaC) and so used Azure Bicep to deploy the resources. Here is the overall flow of this process:
Deploy Application Identity
Deploy SQL Server database (Server, Database, Administrator, Firewall)
Deploy Key Vault w/ Secrets
Deploy Azure App Configuration w/ Config Values
Deploy Azure App Service w/ Plan
I heavily leveraged Bicep modules for each of these parts where I could, in some cases to overcome current limitations related to Bicep being so new. For example, I deployed the Identity using a module because, identity creation takes time and Bicep has a tendency to not respect this wait period, the module forces it to. Here is the code:
This file contains hidden or bidirectional Unicode text that may be interpreted or compiled differently than what appears below. To review, open the file in an editor that reveals hidden Unicode characters.
Learn more about bidirectional Unicode characters
As you can see, the module does not really do anything, resource-wise. But by placing it in a module we force dependsOn to actually work. I am not sure if this is a bug but, it underpins a lot of decision we make with what is a module in Bicep.
Let’s Deploy a Database
As we start to deploy Azure resources the first one we want to focus on is Azure SQL. Deploying it using a Serverless SKU is pretty straightforward (reference database.bicep). Where it gets tricky is when we want to enable MSI access into Azure SQL.
The first thing to realize here is, typical SQL users (even the admin) cannot create users linked to AD, only an AD user can. So, the first thing we need to do is link an AD account here as the admin. This should NOT be the User Managed Identity we created for the application. Rather, it should be an actual AD user, perhaps the so-called “break glass” user – you need only provide the ObjectId of the user from Active Directory (you can find it on the User Detail screen in AAD).
We set the admin using the administrators resource:
This file contains hidden or bidirectional Unicode text that may be interpreted or compiled differently than what appears below. To review, open the file in an editor that reveals hidden Unicode characters.
Learn more about bidirectional Unicode characters
Note the appuser name here is not relevant, it should be something that describes the user, it can be whatever you want.
Once the database is created, log into the Query Builder (or connect using SSMS) using that Active Directory user. Next you need to run the follow query to create the user represented by the MSI we created earlier:
This file contains hidden or bidirectional Unicode text that may be interpreted or compiled differently than what appears below. To review, open the file in an editor that reveals hidden Unicode characters.
Learn more about bidirectional Unicode characters
Make sure to replace the names here and ALSO note how permissions are defined for the MSI user. And remember this script can ONLY be run by an AD User in SQL, you cannot log in, even as the admin, and run this script.
Once this is run, we will be able to use MSI to access the database.
Let’s add a Key Vault
Key Vault is ubiquitous in modern applications as it is an ideal place to store sensitive values. I will often store my Storage Account Access Key values and Database Administrator password here. In addition, for this POC I want to store a “secure” value to show how it can be retrieved using the App Configuration service (which we will be deploying next).
Now, a funny thing about Bicep, at its current stage of development, you cannot return, as an output, a key dictionary based off an array – we would often refer to this as a projection. To mitigate this, I do not recommend using a module for Key Vault. So, you will not see a keyvault.bicep file, instead you will see the key vault operations in the main deploy.bicep file.
Ideally, in a situation such as this we would pass an array of secrets into a module and then, as output, we could return a lookup object where the name of the secret provides us the URI of the secret. This is not currently possible, from an array, in Bicep.
The important secret I want to point out is sensitiveValue we will retrieve this value using App Configuration service next.
But for the access to occur we need to allow a look up to occur using our Managed Identity, we do this with Access Policies – this can be either built-in or using AAD; I am choosing to use the built-in. The key here to remember is the policies are all or nothing. If you grant get secret, the identity can get ANY secret in the vault. This is rarely desirable and thus we use the practice of key vault splitting to mitigate this in complex and shared application scenarios.
App Configuration Service
Despite having been around for almost 2 years at this point, the App Configuration Service is not a commonly used service, which is a shame. It has the ability to manage configuration, link to Key Vaults, and provide a web centric way to manage Feature Flags. For me, it is a common and necessary service because not only does it take the config out of the App Service and enable higher security.
If configuration values are left within the App Service, as Configuration, then we have to be extra diligent that we lock down roles for our users so the values cannot be seen. If we move the values to a different service, we can more easily enforce this sort of deny by default requirement.
App Configuration Service is separated into a template for the main service and then subsequent values. The most interesting of these is the Key Vault requirement, which is not anything super special but we do we use a different content type, here is our value referring back to the sensitiveValue we created with the Key Vault:
This file contains hidden or bidirectional Unicode text that may be interpreted or compiled differently than what appears below. To review, open the file in an editor that reveals hidden Unicode characters.
Learn more about bidirectional Unicode characters
Here we use a module and pass an array of values for creation, using the configurationStores/keyVaults resource. Among these is a value which specifies a JSON based content type. This JSON is an understood format which allows use of AppConfig’s built-in SecretClient to lookup secrets.
One important point that may not be immediately obvious is the lookup of the secret is still done by the invoking client. This means the “host” of the application (App Service in our case) will use its identity to contact Key Vault once it receives the value from App Config service.
Deploy the App Service
The final bit of infrastructure we need to deploy is out App Service + App Service Plan combination and part of this will involve assigning our application identity to the App Service via this definition:
This file contains hidden or bidirectional Unicode text that may be interpreted or compiled differently than what appears below. To review, open the file in an editor that reveals hidden Unicode characters.
Learn more about bidirectional Unicode characters
Note the identity block above and how we make the assignment. We are able to assign as many user assigned identities to our app service as we like. This gives a TON of flexibility in terms of how we limit blast radius in more secure applications. Combining this feature with the use of the Azure.Identity library in our applications and it enables high security scenarios with minimal code, as we will see with our application.
The final bit here is I am using .NET Core 3.1 which is the last LTS release before .NET 6. The reason for its usage here is due to the circumstances with the POC, its designed to showcase this approach with a .NET Core 3.1 application – the same techniques here can apply to .NET 5 and beyond.
The App Configuration Service is connected at application start and injects its values into the IConfiguration dependency you should be using today – for added worth, it overwrites local values and assumes the values coming from the Configuration Service are valid. Here is what my connection looks like:
This file contains hidden or bidirectional Unicode text that may be interpreted or compiled differently than what appears below. To review, open the file in an editor that reveals hidden Unicode characters.
Learn more about bidirectional Unicode characters
The key here is the use of ManagedIdentityCredential type which comes from the Azure.Identity NuGet package. Most services in Azure have integrations with this library allowing the process of getting tokens from Azure IDMS to be transparent and handled under the covers.
The other aspect to note here is what we pass to this class, which is the ClientId of the Service Principal (in this case created through the User Managed Identity) within Azure Active Directory. If you recall when we assigned the identity to the App Service we used the Resource Id for the User Managed Identity. This is what allows an App Service to have many identities associated with it, you can use any one you wish so long as it is assigned to the App Service (or whatever service you are using).
Notice also, we call the follow on method ConfigureKeyVault and pass it the same credential. Truthfully, we could specify a different identity here if we so choose, in this case I am not. But it is the credential the underlying SecretClient (or KeyClient) will use when communicating with Key Vault when a Key Vault reference is discovered (this is the purpose of the content type setting).
Azure Configuration Service also supports the use of labels which can be used to differentiate environment or run condition. I dont often recommend using it for environmentalization, as it can lead to complexity and mess plus, you rarely want all of your values in the same service as it means if access is breached all values can potentially be read. Your best bet is to use separate App Config Service instances for each environment. Within those you can support special cases with labels.
Yes, you can literally do this with JUST the connection string, I used the fourth example to make it work, I only needed to provide the Object/Principal Id of my identity. Obviously, you want to be careful about sharing this since, without networking rules anyone could technically access your database server if they have the ObjectId.
Lessons Learned
Bicep is a wonderful language and, as someone who distanced himself from ARM templates due to their difficulty and favored Terraform, I am very excited at what the future holds. That said, and I have mentioned this before, even to colleagues at Microsoft, Bicep is great until you get into more complex and nuanced cases – I am working on some shareable modules and have had difficulty, especially with array and outputs.
I wanted to prove that you could do the entire process using Bicep and Infrastructure as Code and I was able to accomplish that. Part of what made this easier was the use of a User Managed Identity which allowed tighter control over the identity.
The rise of IaC as a model for teams aligns very naturally with the high adoption of teams using the cloud to deploy applications. The ability to provision infrastructure on-demand is essential but, moreover, it allows teams to define the service and infrastructure applications use within the same VCS (Version Control System) where their application code resides. Effectively, this allows the team to see the application not just as the source code but also be inclusive on the underlying support service which allow the application code to work.
Difference from Configuration as Code
Infrastructure as Code is a rather broad term. The modern definition is, as I stated above, more aligned with provisioning infrastructure from scripts on-demand. Configuration as Code is more aligned with on-premises deployments where infrastructure cannot be created on-demand. In these environments the fleet is static and so it is the configuration of the relevant members of the fleet which are important.
It is with Configuration as Code where you commonly see tools like Octopus Deploy (link), Ansible (link), Chef (link), Puppet (link), and others. This is not to say these tools CANNOT spin up infrastructure on-demand, they most certainly can, but it is not their main use case.
In both approaches, and with IaC in general, the central idea is that your application is not merely its code, but also the infrastructure (or configuration of certain infrastructure) which need to be persisted.
Why is it important?
Regardless of the flavor, IaC is vitally important to the modern application development team. Why? Well let me ask you a question: Where is the best place to test an application?
The only viable answer here is: Production. But wait, testing in production is risky and can cause all sorts of problems!! You are clearly crazy Jason!!.
Yes, but let me amend the answer: the best place to test is an environment that is Production-like. This answer is the reason we have things like Docker, Kubernetes, and IaC. We need the environments we develop in and run tests in to be as close to production as possible.
Now, I don’t mean that your developers should have an environment that has the performance specs or disaster recovery features of Production but, from a configuration standpoint, it should be identical. And above all, the team MUST HAVE the same configurations in development as they do in Production. That means, if developers are planning to deploy their application to .NET 5.0.301 on Windows Server 2019, ideally their development environments should be using .NET on Windows Server 2019 – or at least when the application is deployed for testing that environment should be running Windows Server 2019.
Mitigating Drift
The principal goal of placing infrastructure or configuration into VCS as code is to ensure consistency. This aids in ensuring a GUARANTEE that environments are configured in a way that is expected. There is nothing worse than having to find a flag or setting that someone (who is no longer around) applied three years ago when setting up a second server and trying to figure out why “it doesnt work on that machine”.
With proper IaC control, we ensure that EVERY configuration and service is under source controlled so we can quickly get an accurate understanding of the services involved in supporting an application and the configuration of those services. And the more consistent we are, the lower the chance that a difference in environments allows a bug to manifest in production which can not be duplicated in any other environment.
Production is still Production
All this being said, it is important to understand that Production is still Production. That means, there will be additional safeguards in place to ensure proper function in case of disaster and the specs are generally higher. The aim of IaC is NOT to say you should run a Premium App Service Plan at the cost of thousands of dollars per month in Development. The aim is to ensure you are aiming for the same target.
That said, one of other benefits of IaC is the ability to spin up ephemeral environments to perform testing with production style specs – this can include variants of chaos testing (link). This is something done, usually ahead of a production release. IaC is vital here as it allows the creation of said environment easily and guarantees an EXACT replica of production. Another alternative is blue/green deployments which conforms to the sort of shift right testing (link) that IaC enables.
Understanding Operating Models
As you begin the IaC journey it is important to have an understanding of the sort of operating models which go along with it. This helps you understand how changes to various parts of your infrastructure should be handled; this is often the toughest concept for those just getting started to grasp.
Shared vs Bespoke Infrastructure
In many cases, there might be infrastructure which is shared for all applications and then infrastructure which is bespoke for each application. This understanding and differentiation is core to selecting the right operating model. This understanding also underpins how IaC scripts are broken apart and how frequently each is fun. As an example, when adopting a Hub and Spoke deployment model, the code which builds the hub and the spoke connection points is run FAR less frequently than the code which builds the services applications in the spoke rely upon.
Once you understand this differentiation and separation you can choose the operating model. Typically there are considered to be three operating models:
ManualOps – this is where the IaC scripts in question are run manually, often by an operations team member. The scripts are provided either by the application team or by a central operations teams. This approach is commonly used when organizations and teams are just getting started with IaC and may not have the time or knowledge of how to work Infrastructure updates into automated pipelines
GitOps – coined by WeaveWorks (link) this model centralizes on kicking off infrastructure updates via operatins in Git, usually a merge action. While not essentially driven by a Continuous Integration (CI) process, it is the most common. The key to operating with this model is ensure ALL change to infrastructures are performed via an update to source control, thereby guaranteeing what is in source represents what is deployed.
NoOps – NoOps is a derivation of GitOps which emphasizes a lack of operations involvement per se. Instead of running scripts based on a Git operations or manual, it is ALWAYS run with each check in. Through this, application teams take over the ownership of their operations responsibilities. This is the quintessential model for teams operating in a DevOps centric culture.
Which operating model you select is impacted, again by the nature of the infrastructure being supported, but also your teams maturity. DevOps and IaC is a journey, it is not a destination. Not all teams progress (or need to progress) to the same destination.
Centralized Control for Decentralized Teams
In DevOps, and DevSecOps, the question is first, how to involve the necessary disciplines in the application development process such that no specific concern is omitted or delayed – security often gets the short end of the stick. I cannot tell you how many projects I have seen save their security audit for near the end of the project. Rarely does their audit not yield issues and, depending on the timeline and criticality, some organizations ignore the results and recommendations of these audits at their own peril.
I can recall a project for a healthcare client that I was party to years ago. The project did not go well and encountered many problems throughout its development. As a result, the security audit was pushed to the end of the project. When it happened, the auditer noted that the application did not encrypt sensitive data and was not compliant with many HIPAA regulations. The team took the feedback and concluded it would take 2-3 months to address the problems.
Given where the project was and the relationship with the client, we were told to deliver the application as is. The result was disastrous. The client ended up suing our company. The result was not disclosed. But it it just goes to show that security must be checked early and often.
How DevOps, and DevSecOps, approach this is a couple key ways:
The use of the Liaison model (popularized by Google) in which the key areas of Infrastructure, Quality, Security, and Operations delegate a representative who is part time on projects to ensure teams have access to the resources and knowledge needed to carry out tasks.
Creation of infrastructure resources is done through shared libraries which are “blessed” by teams to ensure that certain common features are created.
IaC can help teams shore up #2. Imagine if each time a team wanted to create a VM they had to use a specific module that would limit what OS images they could use, ensure certain ports were closed, and installed standard monitoring and security settings to the machine. This brings about consistency while still allowing teams to self service as needed. For operations, the image could require a tag for the created instances so operations can track them centrally. The possibilities are endless.
This is what is meant by “centralized control for decentralized teams”. Teams could even work with Infrastructure, Operations, and Security to make changes to these libraries in controlled ways. This lets the organizations maintain control over the decentralization necessary to allow teams to operate efficiently.
Using Modules with Terraform
Most IaC tools (if not all) support this modularization concept to some degree, Terraform (link) is no exception. The use of modules can ensure that the service that teams do deploy conform to certain specifications. Further, since Terraform modules are simply directories containing code files, they can easily be zipped and deployed to a “artifact” server (Azure Artifact or GitHub Packages to name a couple) where other teams can download the latest version or a specific version.
Let’s take a look at what a script that uses modules can look like. This is an example application that leverages Private Endpoint to ensure traffic from the Azure App Service to the Azure Blob Storage Container never leaves the VNet. Further, it uses an MSI (Managed Service Identity) with RBAC (Role Based Access Control) to grant specific rights on the target container to the Identity representing the App Service. This is a typical approach to building secure applications in Azure.
This file contains hidden or bidirectional Unicode text that may be interpreted or compiled differently than what appears below. To review, open the file in an editor that reveals hidden Unicode characters.
Learn more about bidirectional Unicode characters
For this particular script, the modules are all defined locally so, I am not downloading them from a central store but, doing so would be trivial. The modules of Terraform give the ability to also hide certain bits of logic from the callers. For example, there are a variety of rules which must be followed when setting up a Private Endpoint for an Azure Storage account (creation of DNS zone, usage of the correct Private IP, specific names which must be used) all of which can be encapsulated within the module.
There is even validation rules which can be written for Module Input parameters, again, allows Infrastructure or Security to enforce their core concerns on the teams using the modules. This is the power of IaC in large organizations. Its not an easy level to achieve but, achieving it helps team gain efficiencies which were, previously, difficult, if not impossible, to achieve.
DevOps is always an interesting conversation with clients. Many managers and organizations are looking for a path to get from Point A to Point B. Sadly, DevOps does not work that way. In many ways, as I often have to explain, its a journey, not a destination. The way DevOps is embraced will change from team to team, organization to organization, person to person.
One of the key mistakes I see clients happen upon is “too much, too soon”. Many elements of DevOps take a good amount of time and pivoting to get used to. Infrastructure as Code is one such element that can take an especially long time (this is not to imply that DevOps and IaC must go together. IaC is a component of DevOps, yes, but it can equally stand on its own).
It is important, with any transformation, to start small. I have seen organizations hoist upon their teams a sort of mandate to “codify everything” or “automate everything”. While good intentioned, this advice comes from a misunderstanding of DevOps as a “thing” rather than a culture.
Obviously, advice on DevOps transformations is out of scope for this post and is unique to each client situation. But, it is important to be committed to a long term plan. Embracing IaC (and DevOps) is not something that happens overnight and there are conversations that need to take place and, as with any new thing, you will need to address the political ramifications of changing the way work is done – be prepared for resistance.
In my previous post (here), I talked about the need to consider security when you build your application and focused mainly on securing network traffic. In keeping with a focus on DevOps, we took an Infrastructure as Code (IaC) approach which used Terraform to represent infrastructure in a script. But, as someone point out to me privately, I only covered a part of security, and not even the bit which generally leads to more security flaws.
While securing network access and communication direction is vital the more likely avenue for an attack tends to be an attacker finding your value in source code or in an Azure configuration section. In the example for Private Endpoints I stored the connection string for the Storage Account and the Access Key for the Event Grid in the Azure App Service Configuration section.
This is not entirely bad, as Configuration can be secured with RBAC to keep them visible to certain persons. However, this is still not advised as you would not be be following a “defense in depth” mentality. Defense in Depth calls for us to never rely on ONE mechanism for security but rather, force a would be attacked to conquer multiple layers. For web applications (and most Azure apps) the defacto standard for securing values in Azure Key Vault (Key Vault | Microsoft Azure).
By using Azure Key Vault with Managed Identity, you can omit your sensitive values from the configuration section and use a defined identity for the calling service to ensure only necessary access for the service to request its values. Doing so lessens the chance that you will leak configuration values to users with nefarious intentions.
Understanding Managed Identity
Most services in Azure can make use of managed identities in on of two flavors:
System Assigned Identity – this is an identity that will be managed by Azure. It can only be assigned to a SINGLE resource
User Managed Identity – this is an identity created and managed by a user. It can be assigned to as many resources as needed. It is ideal for situations involving things like scale-sets where new resources are created and need to use the same identity.
For this example we will use a System Assigned Identity as Azure App Service does not span multiple resources within a single region, Azure performs some magic behind the scenes to maintain the same identity for the server farm machines which support the App Service as it scales.
The identity of the service effectively represents a user, or more accurately a service principal. This service principal has an object_id that we can use in Key Vault Access policy. These policies, separate from RBAC settings, dictate what a specific identity can do against that key vault.
Policies are NOT specific to certain secrets, keys, and certificates. If you GET secret permission to an identity it allows that identity to read ANY secret in the vault. This is not always advisable. To improve your security posture, create multiple key vaults to segment access to secret, key, and certificate values.
We can use Terraform to create the Key Vault and an App Service with an identity, and make the association. This is key because, doing so allows us to create these secret values through IaC scripts versus relying on engineers to do it manually.
Create the App Service with a System Identity
Here is code for the App Service, note the identity block:
This file contains hidden or bidirectional Unicode text that may be interpreted or compiled differently than what appears below. To review, open the file in an editor that reveals hidden Unicode characters.
Learn more about bidirectional Unicode characters
The change from the previous version of this module is, the StorageAccountConnectionString and EventGridAccessKey is no longer present. We only provide the endpoints for our KeyVault and EventGrid, the sensitive values are held in Key Vault and accessed using the App Service’s Managed Identity.
Setup the Key Vault
First, I want to show you the creation block for Key Vault, here:
This file contains hidden or bidirectional Unicode text that may be interpreted or compiled differently than what appears below. To review, open the file in an editor that reveals hidden Unicode characters.
Learn more about bidirectional Unicode characters
The important thing to point out here is the definition of access_policy in this module. This is not the access being given to our App Service, it is instead a policy to allow Terraform to update Key Vault (the actual permissions are provided as parameters).
The output here is the Key Vault URI (for use as a configuration setting to the App Service) and the Event Grid endpoint (also for use as a configuration setting in App Service).
Creation of this Key Vault MUST precede the creation of the App Service BUT, we cannot create the App Service Access Policy until the App Service is created, we need the Identity’s obejct_id (see above).
Here is the access policy that gets created to allow the Managed Identity representing the App Service to Get secrets from the Key Vault:
This file contains hidden or bidirectional Unicode text that may be interpreted or compiled differently than what appears below. To review, open the file in an editor that reveals hidden Unicode characters.
Learn more about bidirectional Unicode characters
This policy does need to support List permission on the Key Vault Secret so that the configuration provider can bring all secrets into the configuration context for our App Service. This is the .NET Core code to bring the Key Vault Secrets into the IConfiguration instance for the web app:
This file contains hidden or bidirectional Unicode text that may be interpreted or compiled differently than what appears below. To review, open the file in an editor that reveals hidden Unicode characters.
Learn more about bidirectional Unicode characters
The result here is, the Web App will use the Managed Identity of the Azure App Service to communication with our Key Vault at the given endpoint to bring our sensitive values into the web app. This gives us a solid amount of security and diminishes the chances that configuration values leak into places where they can be exposed.
Make it more secure
One issue with the above approach is, it requires some fudging because local development will NOT have a managed identity. Instead, they will need to use something else, such as a InteractiveCredentials or ClientSecretCredentials (available in Azure.Identity NuGet package). These are fine but, aside from requiring a person to authenticate with Azure when they run the app or finding a way to ensure sensitive client authorization values do NOT leak into source, it is a bit onerous.
The way to make our approach more secure is to introduce Azure App Configuration which can integrate with Key Vault in much the same way App Service does. The added benefit is Azure App Configuration can replace your local configuration in Azure and offers numerous features to aid in the management of these values across environments.
Unfortunately, at the time of this writing, Terraform does NOT support managing the keys within Azure App Configuration. Still, while its not perfectly secure, just using Key Vault is usually an improvement over existing sensitive data management techniques I typically see organization and teams using.
In my previous post I talked about the need for security to be a top consideration when building apps for Azure, or any cloud for that matter. In that post, I offered an explanation of the private endpoint feature Azure services can use to communicate within Virtual Network resources (vnet).
While this is important, I decided to take my goals one step further by leveraging Terraform to create this outside of the portal. Infrastructure as Code (IaC) is a crucial concept for teams that wish to ensure consistency and predictability across environments. While there exists more than one operating model for IaC the concepts are the same:
Infrastructure configuration and definition should be a part of the codebase
Changes to infrastructure should ALWAYS be represented in scripts which are run continuously to mitigate drift
There should be a defined non-manual action which causes these scripts to be evaluated against reality
Terraform is a very popular tool to accomplish this, for a number of reasons:
Its HashiCorp Configuration Language (HCL) tends to be more readable than the formats used by ARM (Azure Resource Manager) or AWS Cloud Foundation
It supports multiple cloud both in configuration and in practice. This means, a single script could manage infrastructure across AWS, Azure, Google Cloud, and others.
It is free
However, it is also to note Terraform’s weakness in being a third party product. Neither Microsoft or others officially support this tool and as such, their development tends to be behind native tooling for specific platforms. This means, certain bleeding edge features may not be available in Terraform. Granted, one can mitigate this in Terraform by importing a native script into the Terraform file.
All in all, Terraform is a worthwhile tool to have at one’s disposal given the use cases it can support. I have yet to observe a situation in which there was something a client was relying on that Terraform did not support.
How to Private Endpoints Work?
Understanding how Private Endpoints work in Azure is a crucial step to building them into our Infrastructure as Code solution. Here is a diagram:
In this example, I am using an Azure App Service (Standard S1 SKU) which allows me to integrate with a subnet within the vnet. Once my request leaves the App Service it arrives at a Private DNS Zone which is linked to the vnet (it shown as part of the vnet, that is not true as its a global resource. But for the purposes of this article we can think of it as part of the vnet.
Within this DNS Zone we deploy an A Record with a specific name matching the resource we are targeting. This gets resolved to the private IP of a NiC interface that effectively represents our service. For its part, the service is not actually in the vnet, rather it is configured to only allow connections from the private endpoint. In effect, a tunnel is created to the service.
The result of this, as I said in the previous post, your traffic NEVER leaves the vnet. This is an improvement over the Service Endpoint offering which only guarantees workloads will never leave the Azure backbone. That is fine for most things but, Private Endpoints offer an added level of security for your workloads.
Having said all that, let’s walk through building this provisioning process in Terraform. For those who want to see code this repo contains the Terraform script in its entirety. As this material is for education purposes only, this code should not be considered production ready.
Below is the definition for App Service and the Swift connection which supports the integration.
Create a Virtual Network with 3 subnets
Our first step, as it usually is with any secure application, create a Virtual Network (vnet). In this case we will give it three subnets. I will take advantage of Terraform’s module concept to enable reuse of the definition logic. For the storage and support subnets we can use the first module shown below, for the apps we can use the second, as its configuration is more complicated and I have not taken the time to unify the definition.
This file contains hidden or bidirectional Unicode text that may be interpreted or compiled differently than what appears below. To review, open the file in an editor that reveals hidden Unicode characters.
Learn more about bidirectional Unicode characters
Pay very close attention to the enforce properties. These are set in a very specific way to enable our use case. Do not worry though, IF you make a mistake the error messages reported back from ARM are pretty helpful to make corrections.
Here is an example of calling these modules:
This file contains hidden or bidirectional Unicode text that may be interpreted or compiled differently than what appears below. To review, open the file in an editor that reveals hidden Unicode characters.
Learn more about bidirectional Unicode characters
One tip I will give you for building up infrastructure, while Azure documentation is very helpful, for myself I will create the resource in the portal and choose the Export Template option. Generally, its pretty easy to map the ARM syntax to Terraform and glean the appropriate values – I know the above can seem a bit mysterious if you’ve never gone this deep.
Create the Storage Account
Up next we will want to create our storage account. This is due to the fact that our App Service will have a dependency on the storage account as it will hold the Storage Account Primary Connection string in its App Settings (this is not the most secure option, we will cover that another time).
I generally always advise the teams I work with to ensure a Storage Account is set to completely Deny public traffic – there are just too many reports of security breaches which start with a malicious user finding sensitive data on a publicly accessible storage container. Lock it down from the start.
This file contains hidden or bidirectional Unicode text that may be interpreted or compiled differently than what appears below. To review, open the file in an editor that reveals hidden Unicode characters.
Learn more about bidirectional Unicode characters
One piece of advice, however, make sure you add an IP Rule so that your local machine can still communicate with the storage account as you update it – it does support CIDR notation. Additionally, the Terraform documentation notes a property virtual_network_subnet_ids in the network_rules block – you do NOT need this for what we are doing.
Now that this is created we can create the App Service.
Create the App Service
Our App Service needs to be integrated with our vnet (reference the diagram above) so as to allow communication with the Private DNS Zone we will create next. This is accomplished via a swift connection. Below is the definition used to create an Azure App Service which is integrated with a specific Virtual Network.
This file contains hidden or bidirectional Unicode text that may be interpreted or compiled differently than what appears below. To review, open the file in an editor that reveals hidden Unicode characters.
Learn more about bidirectional Unicode characters
This information is rather buried in the above link and it took me effort to find it. Each setting has a distinct purpose. WEBSITE_DNS_SERVER indicate where outgoing requests should look to for name resolution. You MUST have this value to target the Private DNS Zone linked to the vnet. The WEBSITE_VNET_ROUTE_ALL setting tells the App Service to send ALL outbound calls to the vNet (this may not be practical depending on your use case).
For those eagle eyed readers, you can see settings for an Event Grid here. In fact, the code shows how to integrate Private Endpoints with Azure Event Grid, the technique is similar. We wont cover it as part of this post, but its worth understanding.
Create the Private DNS Rule
Ok, this is where things start to get tricky, mainly due to certain rules you MUST follow to ensure the connection is made successfully. What is effectively going to happen is, our DNS Zone name is PART of the target hostname we need to match. The match will then resolve to the private IP of our NiC card (part of the private endpoint connection).
Here is the definition for the storage DNS Zone. The name of the zone is crucial, as such I have included how the module is called as well.
This file contains hidden or bidirectional Unicode text that may be interpreted or compiled differently than what appears below. To review, open the file in an editor that reveals hidden Unicode characters.
Learn more about bidirectional Unicode characters
Ok there is quite a bit to unpack here, let’s start with the name. The name here is mandatory. If your Private Endpoint will target a Storage Account the name of the DNS Zone MUST be privatelink.blob.core.windows.net. Eagle eyed readers will recognize this URL as the standard endpoint for Blob service within a Storage account.
A second thing to note in the call is the structure of the value passed to the vnet_id parameter. For reasons unknown, Terraform did NOT resolve this based on context, so I ended up having to build it myself. You can see the usage of the data “azurerm_subscription” block in the source code. All it does is give me a reference to the current subscription so I can get the ID for the resource Id string.
Finally, notice that, following the creation of the Private DNS Zone, we are linking our Vnet to it via the azurerm_private_dns_zone_virtual_network_link resource. Effectively, this informs the Vnet that it can use this DNS Zone when routing calls coming into the network – this back to the flags we set on the Azure App Service.
Now we can create the Private Endpoint resource proper.
Create the Private Endpoint
First, I initially thought that you had to create one Private Endpoint per need however, later reading suggests that might not be the case – I have not had time to test this so, for this section, I will assume it is one per.
When you create a private endpoint the resource will get added to your resource group. However, it will also prompt the creation of a Network Interface resource. As I have stated, this interface is effectively your tunnel to the resource connected through the Private Endpoint. This interface will get assigned an IP consistent with the CIDR range of the subnet specified to the private endpoint. We will need this to finish configuring routing within the DNS Zone.
Here is the creation block for the Private Endpoint:
This file contains hidden or bidirectional Unicode text that may be interpreted or compiled differently than what appears below. To review, open the file in an editor that reveals hidden Unicode characters.
Learn more about bidirectional Unicode characters
I am theorizing you can specify multiple private_service_connection blocks, thus allowing the private endpoint resource to be shared. However, I feel this might make resolution of the private IP harder. More research is needed.
The private_service_connection block is critical here as it specifics which resource we are targeting (private_connection_resource_id) and what service(s) (group(s)) within that resource we specifically want access to. For example, in this example we are targeting our Storage Account and want access to the blob service – here is the call from the main file:
This file contains hidden or bidirectional Unicode text that may be interpreted or compiled differently than what appears below. To review, open the file in an editor that reveals hidden Unicode characters.
Learn more about bidirectional Unicode characters
The key here is the output variable private_ip which we will use to configure the A record next. Without this value, requests from our App Service being routed through the DNS Zone will not be able to determine a destination.
Create the A Record
The final bit here is the creation of an A Record in the DNS Zone to give a destination IP for incoming requests. Here is the creation block (first part) and how it is called from the main Terraform file (second part).
This file contains hidden or bidirectional Unicode text that may be interpreted or compiled differently than what appears below. To review, open the file in an editor that reveals hidden Unicode characters.
Learn more about bidirectional Unicode characters
It is that simple. The A Record is added to the DNS Zone and its done. But LOOK OUT back to the naming aspect again. The name here MUST be the name of your service, or at least the unique portion of the URL when referencing the service. I will explain in the next section.
Understanding Routing
This is less obvious with the storage account than it is with Event Grid or other services. Consider what your typical storage account endpoint looks like:
mystorageaccount.blob.core.windows.net
Now here is the name of the attached Private DNS Zone: privatelink.blob.core.windows.net
Pretty similar right? Now look at the name of the A Record – it will be the name of your storage account. Effectively what happens here is the calling URL is mystorageaccount.privatelink.blob.core.windows.net. But yet, the code we deploy can still call mystorageaccount.blob.core.windows.net and work fine, why? The answer is here: Use private endpoints – Azure Storage | Microsoft Docs
Effectively, the typical endpoint gets translated to the private one above which then gets matched by the Private DNS Zone. The way I further understand it is, if you were calling this from a peered Virtual Network (on-premise or in Azure) you would NEED to use the privatelink endpoint.
Where this got hairy for me was with Event Grid because of the values returned relative to the values I needed. Consider the following Event Grid definition:
This file contains hidden or bidirectional Unicode text that may be interpreted or compiled differently than what appears below. To review, open the file in an editor that reveals hidden Unicode characters.
Learn more about bidirectional Unicode characters
The value of the output variable eventgrid_topic_name is simply the name of the Event Grid instance, as expected. However, if you inspect the value of the endpoint you will see that it incorporates the region into the URL. For example:
Given the REQUIRED name of a DNS Zone for the Event Grid Private Endpoint is privatelink.eventgrid.azure.net my matched URL would be: someeventgrid.privatelink.eventgrid.azure.net which wont work – I need the name of the A Record to be someeventgrid.eastus-1 but this value was not readily available. Here is how I got it:
This file contains hidden or bidirectional Unicode text that may be interpreted or compiled differently than what appears below. To review, open the file in an editor that reveals hidden Unicode characters.
Learn more about bidirectional Unicode characters
It is a bit messy but, the implementation here is not important. I hope this shows how the construction of the Private Link address through the DNS zone is what allows this to work and emphasizes how important the naming of the DNS Zone and A Record are.
In Conclusion
I hope this article has shown the power of Private Endpoint and what it can do for the security of your application. Security is often overlooked, especially with the cloud. This is unfortunate. As more and more organizations move their workloads to the cloud, they will have an expectation for security. Developers must embrace these understandings and work to ensure what we create in the Cloud (or anywhere) is secure by default.
Security. Security is one of the hardest and yet most vital pieces to any application we build, whether on-premise or in the cloud. We see evidence of persons not taking security seriously all the time in the news in the form of data leaks, ransomware, etc. No cloud can automatically safeguard you from attacks but, they do offer some very sophisticated tools to aid in helping you more easily bring a strong security posture to your organization.
In Azure, the release of the Private Link feature is a crucial means to ensure we safeguard access to our PaaS (Platform as a Service) deployments. Using Private Link you can create a secure tunnel from your vNet (Virtual Network) to the PaaS service (Azure Storage for example). By using this tunnel, you can ensure that NO TRAFFIC between your assets in the vNet and the dependent services traverse the public internet. Why is this important?
Encryption can definitely aid to ensure data is kept private while in transit but, it is not perfect and for some industries (finance, insurance, healthcare, etc) the privacy of data is not something that can be left to chance.
Defense in Depth
As with any security posture, its strength lies in the layers of protection which exist whether that in NVAs checking incoming traffic, microsegmentation of networks, and/or IP whitelisting, the key is to never rely solely on one measure to keep you safe.
Private Link, for example, keeps your traffic off the internet but, does not protect you from a malicious actor accessing your storage account from a compromised machine. Ensuring your adhere to a defense in depth mentality is the best security along with assuming and accepting you will have a breach and that, the focus is not so much on preventing the breach but, rather, limiting the damage an attacker can do.
Establish your Private Link endpoint (Storage)
Private Link is available for the following services:
This visual shows what is going on under the hood:
The Private Link provides a specific endpoint within a Private DNS Zone within the vNet, this DNS is updated with the mapping for the endpoint. Therefore, for machines WITHIN the vNet you can use the typical endpoint and connection strings for services over the Private Link as you would if it did not exist – Private DNS will ensure the address is resolved to the private link IP which in turn allows communication with the connected PaaS service.
Creating the Initial Resources
The Virtual Network offering from Azure is a way to isolate your resources deployed to Azure, most commonly Virtual Machines and other features deployed through the IaaS (Infrastructure as a Service) model. By using vNets and Network Security Groups (NSGs) you can effectively control the incoming and outgoing traffic for this custom network you have created in Azure.
The short story is, for the purposes here, you can take the default CIDR for the Address Space (10.0.0.0/16) and the default Subnet CIDR (10.0.0.0/24). This will work fine for this bit (for those more familiar with CIDR you can adjust this to be more practical).
This Virtual Network not being setup we can create our Storage Account. There is an option on the Networking tab for Private Endpoint. By choosing to Add private endpoint you can select the vNet and the subnet in which this Private Endpoint will be created.
A quick note, Private Link will ONLY allow access to a specific service within the storage account; you dont get unfettered access to all services, its designed to be a pipe to a specific service. For this demo, I will be select blob as my file upload code will create and retrieve objects from Azure Storage Blob Service.
Keep the default settings for the Private DNS integration section.
So, right now we have a pretty useless setup. Sure its secure, but we cant do anything with our Private Endpoint. We could deploy a Virtual Machine running IIS or Nginx (or whatever you prefer), through some .NET Core code up there and interact with the endpoint.
That works but, I have a different idea. One of the new features in Azure AppService is the ability to allow the App Service to integrate with a Virtual Network. Since AppService is a PaaS it also means we are not required to patch and maintain and underlying OS, we can just deploy our code and indicate to Azure how much in the way of resources we need. Let’s use this.
Prepare our VNet for App Service Integration
So, disclaimer, I am not a Networking expert, though I know enough to get by, there are people who are far more versed than I am. I say this because, one of the requirements for Azure App Service VNet Integration is the App Service be injected into an empty Subnet.
To achieve this, I added a secondary address space to my VNet and created a single subnet within this new Address Space, called Apps. There is likely a better way to do this, but this is what worked for me.
Here is a screen shot of what my VNet Address space and Subnets look like:
VNet Address SpaceVNet Subnets
Make sure this is created AHEAD of the next phase where we will create and join an App Service instance to this VNet.
Once the App Service is created, you can upload your code to it. For simplicity, I am posting gists with the code for reading and writing blob data from a Web API, but there are numerous examples you could draw from:
The StorageAccountConnectionString is the value straight from the Azure portal, no changes. This is the beauty of the Private DNS Zone that gets added to the Virtual Network when you add a Private Link. More on that later.
Deploy your application to your Azure AppService and add StorageAccountConnectionString to your Configuration blade, again, the value is verbatim what is listed in the Access Keys blade in the Storage Account.
You can now try to use your application at it should fail. The error, if you look in the logs will be 403 Forbidden which makes sense, we have NOT joined the App Service yet, this proves our security is working – the storage account is NOT visible to anyone outside of our Virtual Network.
I expect you will want to test things locally with the Storage Account, it is onerous to only do your testing when deployed to Azure. While the Storage Account IS setup to allow connections via the Private Link you can also poke a whole in the Storage Account firewall to allow specific IP addresses (or ranges). This can be found under the Networking blade of the Storage Account, look for the Firewall section. There is an option to add your current IP to the allowed list.
In the Azure App Service select the Networking blade. The very first option in the listing is VNet Integration – this is what you want to configure. Select the Click here to configure link.
Select the Add VNet option. This will open a panel with your available VNets and their respective Subnets. This is what we are after. You should see your Apps (or whatever you used) Subnet – select this. Press Ok.
The Configuration screen will update with the new details. Give it a few minutes for the stars to align before you test. Not super long but just long enough that if you test right away it might not work.
What are the results?
If everything is working, your App Service can talk to the Storage Account with NO CONFIGURATION changes. Yet, this is very secure since only the App Service can talk to the Storage Account over the web, lessening the chances of a data leak. There are other ways to further secure this, NSGs and Firewall rules being at the top of the list. But, this is a good start to creating a secure application.
Difference with Service Connections
You may be away of another feature in Azure known as Service Connections, and make no mistake they share a lot of similarities with Private Links but, the two are different.
The greatest difference is that Service Connections expose a Public IP, Private Links do not, they only ever user Private IPs. Thus the two address distinctly different use cases. The Service Connection can limit access to the underlying service but data is still traversing the public web. With Private Link (Endpoints) the data NEVER leaves the VNet and is thus more secure.
Regardless of which you choose I implore you to consider security first and foremost in your applications. There are enough tools and features in Azure to keep security breaches to a minimum.