One of the common questions I field with our customers involves the granularity of permissions within Azure. Though we provide RBAC as a means to assign roles that enables certain functionalities, often this is not granular enough – two prominent examples are Azure Key Vault and Azure Container Registry. In both of these, we typically recommend a “splitting” approach whereby multiple instances of these resources are deployed to “segment” the dispersion of values/assets.
The problem here is twofold: 1) it does not solve the problem and 2) it creates pollution, especially within large organizations and diminishes ROI (Return on Investment) as organizations must now devote additional resources to managing that which should be managed by the cloud provider. In the case of Container Registry, it also adds unnecessary cost as Container Registry is not billed on consumption as Key Vault is: https://azure.microsoft.com/en-gb/pricing/details/container-registry/#pricing
To mitigate this, the Container Registry team is offering, in preview, Scope Maps and Tokens. Let’s see how they work.
Explanation
First, the Container Registry MUST be created using the Premium SKU, if not the Scope Map and Tokens feature will not be available.
Once created, you will want to create a Scope Maps
When you open this you will see 3 default scope maps created – unfortunately at the time of this writing there is no way to duplicate these using the portal, since user created scope maps must target specific registries with no support for wild cards.
Our goal is to create an identity that supports pushing and reading images from a specific repository in the ACR, in my case I created an image called servers/nginx with a tag value of 1.3.5 – this is purely fictitious.
The specific repository (or repositories) can be selected from the drop downs after clicking the + Add button. Next to this selection select the permissions this scope map has – for a writer type mapping you will want content/read and content/write.
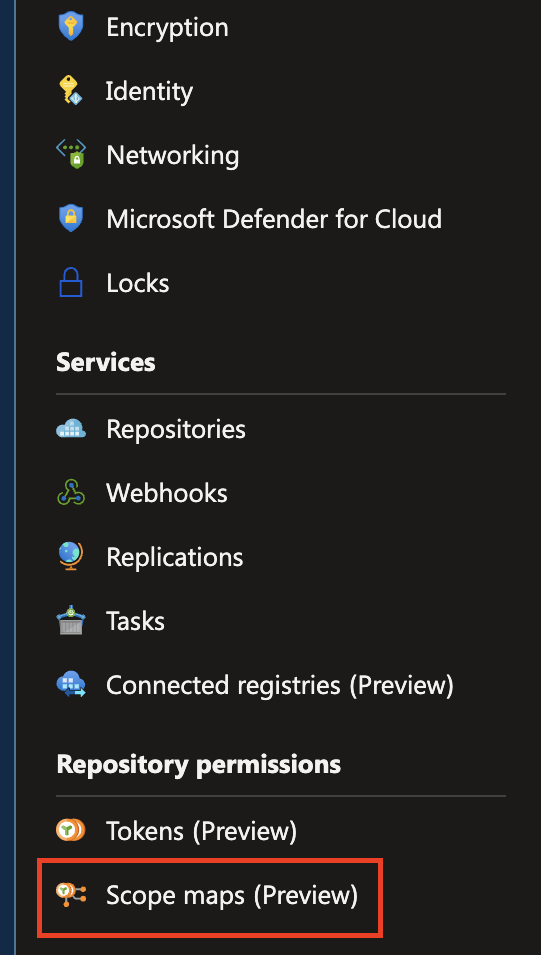
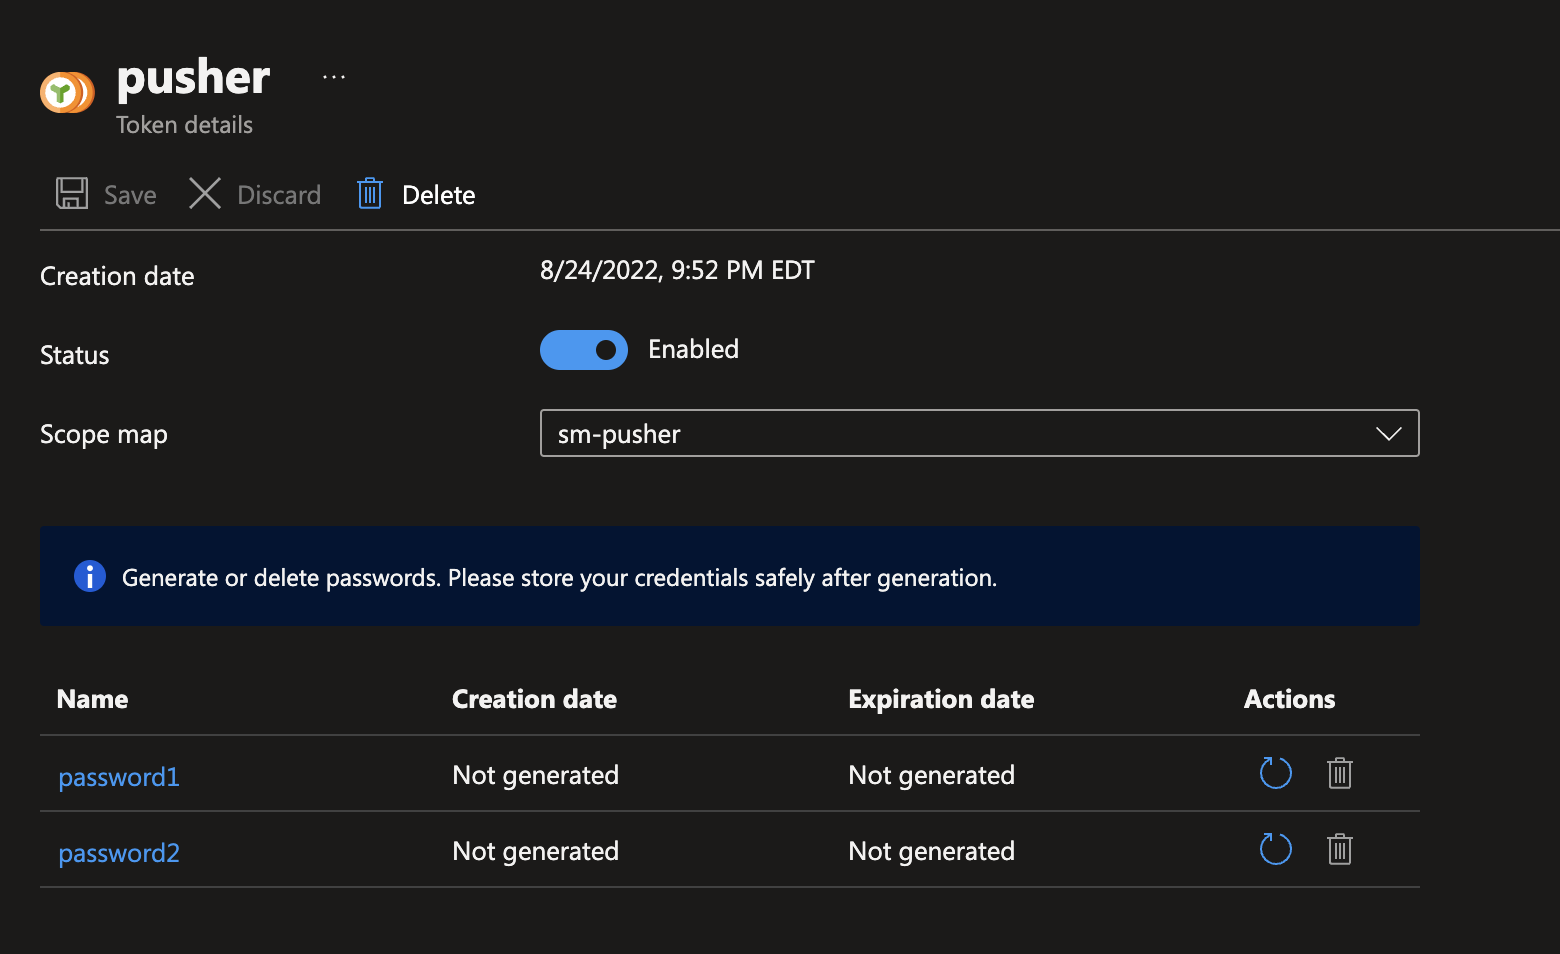
Once the scope map is defined, we need to create a token which will serve as the username/password for the user. We do this in the Tokens section:
This screen is self explanatory, provide the Name you want to use to identify the token (the username) and the associated Scope Map (the assigned role). Ensure the token is Enabled (default) and press the Create button.
The final step is to generate a set of passwords for the token; these passwords can or cannot have an expiry value. Click the name of the Token in the list, this will open the token details screen. You can see mine below for the pusher token:
I have yet to generate a password for either value. Click the refresh arrow to generate the password, you can choose whether or not you want an expiry. Once the generation is complete the web portal will display both the password and the appropriate docker login command – this is what az acr login calls under the hood.
Copy the docker login command for later when we run our tests.
Remember, once you leave the password generation screen you will NOT be able to view the password again, only regenerate it.
Testing our Token
In my example, I had create a repository in the registry called servers/nginx, I then walked through the steps of creating a dedicated Token with Scope Map to push to this registry. To see this action, we need another image to push to our nginx repository – we can accomplish this by performing a docker tag – I used this command:
docker tag crsandboxym01.azurecr.io/servers/nginx:1.3.5 crsandboxym01.azurecr.io/servers/nginx:2.4.6
This command effectively gives me a new image called crsandboxym01.azurecr.io/servers/nginx:2.4.6 that we can push. Use the docker login command provided by the portal and then execute docker push on the retagged image – the image should push up successfully.
To test the deny case, run the following command:
docker tag crsandboxym01.azurecr.io/servers/nginx:2.4.6 crsandboxym01.azurecr.io/servers/myserver:1.0.0
This will add a new image called crsandboxym01.azurecr.io/servers/myserver:1.0.0 that is equivalent to our nginx image in every way except name. If you execute a docker push here you should get a deny message.
So that’s it – that is how to use token.
Additional Considerations
While this is certainly needed functionality, especially for some of my larger clients, I understand the disappointment that repository selection for a scope map cannot use wildcards; such a feature is nearly a requirement for enterprises consisting of many teams and numerous images and repositories. Hopefully this will be a feature that gets added in the not too distant future.
One other thing to keep in mind is Tokens do NOT trump RBAC rules. If I use an azure acr login and I have AcrPush I can still push to whichever repository I want. Thus this needs to be safeguarded and kept from development teams if the token approach is desired.
In my previous post I talked about the need for security to be a top consideration when building apps for Azure, or any cloud for that matter. In that post, I offered an explanation of the private endpoint feature Azure services can use to communicate within Virtual Network resources (vnet).
While this is important, I decided to take my goals one step further by leveraging Terraform to create this outside of the portal. Infrastructure as Code (IaC) is a crucial concept for teams that wish to ensure consistency and predictability across environments. While there exists more than one operating model for IaC the concepts are the same:
Infrastructure configuration and definition should be a part of the codebase
Changes to infrastructure should ALWAYS be represented in scripts which are run continuously to mitigate drift
There should be a defined non-manual action which causes these scripts to be evaluated against reality
Terraform is a very popular tool to accomplish this, for a number of reasons:
Its HashiCorp Configuration Language (HCL) tends to be more readable than the formats used by ARM (Azure Resource Manager) or AWS Cloud Foundation
It supports multiple cloud both in configuration and in practice. This means, a single script could manage infrastructure across AWS, Azure, Google Cloud, and others.
It is free
However, it is also to note Terraform’s weakness in being a third party product. Neither Microsoft or others officially support this tool and as such, their development tends to be behind native tooling for specific platforms. This means, certain bleeding edge features may not be available in Terraform. Granted, one can mitigate this in Terraform by importing a native script into the Terraform file.
All in all, Terraform is a worthwhile tool to have at one’s disposal given the use cases it can support. I have yet to observe a situation in which there was something a client was relying on that Terraform did not support.
How to Private Endpoints Work?
Understanding how Private Endpoints work in Azure is a crucial step to building them into our Infrastructure as Code solution. Here is a diagram:
In this example, I am using an Azure App Service (Standard S1 SKU) which allows me to integrate with a subnet within the vnet. Once my request leaves the App Service it arrives at a Private DNS Zone which is linked to the vnet (it shown as part of the vnet, that is not true as its a global resource. But for the purposes of this article we can think of it as part of the vnet.
Within this DNS Zone we deploy an A Record with a specific name matching the resource we are targeting. This gets resolved to the private IP of a NiC interface that effectively represents our service. For its part, the service is not actually in the vnet, rather it is configured to only allow connections from the private endpoint. In effect, a tunnel is created to the service.
The result of this, as I said in the previous post, your traffic NEVER leaves the vnet. This is an improvement over the Service Endpoint offering which only guarantees workloads will never leave the Azure backbone. That is fine for most things but, Private Endpoints offer an added level of security for your workloads.
Having said all that, let’s walk through building this provisioning process in Terraform. For those who want to see code this repo contains the Terraform script in its entirety. As this material is for education purposes only, this code should not be considered production ready.
Below is the definition for App Service and the Swift connection which supports the integration.
Create a Virtual Network with 3 subnets
Our first step, as it usually is with any secure application, create a Virtual Network (vnet). In this case we will give it three subnets. I will take advantage of Terraform’s module concept to enable reuse of the definition logic. For the storage and support subnets we can use the first module shown below, for the apps we can use the second, as its configuration is more complicated and I have not taken the time to unify the definition.
This file contains hidden or bidirectional Unicode text that may be interpreted or compiled differently than what appears below. To review, open the file in an editor that reveals hidden Unicode characters.
Learn more about bidirectional Unicode characters
Pay very close attention to the enforce properties. These are set in a very specific way to enable our use case. Do not worry though, IF you make a mistake the error messages reported back from ARM are pretty helpful to make corrections.
Here is an example of calling these modules:
This file contains hidden or bidirectional Unicode text that may be interpreted or compiled differently than what appears below. To review, open the file in an editor that reveals hidden Unicode characters.
Learn more about bidirectional Unicode characters
One tip I will give you for building up infrastructure, while Azure documentation is very helpful, for myself I will create the resource in the portal and choose the Export Template option. Generally, its pretty easy to map the ARM syntax to Terraform and glean the appropriate values – I know the above can seem a bit mysterious if you’ve never gone this deep.
Create the Storage Account
Up next we will want to create our storage account. This is due to the fact that our App Service will have a dependency on the storage account as it will hold the Storage Account Primary Connection string in its App Settings (this is not the most secure option, we will cover that another time).
I generally always advise the teams I work with to ensure a Storage Account is set to completely Deny public traffic – there are just too many reports of security breaches which start with a malicious user finding sensitive data on a publicly accessible storage container. Lock it down from the start.
This file contains hidden or bidirectional Unicode text that may be interpreted or compiled differently than what appears below. To review, open the file in an editor that reveals hidden Unicode characters.
Learn more about bidirectional Unicode characters
One piece of advice, however, make sure you add an IP Rule so that your local machine can still communicate with the storage account as you update it – it does support CIDR notation. Additionally, the Terraform documentation notes a property virtual_network_subnet_ids in the network_rules block – you do NOT need this for what we are doing.
Now that this is created we can create the App Service.
Create the App Service
Our App Service needs to be integrated with our vnet (reference the diagram above) so as to allow communication with the Private DNS Zone we will create next. This is accomplished via a swift connection. Below is the definition used to create an Azure App Service which is integrated with a specific Virtual Network.
This file contains hidden or bidirectional Unicode text that may be interpreted or compiled differently than what appears below. To review, open the file in an editor that reveals hidden Unicode characters.
Learn more about bidirectional Unicode characters
This information is rather buried in the above link and it took me effort to find it. Each setting has a distinct purpose. WEBSITE_DNS_SERVER indicate where outgoing requests should look to for name resolution. You MUST have this value to target the Private DNS Zone linked to the vnet. The WEBSITE_VNET_ROUTE_ALL setting tells the App Service to send ALL outbound calls to the vNet (this may not be practical depending on your use case).
For those eagle eyed readers, you can see settings for an Event Grid here. In fact, the code shows how to integrate Private Endpoints with Azure Event Grid, the technique is similar. We wont cover it as part of this post, but its worth understanding.
Create the Private DNS Rule
Ok, this is where things start to get tricky, mainly due to certain rules you MUST follow to ensure the connection is made successfully. What is effectively going to happen is, our DNS Zone name is PART of the target hostname we need to match. The match will then resolve to the private IP of our NiC card (part of the private endpoint connection).
Here is the definition for the storage DNS Zone. The name of the zone is crucial, as such I have included how the module is called as well.
This file contains hidden or bidirectional Unicode text that may be interpreted or compiled differently than what appears below. To review, open the file in an editor that reveals hidden Unicode characters.
Learn more about bidirectional Unicode characters
Ok there is quite a bit to unpack here, let’s start with the name. The name here is mandatory. If your Private Endpoint will target a Storage Account the name of the DNS Zone MUST be privatelink.blob.core.windows.net. Eagle eyed readers will recognize this URL as the standard endpoint for Blob service within a Storage account.
A second thing to note in the call is the structure of the value passed to the vnet_id parameter. For reasons unknown, Terraform did NOT resolve this based on context, so I ended up having to build it myself. You can see the usage of the data “azurerm_subscription” block in the source code. All it does is give me a reference to the current subscription so I can get the ID for the resource Id string.
Finally, notice that, following the creation of the Private DNS Zone, we are linking our Vnet to it via the azurerm_private_dns_zone_virtual_network_link resource. Effectively, this informs the Vnet that it can use this DNS Zone when routing calls coming into the network – this back to the flags we set on the Azure App Service.
Now we can create the Private Endpoint resource proper.
Create the Private Endpoint
First, I initially thought that you had to create one Private Endpoint per need however, later reading suggests that might not be the case – I have not had time to test this so, for this section, I will assume it is one per.
When you create a private endpoint the resource will get added to your resource group. However, it will also prompt the creation of a Network Interface resource. As I have stated, this interface is effectively your tunnel to the resource connected through the Private Endpoint. This interface will get assigned an IP consistent with the CIDR range of the subnet specified to the private endpoint. We will need this to finish configuring routing within the DNS Zone.
Here is the creation block for the Private Endpoint:
This file contains hidden or bidirectional Unicode text that may be interpreted or compiled differently than what appears below. To review, open the file in an editor that reveals hidden Unicode characters.
Learn more about bidirectional Unicode characters
I am theorizing you can specify multiple private_service_connection blocks, thus allowing the private endpoint resource to be shared. However, I feel this might make resolution of the private IP harder. More research is needed.
The private_service_connection block is critical here as it specifics which resource we are targeting (private_connection_resource_id) and what service(s) (group(s)) within that resource we specifically want access to. For example, in this example we are targeting our Storage Account and want access to the blob service – here is the call from the main file:
This file contains hidden or bidirectional Unicode text that may be interpreted or compiled differently than what appears below. To review, open the file in an editor that reveals hidden Unicode characters.
Learn more about bidirectional Unicode characters
The key here is the output variable private_ip which we will use to configure the A record next. Without this value, requests from our App Service being routed through the DNS Zone will not be able to determine a destination.
Create the A Record
The final bit here is the creation of an A Record in the DNS Zone to give a destination IP for incoming requests. Here is the creation block (first part) and how it is called from the main Terraform file (second part).
This file contains hidden or bidirectional Unicode text that may be interpreted or compiled differently than what appears below. To review, open the file in an editor that reveals hidden Unicode characters.
Learn more about bidirectional Unicode characters
It is that simple. The A Record is added to the DNS Zone and its done. But LOOK OUT back to the naming aspect again. The name here MUST be the name of your service, or at least the unique portion of the URL when referencing the service. I will explain in the next section.
Understanding Routing
This is less obvious with the storage account than it is with Event Grid or other services. Consider what your typical storage account endpoint looks like:
mystorageaccount.blob.core.windows.net
Now here is the name of the attached Private DNS Zone: privatelink.blob.core.windows.net
Pretty similar right? Now look at the name of the A Record – it will be the name of your storage account. Effectively what happens here is the calling URL is mystorageaccount.privatelink.blob.core.windows.net. But yet, the code we deploy can still call mystorageaccount.blob.core.windows.net and work fine, why? The answer is here: Use private endpoints – Azure Storage | Microsoft Docs
Effectively, the typical endpoint gets translated to the private one above which then gets matched by the Private DNS Zone. The way I further understand it is, if you were calling this from a peered Virtual Network (on-premise or in Azure) you would NEED to use the privatelink endpoint.
Where this got hairy for me was with Event Grid because of the values returned relative to the values I needed. Consider the following Event Grid definition:
This file contains hidden or bidirectional Unicode text that may be interpreted or compiled differently than what appears below. To review, open the file in an editor that reveals hidden Unicode characters.
Learn more about bidirectional Unicode characters
The value of the output variable eventgrid_topic_name is simply the name of the Event Grid instance, as expected. However, if you inspect the value of the endpoint you will see that it incorporates the region into the URL. For example:
Given the REQUIRED name of a DNS Zone for the Event Grid Private Endpoint is privatelink.eventgrid.azure.net my matched URL would be: someeventgrid.privatelink.eventgrid.azure.net which wont work – I need the name of the A Record to be someeventgrid.eastus-1 but this value was not readily available. Here is how I got it:
This file contains hidden or bidirectional Unicode text that may be interpreted or compiled differently than what appears below. To review, open the file in an editor that reveals hidden Unicode characters.
Learn more about bidirectional Unicode characters
It is a bit messy but, the implementation here is not important. I hope this shows how the construction of the Private Link address through the DNS zone is what allows this to work and emphasizes how important the naming of the DNS Zone and A Record are.
In Conclusion
I hope this article has shown the power of Private Endpoint and what it can do for the security of your application. Security is often overlooked, especially with the cloud. This is unfortunate. As more and more organizations move their workloads to the cloud, they will have an expectation for security. Developers must embrace these understandings and work to ensure what we create in the Cloud (or anywhere) is secure by default.
I am a huge fan of serverless and its ability to create more simple deployments with less for me to worry about and still with the reliability and scalability I need. I am also a fan of containers and IaC (Infrastructure as Code) so the ability to combine all three is extremely attractive from a technical, operational, and cost optimization standpoint.
In this post, I will go through a recent challenge that I completed where I used HashiCorp Terraform to setup an Azure Function app where the backing code is hosted by a Docker Container. I feel this is a much better way to handle serverless deployments instead of the referenced Zip file I have used in the past.
For this tutorial I will use the basic Premium Plan (SKU P1V2). A quick reminder, you Function App AND its App Service Plan MUST be in the same Azure region. I ran into a problem trying to work with Elastic Premium which, as of this writing, is only available (in the US) in East and West regions.
Terraform to create the App Service Plan (Premium P1V2)
This file contains hidden or bidirectional Unicode text that may be interpreted or compiled differently than what appears below. To review, open the file in an editor that reveals hidden Unicode characters. Learn more about bidirectional Unicode characters
Pretty straightforward. Far as I am aware container based hosting is ONLY available on Linux plans – Windows Container support is no doubt coming but, no idea when it will be available, if ever.
Create the Dockerfile
No surprise that the Docker image has to have a certain internal structure for the function app to be able to use it. Here is the generic Dockerfile you can get using the func helper via the Azure Function Tools (npm).
func init MyFunctionProj –docker
This will start a new Azure Function App project that targets Docker. You can use this as a starting point or just to get the Dockerfile. Below is the contents of that Dockerfile:
This file contains hidden or bidirectional Unicode text that may be interpreted or compiled differently than what appears below. To review, open the file in an editor that reveals hidden Unicode characters. Learn more about bidirectional Unicode characters
At the very least its a good starting point. I assume that when Azure runs the image it looks mount into known directories hence the need to conform as this Dockerfile does.
Push the Image
As with any strategy that involves Docker containers we need to push the source image to a spot where it can be accessed by other services. I wont go into how to do that, but I will assume you are hosting the image in Azure Container Registry.
Deploy the Function App
Back to our Terraform script, we need to deploy our Function App – here is the script to do this:
This file contains hidden or bidirectional Unicode text that may be interpreted or compiled differently than what appears below. To review, open the file in an editor that reveals hidden Unicode characters. Learn more about bidirectional Unicode characters
The MOST critical AppSetting here is WEBSITES_ENABLE_APP_SERVICE_STORAGE and its value MUST be false. This indicates to Azure to NOT look in storage for metadata (as is normal). The other all cap AppSettings are access to the Azure Container Registry – I assume these will change if you use something like Docker Hub to host the container image.
Note also the linux_fx_version setting. If you have visited my blog before you will have seen this when deploying Azure App Service instances (not surprising since a Function App is an App Service under the hood).
Troubleshooting Tips
By far the best way I found to troubleshoot this process was to access the Kudu options from Platform Features for the Azure Function App. Once in, you can access the Docker Container logs (have to click a couple links) and it gives you the Docker output. You can use this to figure out why an image may not be starting.
This was what led me to ultimately discovered the APP_SERVICE_STORAGE setting (above) as the reason why, despite the container starting, I never saw my functions in the navigation.
Hope this helps people out. I think this is a very solid way to deploy Azure Functions moving forward though, I do wish a Premium plan was not required.