Kubernetes is all the talk around town these days as the next generation deployment platform for containerized applications. It has a lot of benefits and the full support of the major cloud providers (Google, Amazon, Microsoft) and a whole movement behind it represented by the Cloud Native Computing Foundation (CNCF).
My interest is mostly from how it can be used with respect to DevOps and deployments. Having tinkered considerably with MiniKube locally, EKS via labs, I decided to dive into setting up a deployment pipeline with AKS (Azure Kubernetes Service). I found it rather easy to be honest. Might finally be getting to the point where I can wrap my head around this.
The Setup
So, the prerequisite to this is an application that builds using (preferably) a Docker container. This is the Dockerfile I am using (generated via the Docker extension in VSCode):
FROM microsoft/dotnet:2.1-aspnetcore-runtime AS baseWORKDIR /appEXPOSE 80FROM microsoft/dotnet:2.1-sdk AS buildWORKDIR /srcCOPY [“WebApp.csproj”, “./”]RUN dotnet restore “./WebApp.csproj”COPY . .WORKDIR “/src/.”RUN dotnet build “WebApp.csproj” -c Release -o /appFROM build AS publishRUN dotnet publish “WebApp.csproj” -c Release -o /appFROM base AS finalWORKDIR /appCOPY –from=publish /app .ENTRYPOINT [“dotnet”, “WebApp.dll”]
What needs to be understood is, when executed, this will produce a Docker image that can be stored in a registry and referenced later via a service supporting container (Azure AppService, FarGate, etc). For our purposes we will want to create a DevOps Build Pipeline that creates this image and stores it in Azure Container Registry.
The main goal of this section is that you have an application (does not have to be in .NET Core, could be in Python) that builds to a container.
Create the Build Pipeline
When you are dealing with containerized applications your build pipelines goal (along with integration checking and testing) is to produce an image. The image is the static format of a container. When we start an image in Docker that running instance is referred to as the container.
Azure DevOPs makes this relatively easy but, before we can do that, we need to create a registry which is a place we can store images. It is from here that Kubernetes will pull them to create the containers that allows the application to be executed.
Easy enough to create an Azure Container Registry through the Azure Portal, just remember to Enable admin mode.
With this created we now have a place to output the builds from our automated processes. The way the registry works is you create a repository. This is really a collection of similar images. You then tag these images to indicate a version (for development I often use the builder number and the Git commit hash, for releases I use a semantic version identifier).
To start off with, you need to define the source of your pipeline, this is going to be your source repository and appropriate branch, I am using develop in accordance with the gitflow approach to source management.
After you select your source you get to pick how you want to start your pipeline. Conveniently, Microsoft has a Docker container template which will get you 90% of what you will need.
You need to check the following fields for each of the two tasks that are created as part of this template:
- Build an image
- Docker File – should be the location of your Dockerfile. Default works well here, but I like to be specific (make sure you update Use Default Build Context if you take something other than the default)
- Image Name – this is the image name with tag that you want to build. More simply, this what you will save to the registry. Here is an example of what I used for a side project I have:
- feedservice-dev:$(Build.BuildNumber)-$(Build.SourceVersion)
- feedservice-dev – this is the name of the respository in ACR that the image will live under (the repository gets created for you)
- $(Build.BuildNumber)-$(Build.SourceVersion) – this is the tag which will differentiate this image from others. Here I am using build variables to denote the tag.
- feedservice-dev:$(Build.BuildNumber)-$(Build.SourceVersion)
- Push an image
- Image Name
- This needs to match the image name specified in Build an image
- Image Name
On Using :latest
Within Docker there is a convention of :latest to designate the latest image created. I tend to not use this custom very often for production scenarios simply because I favor specificity. If you choose to use it, you just need to publish two images instead of one to the ACR (overwrite :latest each time)
Make sure to select Triggers and turn on Continuous Integration so we get builds that kick off automatically.
If all is working correctly, you should see the build kick off almost instantly after you push to the remote repo for the target branch. Once that build completes you should be able to see the new image in your registry.
Setting up Kubernetes
Azure actually makes this very easy. But first, a quick primer on Kubernetes.
Kubernetes is a container orchestration framework with a focus on maintaining the ideal state. It is composed of nodes which house its various resources. There are three core ones that you should be aware of:
- Pod – equivalent to a VM, houses a container (or containers). A normal deployment will feature MANY pods depending on the level of scale being targeted
- Deployment – A group of pods with conditions around ideal state. At the simplest level, we can specify the minimum number of pods that represent at deployment (generally in production you want no less than three here)
- Service – A resource that enables access to pods either internally or externally. Often serves as a LoadBalancer in cloud based deployments
More information: https://kubernetes.io/
Beneath the pod concept, everything in Kubernetes resides on nodes. These nodes reside within a cluster. You can have as many clusters as you like and they can reside in different environments, both on-premise and in the cloud; you can even federate between them enabling more flexible deployment scenarios.
For the purposes of this tutorial we will create a hosted Kubernetes cluster on Microsoft Azure using their Azure Kubernetes Service (AKS).
It is easy enough, simply create an instance of the Kubernetes Service. Here are some important fields to be aware of as you create the Cluster:
- Project Details
- Resource group: I like to specify a separate one for the cluster however, I have noticed that AKS will still create other Resource groups for other components supporting the AKS instance
- Kubernetes cluster name: Anything you can, no spaces
- DNS prefix name: Anything you want
- Authentication
- Create a new service principal
- Enable RBAC: Yes
- Networking
- HTTP Application Routing: Yes
Take the default for everything else
This process will take a while so go grab a cup of coffee or be social while it is happening.
Once it completes, Azure will provide you with some commands you can run through the Azure CLI (I recommend downloading this if you do not have it installed)
Kubernetes can be administered from ANY machine via kubectl. Supporting this is done via the notion of context. You can change your kubectl context to any Kubernetes deployment. Azure makes this easy by executing the following command
sudo az aks install-cli
This will install kubectl (if you dont have it) and set your context to AKS.
Kubernetes features a nice web dashboard to give you insight into what is happening within a cluster. You need to run a couple commands to get this to work:
az aks get-credentials –resource-group <YourRG> –name <YourClusterName>
Followed by
az aks browse –resource-group <YourRG> –name <YourClusterName>
This will launch your default web browser with the Kubernetes dashboard proxied to your localhost. I have found that sometimes when I start this I get a punch of warnings around configmaps and other errors. This stems from a permissions problem that requires a role be created. Use this command to fix things
kubectl create clusterrolebinding kubernetes-dashboard -n kube-system
–clusterrole=cluster-admin
–serviceaccount=kube-system:kubernetes-dashboard
After this runs, rerun the browse command from above and the errors should be gone.
The Kubernetes dashboard offers a wealth of information that can assist with analyzing and debugging problems with deployments. It is one of the best tools at your disposal when dealing with cluster management.
If everything is green you are good to move on to performing the initial deployment.
Perform the initial deployment
As I said above, the easiest way to manage your Kubernetes cluster is via local usage of kubectl with the context pointing at AKS. This will allow you to directly apply changes and perform the initial deployment; note this assumes you have your container image in ACR.
Here is the YAML file we are going to use: https://gist.github.com/xximjasonxx/47151a9274ae732dd063c7f9605365c4
You notice that there are two discrete sections defined: Deployment and Service. The deployment here indicates that ideal state for this “application” has 2 pods at minimum (indicated by replicas). Each Pod should host a container named giftlist-feedapi which is an instance of a feedservice-dev image; here I manually specified a certain image to start from. Not sure if this is best practice, but its just what I did through testing.
In the second section, we define the Service which acts as a LoadBalancer to grant external access to the pods. I should point that LoadBalancer really only works in the Cloud since you wont get a Load Balancer locally by default, need to use NodePort in that case.
Before we can apply our configuration, however, we need to give AKS the ability to talk to ACR so it can pull the images we stored there. We do this by running the following sequence of commands:
AKS_RESOURCE_GROUP=<Your AKS Resource Group>
AKS_CLUSTER_NAME=<Your Cluster Name>
ACR_RESOURCE_GROUP=<Resource Group with Container Registry>
ACR_NAME=<Your ACR Name>CLIENT_ID=$(az aks show –resource-group $AKS_RESOURCE_GROUP –name $AKS_CLUSTER_NAME –query “servicePrincipalProfile.clientId” –output tsv)
ACR_ID=$(az acr show –name $ACR_NAME –resource-group $ACR_RESOURCE_GROUP –query “id” –output tsv)
az role assignment create –assignee $CLIENT_ID –role acrpull –scope $ACR_ID
The use of environment variables here is done to ease the various commands involved. With this in place we are now ready to update our Cluster to support the various resources that will be needed to host our application.
We apply this configuration by using the apply subcommand of kubectl like so:
kubectl apply -f development.yaml
This command will return almost instantly. If you have the Dashboard still open you can watch everything happen. Once all of the deployments are fulfilled you can flip over to the Services section to see your service being created. This process tends to take a bit of time but should end with a public IP address being available that redirect to a Pod running your containerized service.
Alternatively you can use
kubectl get deployments
and
kubectl get services
To check on the status of the resources that are being deployed. I tend to favor the Dashboard since it will also expose the logs on the web, you can still get the logs, but the web makes it easier.
If everything goes right your Service which eventually yield an External-IP which you can access from a web browser.
Adding a Release Pipeline
Ok, so full disclosure, this part I am still working through as I am not 100% sure if this is the way it should be done. But I figured its a good place to start.
First step, create a release pipeline in Azure DevOps and make sure the Continuous Integration trigger is set (click the lightning icon as shown below).
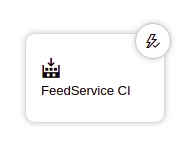
This artifact should be configured as the output from the build you created previously, shown here is mine:
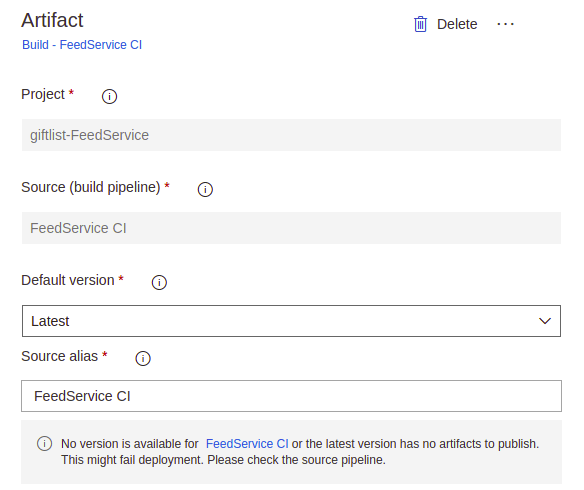
With this configuration and enabling the CI trigger we can ensure that ANY build that is processed by our build pipeline also correlates to a release as well.
Next for Stages we will have only one. Make sure the Tasks are configured as such
- Deployment Process
- Name: Anything you want but, make it descriptive
- Agent Job
- Display name: Anything you want
- Agent Pool: Ubuntu
Add a single Task of type Deploy to Kubernetes, configure it to run the set command with the following arguments (assuming you are following alone)
image deployment.v1.apps/feed-api-deployment giftlist-feedapi=giftlistregistry.azurecr.io/feedservice-dev:$(Build.BuildNumber)-$(Build.SourceVersion) –record
Please do not copy the above verbatim, there is some nuance here
Ok, so when you run apply as we did earlier you actually create entries in the Kubernetes data controller plane. We can actually make changes to these values using the set command which is what we are doing here
Basically we are using the set to change the image being used for our deployment. This will cause Kubernetes to begin orchestrating an update so, if you run the get deployments command enough, you will see Kubernetes spin up a third Pod while it replaces each Pod so as to maintain the ideal state.
Now, if everything works, you should be able to commit a change, see it automatically build which will generate a new image that gets saved to your ACR. Next, it kicks off a Release pipeline which updates your Kubernetes configuration to use the newly created image.
Pretty slick eh?
Closing Thoughts
Kubernetes is nothing more than a new way to deploy code for applications that use containers, which is becoming increasingly common across development teams. The use of K8s is a response to the problem of managing hundreds if not thousands of containers. In this example, I showed a very simple example of applying this process with Azure DevOps but there are many other topics I did not cover such as Helm charting.
The goal though is to understand that Kubernetes is a solid option but is NOT the only option for new applications. Like all things, it has its uses. Though, different from other things, Kubernetes seeks to provide a new platform that houses all environments for your applications so you can get as close to production as possible, if not all the way.
I hope to give more insight into this as I continue to look deeper into ways to use this though the creation of side projects.

Hi Jason
I’m also working on this topic, see https://pleasereleaseme.net/deploy-a-dockerized-asp-net-core-application-to-azure-kubernetes-service-using-a-vsts-ci-cd-pipeline-part-4/
I’ve had a complete rethink over the past few weeks and my next post will be about: a) moving away from specialised Azure DevOps tasks and instead using command line commands in Bash scripts, and b) splitting the deployment in to separate pipelines for each component plus the k8s config so each component can have its own lifecycle.
Cheers – Graham
LikeLike
Here are my latest thoughts on this Jason: https://pleasereleaseme.net/a-better-way-of-deploying-a-dockerized-application-to-azure-kubernetes-service-using-azure-pipelines/. Great to hear your take on all this.
LikeLike