Deploying to the Cloud makes a lot of sense as the large number of services in Azure (and other providers) can help accelerate teams and decrease time to market. However, while many services are, with their defaults, a great option for hosting applications on the public Internet, it can be a bit of a mystery for scenarios where applications should be private. Here I wanted to walk through the steps of privatizing a Function App and opening it to the Internet via an Application Gateway.
Before we start, a word on Private Endpoint
This post will heavily feature Private Endpoint as a means to make private connections. Private Endpoints and the associated service, Private Link, enable to very highest levels of control over the flow of network traffic by restricting it ONLY within the attached Virtual Network.
This, however, comes at a cost as it will typically require the usage of Premium plans for services to support the feature. What is important to understand is that service-service (even cross region) communication in Azure is ALL handled on the Microsoft backbone, it never touches the public internet. Therefore, your traffic is, by default, traveling in a controlled and secure environment.
I say this because I have a lot of clients whose security teams set Private Endpoint as the default. For the vast majority of use cases, this is overkill as the default Microsoft networking is going to be adequate for majority of data cases. The exceptions are the obvious ones: HIPPAA, CIJIS, IRS, and Financial (most specifically PCI), and perhaps others. But, in my view, using it for general data transfer, is overkill and leads to bloated cost.
Now, on with the show.
Create a Virtual Network
Assuming you already have a Resource Group (or set of Resource Groups) you will first want to deploy a Virtual Network with an address space, for this example I am taking the default of 10.0.0.0/16. Include the following subnets:
- functionApp – CIDR: 10.0.0.0/24 – will host the private endpoint that is the Function App on the Virtual Network
- privateEndpoints – CIDR: 10.01.0/24 – will host our private endpoints for related services, Storage Account in this case
- appGw – CIDR: 10.0.2.0/24 – will host the Application Gateway which enables access to the Function App for external users
- functionAppOutbound – CIDR: 10.0.3.0/24 – This will be the integration point where the function app will send outbound requests
The Region selected here is critical, as many network resources can either not cross a regional boundary OR can only cross into their paired region. I am sing East US 2 for my example.
Create the Storage Account
Function Apps rely on a storage account to support the runtime. So we will want to create one to support our function app. One thing to keep in mind, Private Endpoints are NOT supported on v1 of Storage Account, only v2. If you attempt to create the Storage Account through the Portal via the Function App process, it will create a v1 account and NOT support Private Endpoint.
When you create this Storage Account, be sure the network settings are wide-open; we will adjust it after the Function App is successfully setup.
Create the Function App
Now with the Function App we want to keep a few things in mind.
- Use the same region that the Virtual Network is deployed into
- You MUST use either a Premium or App Service plan type, Consumption does not support privatization
- For hosting, select the storage account you created in the previous section.
- For the time being do NOT disable public access – we will disable it later
For added benefit I recommend picking Windows for the Operating system as it will enable in-portal editing. This will let you quickly setup the Ping endpoint I am going to describe later. Note this post does NOT go into deploying – without public access additional configuration may be required to support automated deployments.
Allow the process to complete to create the Function App.
Enable VNet Integration
VNet integration is only available on Premium SKUs and above for both Function Apps and App Services. It enables a service to sit effectively on the boundary of the VNet and communicate with private IPs in the attached VNet as well as peered VNets.
For this step, access the Networking blade in your Function App and look for the VNet integration link on the right side of the screen.

Next, click “Add VNet” and select the Virtual Network and Subnet (functionAppOutbound) which receive the outbound traffic from the Function App.
Once complete, leave ROUTE ALL enabled. Note that for many production scenarios leaving this on can create issues, as I explain next. But for this simple example, having it enabled will be fine.
What is ROUTE ALL?
I like to view an App Service, or Function App, as having two sides, inbound and outbound. VNet integration allows the traffic coming out of the service to enter a Virtual Network. Two different modes are supported: ROUTE ALL and default. With ROUTE ALL enabled ALL traffic enters the VNet, including traffic perhaps bound for an external host (https://www.google.com for example). Thus, to support this YOU must add the various control to support egress. With ROUTE ALL disabled, routing will simply follow rules within RFC1918 (link) and send 10.x and a few others into the Virtual Network and the rest will follow Azure Routing rules.
Microsoft documentation explains it more clearly: Integrate your app with a Virtual Network
Setup Private Connection for Storage Account
Function Apps utilize two sub-services within Storage Account for operation: blob and file. We need to create private endpoints for these two sub-services so that, using the VNet Integration we just enabled, the connection to the runtime is handled via private connection.
Access the Storage Account and select the Networking blade. Immediately select Disabled for Public network access. This will force the use of Private Endpoint as the sole means to access the storage account. Hit Save before continuing to the next step.
Select the Private endpoint connections tab from the top. Here is a screen shot of the two Private Endpoints I created to support my case:

We will create a Private Endpoint for file share and blob services, as these are being used by the Function App to support the runtime. By doing this through the portal, other networking elements, such as setup of the Private DNS Zone can be handled for us. Note, in an effort to stay on point, I wont be discussing how Private Endpoint/Link routing actually works.
Click the + Private endpoint button and follow the steps for both file and blob subresource types. Pay special attention to the values the defaults select, if you have other networking in the subscription, it can select these components and cause communication issues.
Each private endpoint should link into the privateEndpoints subnet that was created with the Virtual Network.
Remember, it is imperative that the Private Endpoint MUST be deployed in the same region and same subscription as the Virtual Network to which it is being attached to.
More information on Private Endpoint and the reason for the Private DNS Zone here
Update the Function App
Your Function App needs to be updated to ensure it understands that it must get its content over a VNet. Specifically this involves updating Configuration values.
Details on what values should be updated: Configure your function app settings
The one to key on is the WEBSITE_CONTENTOVERVNET setting and ensuring it is set to 1. Note the documentation deploys a Service Bus, we are not doing so here so you can skip related fields.
Be sure to check that each values matches expectation. I skipped over this the first time and ran into problems because of it.
Click Save to apply and before moving on.
Go into General Settings and disable HTTPS Only. We are doing this to avoid dealing with certificate in the soon to be created Application Gateway. In a Production setting you would not want this turned off.
Click Save again to apply the changes.
Next, create a new HttpTrigger Function called HttpPing. Use the source code below:
Again, I am assuming you used Windows for your Plan OS otherwise, you will need to figure out how to get custom code to this function app so you can validate functionality, beyond seeing the loading page.
Once you complete this, break out Postman or whatever and hit the endpoint to make sure it’s working.
Coincidentally, this will also validate that the Storage Account connection is working. Check for common errors like DLL not found or Runtime unreachable or the darn thing just not loading.
Create Private Endpoint for Function App
With the networking features in place to secure the outbound communications from the Function App we need to lock down the incoming traffic. To do this we need disable private access and use Private Endpoint to get a routable private IP for the Function App.
Return to the Networking blade and this time, select Private Endpoints from the screen (shown below):

Using the Express option, create a private endpoint attached to the functionApp subnet in our Virtual Network – choose Yes for Integrate with private DNS zone (this will create the Private DNS zone and allow routing to work). Once complete, attempt to hit your Function App again, it should still work.
Now, we need to disable Public Access to the function app. Do this by returning to the Networking blade of the Function App, this time we will select Access restriction.
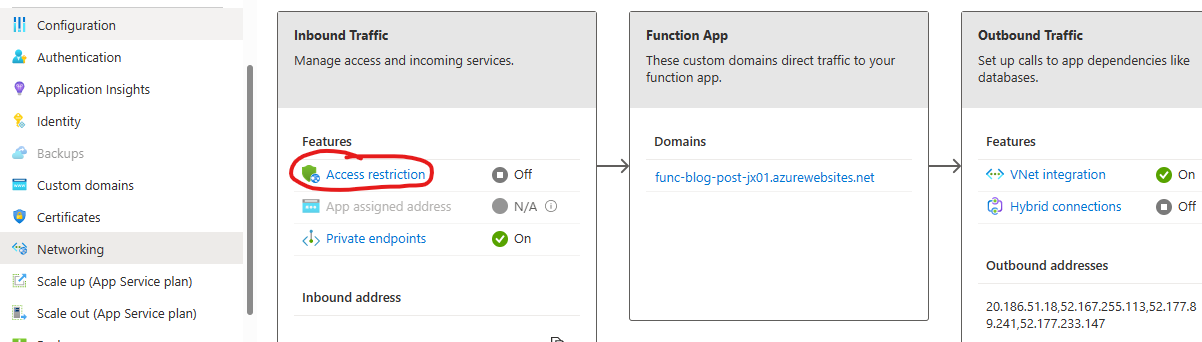
Declick the Allow public access checkbox at the top of the page. And click Save.
If you attempt to query the Function App now, you will be met with an error page indicating a 403 Forbidden.
Remember, for most PaaS services, unless an App Service Environment is used, it can never be fully private. Users who attempt to access this function app now will receive a 403 – as the only route left to the service is through our Virtual Network. Let’s add an Application Gateway and finish the job.
Create an Application Gateway
Application Gateway are popular networking routing controls that operate at Layer-7, the HTTP layer. This means they can route based on pathing, protocol, hostname, verb, really any feature of the HTTP payload. In this case, we are going to assign the Application Gateway a Public IP and then call that Public IP and see our Function App respond.
Start by selecting Application Gateway for the list of available services:

On the first page set the following values:
- Region should be the SAME as the Virtual Network
- Disable auto-scaling (not recommended for Production scenarios)
- Virtual Network should be the Virtual Network created previously
- Select the appGw subnet (App Gateway MUST have a dedicated subnet)
On the second page:
- Create a Public IP Address so as to make the Application Gateway addressable on the public internet, that is it will allow external clients to call the Function App.
On the third page:
- Add a backend pool
- Select App Service and pick you Function App from the list
- Click Add
On the fourth page:
- Add a Routing Rule
- For Priority make it 100 (can really be whatever number you like)
- Take the default for all fields, but make sure the Listener Type is Basic Site and the Fronend IP Protocol is HTTP (remember we disabled HTTPS Only on the Function App)
- Select Backend Targets tab
- For Backend Target select the pool you defined previously
- Click Add new for Backend Settings field
- Backend protocol should be HTTP, with port 80
- Indicate you wish to Override with new host name. Then choose to Pick host name from backend target – since we will let the Function App decide the hostname
- Click Add a couple times
Finish up and create the Application Gateway.
Let’s test it out
When we deployed the Application Gateway we attached it to a public IP. Get the address of that Public IP and replace the hostname in your query – REMEMBER we must use HTTP!!
If everything is setup properly you should get back a response. Congratulations, you have created a private Azure Function App routable only through your Virtual Network.
Options for SSL
To be clear, I would not advocate the use of HTTP for any scenario, even in Development. I abstained from that path to make this walkthrough easier. Apart from create an HTTPS listener in the Application Gateway, Azure API Management operating in External mode with Developer or Premium SKU (only they support VNet Integration) would be the easiest way of support TLS throughout this flow.
Perhaps another blog post in the future – just APIM takes an hour to deploy so, it is a wait 🙂
Closing Remarks
Private endpoint is designed as a way to secure the flow of network data between services in Azure, specifically it is for high security scenarios where data needs to meet certain regulatory requirement for isolation. Using Private Endpoint for this case, as I have shown, is a good way to approach security without taking on the expense and overhead of an App Service Environment which creates an isolated block within the data center for your networking.
That said, using them for all data in your environment is not recommended. Data, by default, goes over the Azure backbone and stays securely on Microsoft networks so long as the communication is between Azure resources. This is advised for most data scenarios and can free your organization from the cost and overhead of maintaining Private Endpoints and Premium SKUs for apps that make no sense to have such capability.
