I have found that DevOps is a crucial part of any development team as it takes a lot of the operational burden out of the hands of developers allowing them to focus on writing code. Additionally, it can make sure that certain testing and verification is done each time, every time, consistently, which improves the overall QA cycle.
We had a project at West Monroe about a year ago that had us deploying .NET code to Amazon AWS; as a side note the client maintained control and access to Amazon, we did not have access to this. During this process, we continued to use Azure as the main deployment engine. Thus, we had to perform communication with Amazon using Powershell scripts. It was rather painful.
As it happens, Amazon has their own suite of DevOps tools for their platform:
- CodeCommit – A Git Repository for your projects
- CodeBuild – A build engine for your code
- CodeDeploy – Deploy your code to EC2 instances
- CodePipeline – Provide end to end CI/CD for your application
So I decided I wanted to see how their products stacked up so moving forward I, and West Monroe developers, could use Amazon’s tools if the deployment target was going to be Amazon. For this first part, I will only be covering CodeCommit and CodeBuild because I have yet to get the CodeDeploy process to work.
Before I get started I would like to make a few things clear:
- CodeBuild does NOT support .NET Standard, but as .NET Core can run on Linux we can build .NET Core apps, but not full .NET apps, at least yet.
- Amazon requires a host of YML files be present in your application for these processes to work. While the documentation does mention them, I feel it could be a lot clearer.
So, lets get started.
Creating your Git Repository
Each developer on your team should have their own local account to log into the AWS console with appropriate rights set. If they are going to be developing code ensure they have the AWSCodeCommitPowerUser policy. Note: It is also acceptable to use the AWSCodeCommitFullAccess policy however, I think only one user should have this policy as normal developers should not need full access, just the ability to interact with the repository. Note: you will need to have full access to actually CREATE the repo, or you can use the root account.
Next, ensure each user has the IAMSelfManagedServiceSpecificCredentials and IAMReadonlyAccess policies. The former allows them to update the credentials for specific services (CodeCommit in this case) while the IAMReadonlyAccess policy enables them actually access IAM in their AWS console. Here is a screenshot of what my group CoreWebUser looks like:
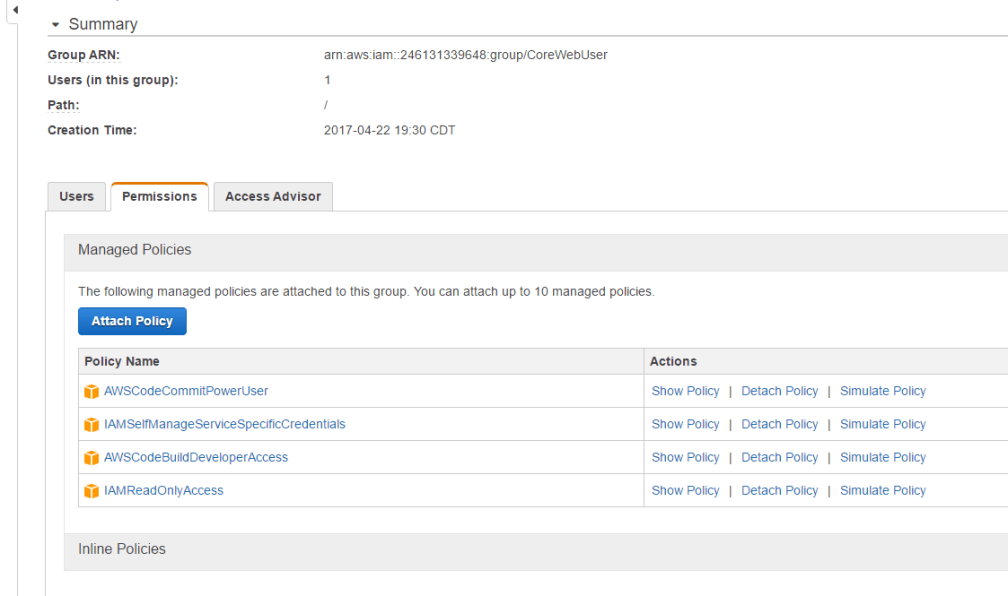
I have also included AWSCodeBuildDeveloperAccess because, later on, I will want this account I am using to be able to start builds using AWS CodeBuild, but more on that later.
Each user who will be a developer needs to generate their Git credentials (that is what the two policies above enable). To do this, each user must login and go into IAM select their user from the Users table.
There is a tab on the subsequent page called Security credentials, the Git credential section is all the way at the bottom. Per Amazon policy, the password is going to be a lot of gibberish for security, make sure to save these credentials somewhere.
Let’s create the repository
Now, lets create that repository – head over to Services -> Developer Tools -> CodeCommit. Once you create the repository Amazon will prompt to cover the steps that we covered above. The important thing here is the clone URL which is your Git remote (or where you will push and pull remote code from).
And thats pretty much it. Poking around on my own SampleApp I have been pretty impressed, especially with the Visualizer which duplicates the branching that I have seen in both SourceTree and GitKraken on the web. A deeper look at this product is outside our scope. This is the easy step, next we move on to the moderately hard step of building the code.
For my code base, I used the default .NET Core web template by running this command
dotnet new web
I then made a simple modification to the hard coded response string. I then pushed this to CodeCommit on the master branch.
Got the Code, let’s build it
As of this writing, AWS does NOT support .NET builds meaning, you will NOT be able to select a Windows machine. This being the case ANY scenario involving .NET Standard is out. What we CAN do is leverage .NET Core which runs anywhere, including Docker and Linux which CodeBuild can support.
With any remote build process the first thing I always tell people to do is UNDERSTAND your own build process and make sure it works locally. Because if you dont understand or it doesnt build locally its MUCH harder to get it to build remotely.
To that end, I suggest building your local version first so you better understand this process. So let’s build it, run this command:
dotnet build
If you run this, you will notice the application does not build (or if it does you somehow ran the next step :)). We need to run a restore to bring in the packages to support our app. Run this command then rerun the build command.
dotnet restore
The reason I had you do this was so the build sequence was understood because we have to create a YAML file to explain this to Amazon. Amazon’s tools rely heavily on these sorts of files. Create a new file called builldspec.yml. It has to be this name and it HAS to be at the root of your application, no exceptions. Here is an example of mine:
version: 0.1

phases:
  pre_build:
    commands:
      - dotnet restore
  build:
    commands:
      - dotnet build
artifacts:
  files:
    - bin/Debug/netcoreapp1.1/*
  discard-paths: yes
A full specification of this file is located here: http://docs.aws.amazon.com/codebuild/latest/userguide/build-spec-ref.html
I cannot stress enough the importance of the format of this file. Follow the spec EXACTLY and use tabs where you see indents. The errors provided if you dont do this is very cryptic and speaks to “number of containers”. Follow the format.
You can see how why I explained the restore then build for .NET core apps. This spec file will ensure Amazon runs those those same commands. Now push this into your remote repository.
Setting up the Build
As with CodeCommit you will need to under the policies attached to the users to access this. Also, like with CodeCommit you have policies for general use, read only, and admin.
- AWSCodeBuildAdminAccess – This policy should be given to one user. And you will need this policy to create the build project.
- AWSCodeBuildDeveloperAccess – This policy should be given to most of your developers, unless there is a reason you want some to not be able to start builds, in which case they should either have no policy for CodeBuild or they should have the AWSCodeBuildReadOnlyAccess policy.
Once you have this set, we can head over to Services -> Developer Tools -> CodeBuild in the AWS Console and start the real fun. First step is easy, create the project (make sure you are using either the root user or the user with AWSCodeBuildAdminAccess).
Now, let’s go section by section:
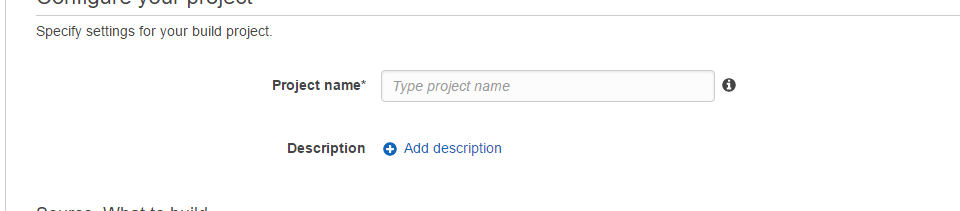
This section is pretty self explanatory. Project name is required, description is not. Fill it in and move on.
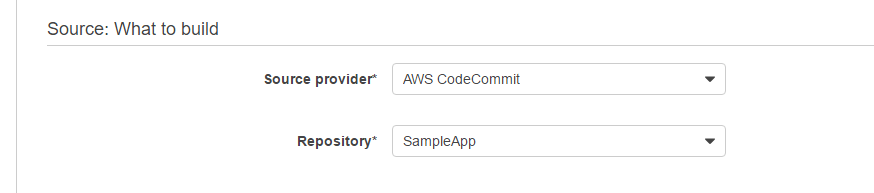
For this section start off my selecting AWS CodeCommit in the Source Provider drop down. You will notice there are other options as well. We wont cover them here.
Once you select the CodeCommit source AWS will display a second dropdown with the Repositories available, pick yours.
This section is complete, let’s move on.
This next section is where the fun part is. When I started this process I roughly knew what Docker was, now I have a better idea, still a bit hazy but noticing something on the .NET Core Setup page helped this along. Here is what my section looks like:

The key here is the Custom Image ID which we specify as the Docker image that Microsoft maintains with the latest version of .NET Core. Remember what we said earlier, .NET Standard is NOT supported here because it MUST be run on a Window machine (Mono not withstanding). .NET Core is designed to run ANYWHERE and since Docker only really support Linux images its ideal for this situation.
The path microsoft/dotnet:latest refers to the Microsoft Docker container and the ‘dotnet’ image there. You can use Amazon ECR which is a Docker esque service that provides containerized instances, but I found this much easier 🙂
Notice the Build specification setting. We could have also specified a sort of build script using the second option but I prefer the YAML approach since not understanding would pigeon-hole you when your build process becomes complex.
Enough with this section, lets move on.
When you run a build on any platform you generate output, in the land of DevOps we refer to this output as Artifacts, this next section helps CodeBuild understand how to handle your artifacts. Here is my configuration:
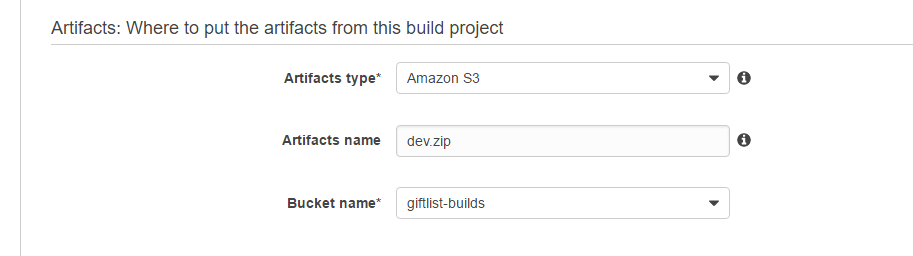
In this example, I am using S3 as the output location. You will need to create the bucket that I have listed. The one interesting point here is the Artifacts name. Now here, I gave the explicit dev.zip which is intentional as I intend to create a Zip file as the final artifact. However, this feature must be set in the Advanced Settings (shown next) and the name will be literal. That means, you need to supply the extension, even if you tell CodeBuild you want it to Zip the output.
Moving on.
Next we need to define the service account that will actually run the build. What is important here is that the role that is used (and Amazon can auto-generate it if the user has the permissions) have the rights to access the OTHER Amazon services as needed (S3, in this case, if you choose to put your artifacts there). Here is what mine looks like:
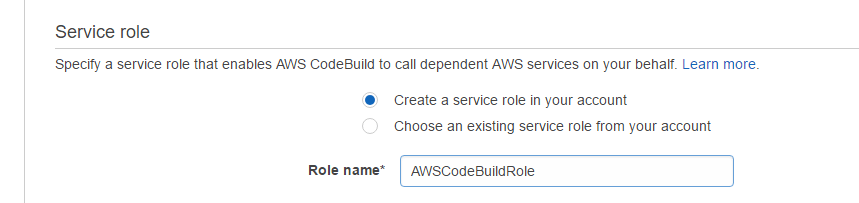
Once you complete this setup, you should go into IAM and ensure this role has the ability to access S3, otherwise the build will fail.
Moving On.
I mentioned previously that you need to tell CodeBuild that it should Zip the artifacts the build process outputs. Expand Show advanced settings.

The important thing here, as indicated by the arrow is the Artifacts packaging option which will tell CodeBuild to zip, thereby matching the extension we provided previously.
That’s it. Now we can start a Build
Here is the output from my build:
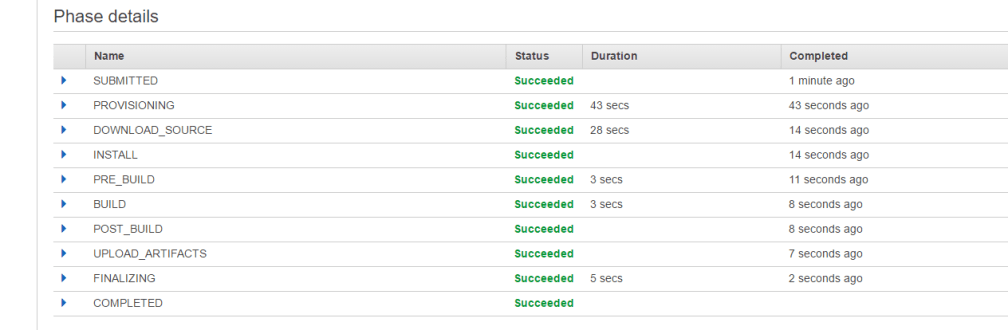
If we go to S3 we can access our bucket and even download the Zip file and verify its contents.
Where do we go from here?
So, we have our application building and yeah, its a pain in the ass and extremely limiting that we cant use this with .NET Standard but its something and I do tend to think that .NET Core is the way of the future, especially for web apps given the flexibility it allows in deployment. My next post, hopefully sometime this week, will focus on using CodeDeploy and CodePipeline to complete the end to end process. For the moment, I am still fighting with them.
Overall, I have found Amazon to be acceptable but, the reality is if you are going to use .NET you really should have a profound reason for not using Azure. The integration with Microsoft’s tools far exceeds anything you will get with Amazon. Plus, we havent even covered the appsec.yml file which is required, I think, to use CodeDeploy. This contrasts heavily with Azure where much this is taken care of for you. Part of that is Microsoft coverage of its own language and Amazon being language agnostic more or less and not favoring one platform over the other.
I look forward to completing my understanding of this process, if for no other reason than to continue to enhance my understanding of the AWS platform and its various features.

Hi,
I am new to DevOps field.Well as you mentioned,for Dot Net developers, AWS is very hard to start.
can you pin point the resource for learning AWS for Dot Net?
I have question regarding AWS DevOps. Can we use CodeBuild to build two different solutions?
Let’s say one solution is ASP.NET MVC and second one is ASP.NET Core.
I am facing problem while building MVC solution.
Thank You,
Sujay.
LikeLike
Regrettably, the best resources I have found are Amazon’s documentation on the internal mechanics. Honestly, the more I have worked with their build engine the more cumbersome I have found it, especially when working with .NET. My current recommendation is to use VSOnline to perform the builds and send those to S3, use Code Deploy to actually deploy from that point
LikeLike