Welcome to the AI Age
Microsoft has been very serious about AI and its incorporation into many common (and uncommon) workflows. I dont see AI as necessarily replacing humans in most things wholesale, at least not yet. But what I do see is it having the ability to make people more productive and, hopefully, allow people more time to spend with families or pursuing passion.
For myself, for example, CoPilot has become integral to the way I search for answers to problems and even generate code. Gone are the days that I needed to search out sample code for learning, now I can just ask for it and, most of the time, be given code that, if it not wholly accurate, is accurate enough to point me in the right direction.
Recently, I went on paternity leave with the arrival of Iris (our second child). As it was the first time, I decided to pick an area to study during my off time (last time I spent the time learning Kubernetes, a skill which has paid off tremendously for me). This time, I choose to dive headlong into our AI services hosted on Azure. What a trip it has been. Its very exciting and has a ton of potential. One of the more obvious ones is how AI could improve customer service by allowing for fleets of agents handling calls. The language generation and comprehension is already sufficient for many use cases. To that end, I thought I would demonstrate how to use a custom voice with Azure Communication Services, our platform for handling texting and telephony features in Azure.
Setting up for the Solution
Within Azure the various AI services can be deployed as standalone services or as a “multi-service” account. I learned the hard way that for integration with ACS to be supported you MUST leverage “multi-service”. The docs do not, right now, do a good job calling this out.
Create AI Services Account
The first thing you need is a Multi-service AI Account. Notice this is DIFFERENT than a single service (such as an instance of Speech Service), which will not work for this.
Here are the official Microsoft documentation instructions for creating this type of service in Azure.
Enable Custom Neural Voice
Custom Neural Voice is NOT something that is turned by default. Like many aspects of AI, while fascinating, it has a lot of negative use cases. Synthesized voices are a large part of deepfaking and at Microsoft we do our best to ensure this technology is used for good, sadly there is a limit to what can be done.
This being the case, users must request this feature be turned on via this form: https://customervoice.microsoft.com/Pages/ResponsePage.aspx?id=v4j5cvGGr0GRqy180BHbR7en2Ais5pxKtso_Pz4b1_xURFZNMk5NQzVHNFNQVzJIWDVWTDZVVVEzMSQlQCN0PWcu
Once enabled, users should browse to https://speech.microsoft.com to build their custom voice.
For the sake of us all, being truthful and forthright about the intentions for CNV is crucial. Deepfaking and fake media is a very real danger in today’s world. To best use it, we must appreciate its capabilities, both good and bad.
Creating the Neural Voice
Custom Neural voice comes in two flavors. Use the appropriate one depending on your use case and available resources:
- Lite – this is the most common and preferred option for hobby and simple cases. The portal will feed you a set of phrases that must be repeated; each utterance is measured for precision. A minimum of 20 utterances is required and, obviously the more given the more accurate the voice is. This is what our sample will use
- Pro – this is for the serious cases. For example, if a large customer wanted to create an AI agent that sounds like one of their agents, this would be the option to use. The assumption is that the utterances are recording using professional equipment in a sound studio. This option requires a MINIMIUM of 300 utterances in a variety of styles and phrasing. Pro will also support different speaking styles (gentle, hard, soft, etc)
Use the official Microsoft documentation instructions for creating a Custom Neural Voice (Lite).
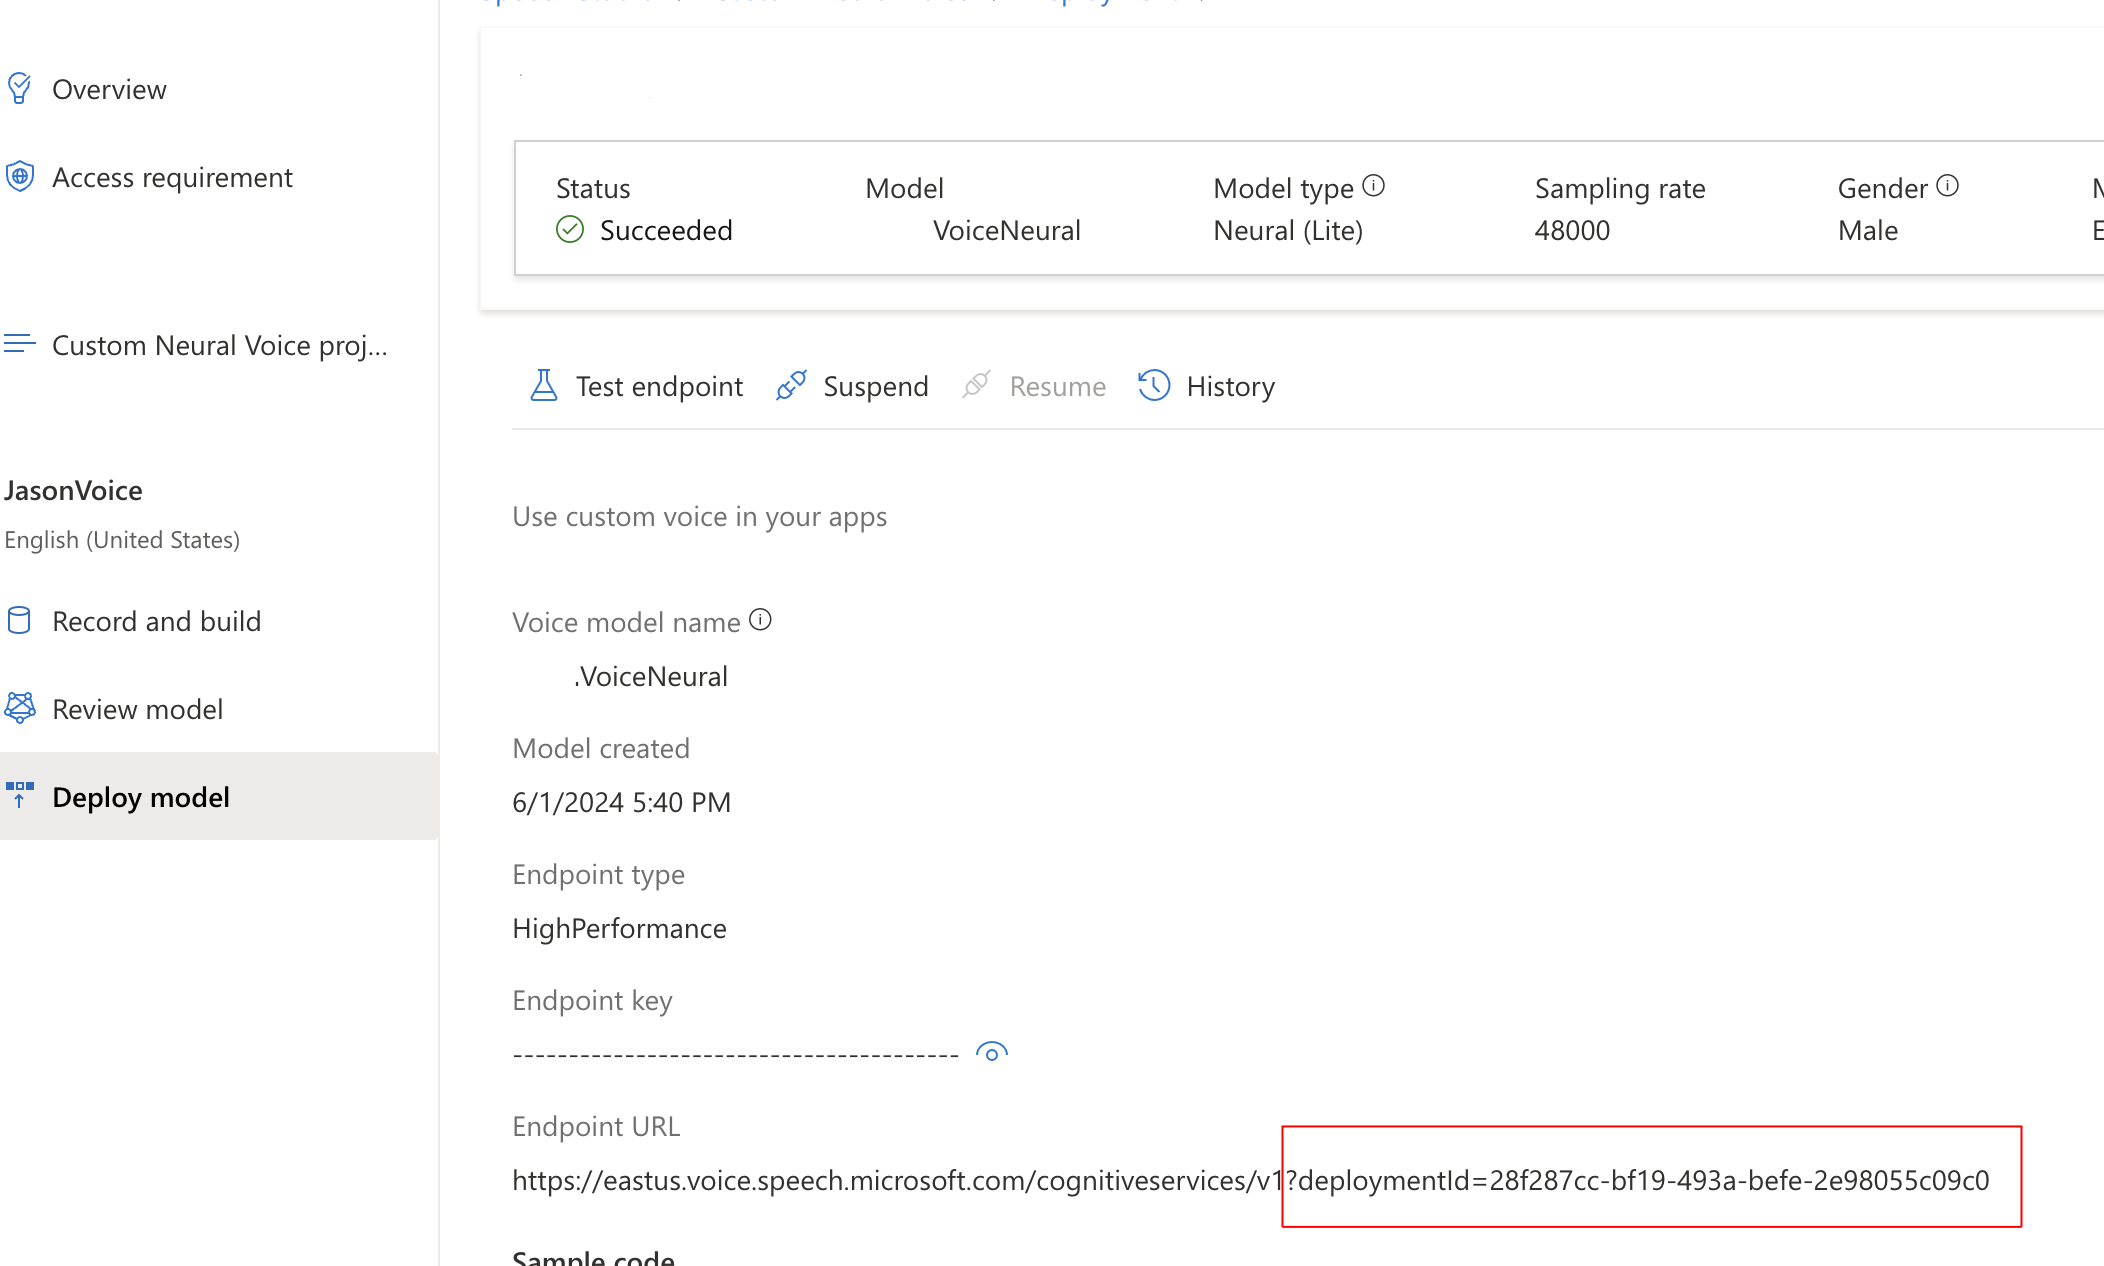
Once you complete the training you can deploy the model. Once deployed, note its deploymentId for later.
With this model deployed we can now begin to use the model. For a quick win, the Studio will provide some code that will produce a console app that you can use to speak some text. Try it, its really surreal hearing yourself speaking something you never spoke.
Create the Azure Communication Service instance
I will spare you walking you through this process. Here is the official Microsoft documentation for creating an ACS instance.
Assign the RBAC permissions
Once ACS is created, enable its System Assigned Managed Identity. Once it is created, go to the appropriate AI Account, the one which is hosting the custom voice model. Ensure the ACS identity has the Cognitive Services Speech Contributor RBAC role assigned. Note: There is a chance that Cognitive Services Speech User will also work but, as of this writing, I have not tested it.
Get a Telephone Number
As with instance creation, this is pretty standard so here is the link to the official Microsoft documentation for creating phone numbers.
Building the Solution
To this point, we have our resources and configurations now, we need code to link things together. For this, I will focus on the code and what it is doing rather than explaining the solution and a wider level. This is because, solutions like this get complicated fast with the number of services involved and the interactions which are orchestrated.
The important thing to understand is that interactions within ACS flows happen via a callback mechanism. When you start a call, you provide a callback which receives events related to your call. I recommend using ngrok if you want to run all of your stuff locally; ngrok will great a tunnel URL to allows ACS to call your local machine.
Finally, I will NOT be talking through how to receive calls and only briefly touch on making them. The reason, again, is focus. Expanding beyond this point would add more information to this post, I hope to cover it at a later date.
Let’s make a phone call
ACS works in an entirely event driven fashion. So, when a call is made, actions for that call are handled by an event handler. Here is my code for calling a specific phone number.
Let’s talk through this starting with requirements. This code was written using the Azure.Communication.CallAutomation v1.2.0 NuGet package. This package makes available the various Call Automation and related Call types that the code uses.
Phone numbers here MUST be expressed in international format, that means including a leading ‘+’ sign, followed by the country code (1 for the United States).
The CreateCallOptions specifies the CognitiveService (now call AI Account [created above]) instance that will handle analysis and call features, such a speech-to-text using Custom Neural Voice. You CANNOT span multiple AI accounts with this, hence why creating a multi-service is required.
The CreateCallOptions also specifies the callback for events relating to the call. These are merely POST events. This is where you start to lay out the flow of the call, here is my code:
The ACS service will, by default, send events using the CloudEvent schema (link). Because these follow a specific format, the CloudEventParseMany is able to quickly translate the incoming JSON string data into the Cloud Event format.
Once this is complete, CloudAutomationEventParser is able to parse the event into an event it expects. When a user answers the call, the CallConnected event is received.
After a reference to the call is established, using data in the event, we can take action on that specific call. In this case, we are playing audio to the caller based on provided Text, using TextSource.
Among the three properties shown here only VoiceName and CustomVoiceEndpointId are required. You can get both of these values from you Deploy Model information page in Speech Studio (screenshot repeated from above).
Because the Azure Functions are running in isolated mode the Output Bindings can no longer be declared as function parameters, they can only be returned. In the above, I was tinkering with outputting call connection information to Cosmos. You can see the use of the HandleEventResponseModel type to support returning a Http result AND a Cosmos DB result – this will be the norm moving forward.
More information on this approach is available in the Microsoft documentation (link). Pay careful attention to the NuGet package requirements.
Testing it
I used Azure Functions running locally with ngrok to allow ACS to route callbacks to my locally running code. Once I had the functions running, I used Postman to contact my make/call endpoint. Once I executed the endpoint, my phone would ring and, upon answering, I would hear the message I indicated above.
For added effect, I ensured my logger displayed the CallConnectionId and then executed this endpoint using Postman to have my voice say whatever I wanted to the caller:
Next Steps
This sample is part of a larger effort for me to understand the use of AI for customer service scenarios. To that end, I am building a simple example of this to help a relative’s small business. Up next is providing options for the caller and then responding with either pre-authored text or OpenAI responses generated from AI search results for trained data.
Full source code: https://github.com/xximjasonxx/CallFunctions
As I said before, this stuff is super exciting.
